PitcoSolsticeandSolsticeSupremeHighEfficiencyGasFryers
SG/SSHSeriesServiceManual 49
GasConversion
1. Remove the pilot assembly. See “Replacing an
Igniter/Pilot Assembly” on page 28.
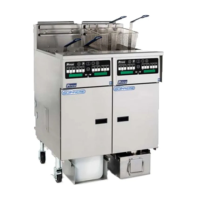
2. Remove the nut, which holds the pilot t
ube,
using a 1/2 inch open-ended wrench.
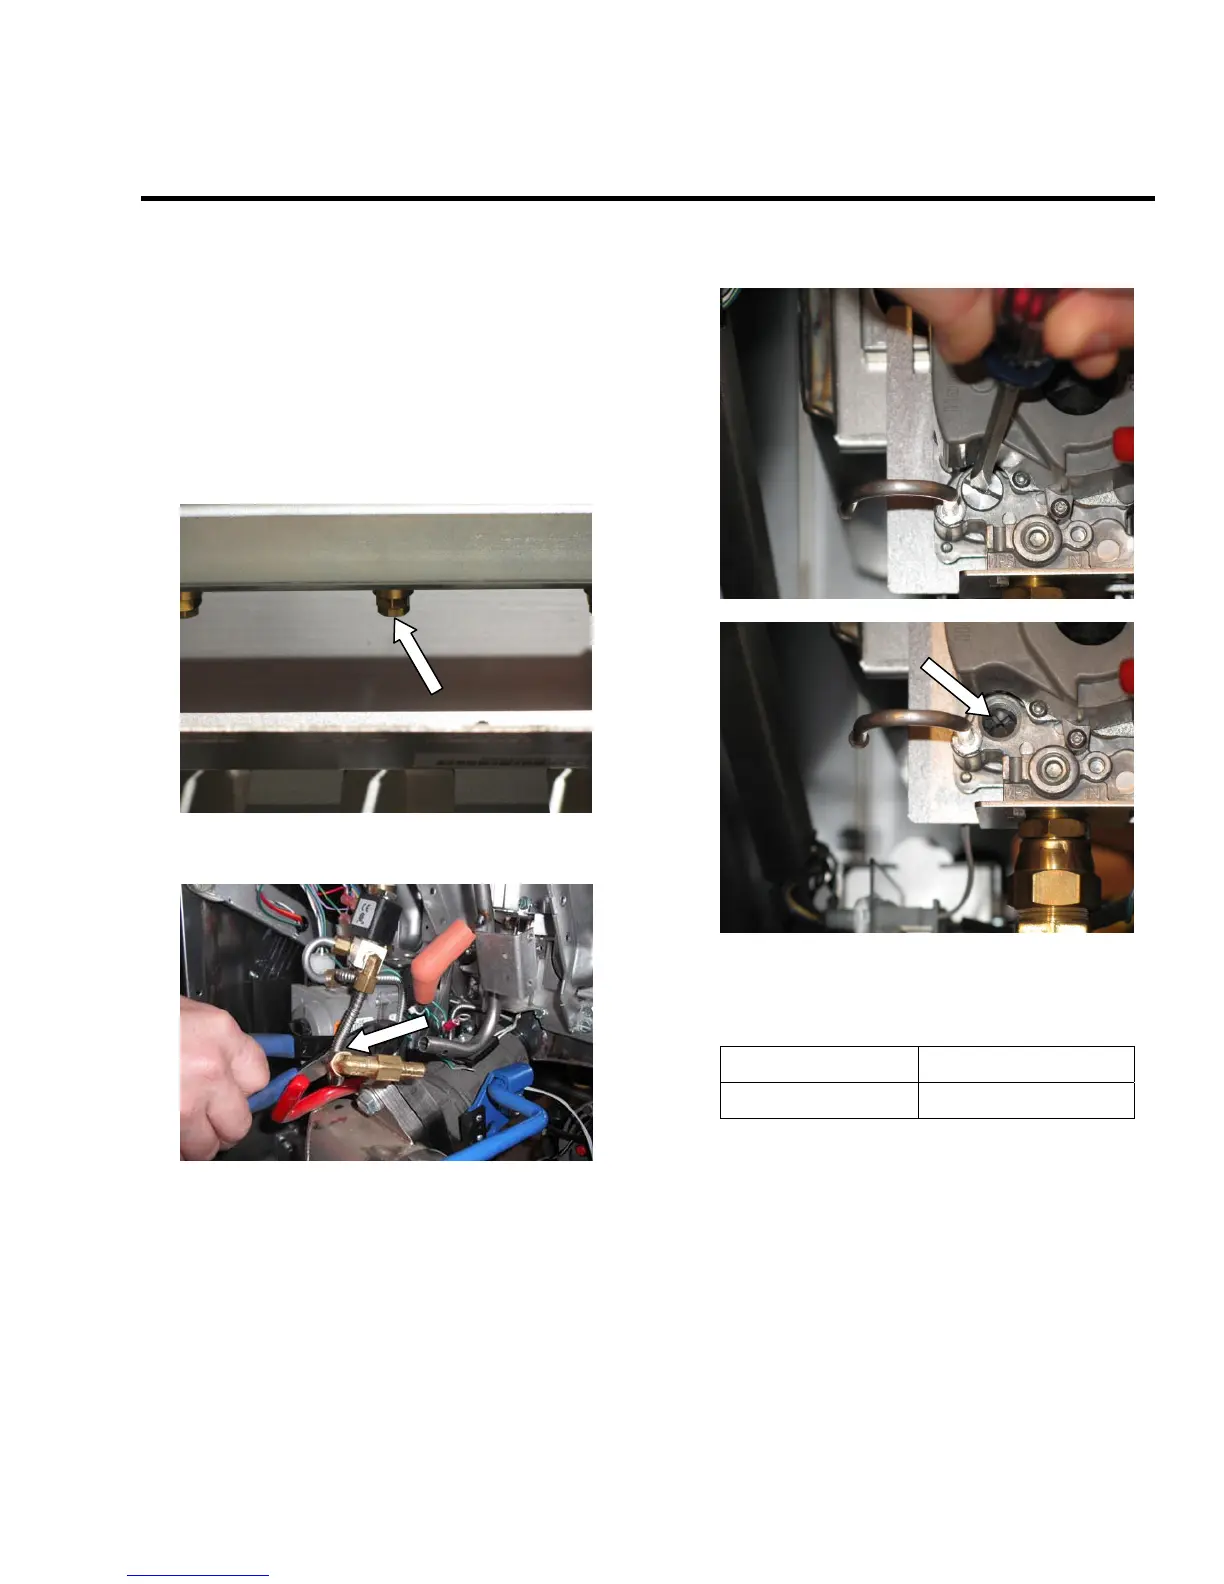
3. Replace bullet orifice with one provide in the
gas conversion kit.
4. Change the main burner orifice tips.
5. Change the SCB orifice tip.
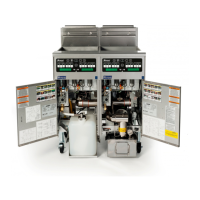
6. Replace and adjust the gas valve regulator.
7. Adjust the burner manifold pressure.
ManifoldGasPressureTable
NAT LP
4.0” 10”
a. Insert a flathead screwdriver into the cap
and turn counter-clockwise to remove it.
b. Insert flathead screwdriver into the cap and
turn counter-clockwise to increase the gas
pressure or clockwise to decrease the gas
pressure.
8. Put a sticker on the door saying the unit has been
converted.