DA80F/DA95F AddressRight™ Printers Service Manual (SV61962 Rev. A)
5-73
Removal and Replacement • 5
DA95F (WF96) - Printer Parts Removal
13. Connect the encoder cable assembly to the encoder.
14. Reinstall all components in reverse order except covers.
15. From the LCD menu, go to the Service menu. Select 2 “Test System”, Se-
lect Belt by pressing Enter. Press + twice to adjust the speed to 2 ips. If
the roller moves slowly (2 ips) then the install is correct. If it turns rapidly
and proclaims “Transport Stall Err”, then there is an issue with the encoder.
First start by ensuring that the encoder is plugged in and restart the pro-
cess again if needed.
16. If functioning properly, reinstall remaining covers.
9. On the replacement (new) encoder, remove the backing plate (if it isn't al-
ready). Install new backing plate with the two screws removed from step
8. Place the alignment bushing tool over the center shaft to ensure the
encoder plate is centered around the shaft. Remove bushing after fasten-
ing backing plate.
10. On the replacement encoder, remove the backing plate (if it isn't already).
Place (snap on) new encoder onto backing plate. Tighten allen screw
with wrench, but do NOT overtighten. As the set screw is tightened, push
the top of the wrench towards the base of the encoder. This will properly
align the encoder disk within its housing.
11. Remove the allen wrench from the encoder and re-tape it back on the
drive assembly (see figure from step 2).
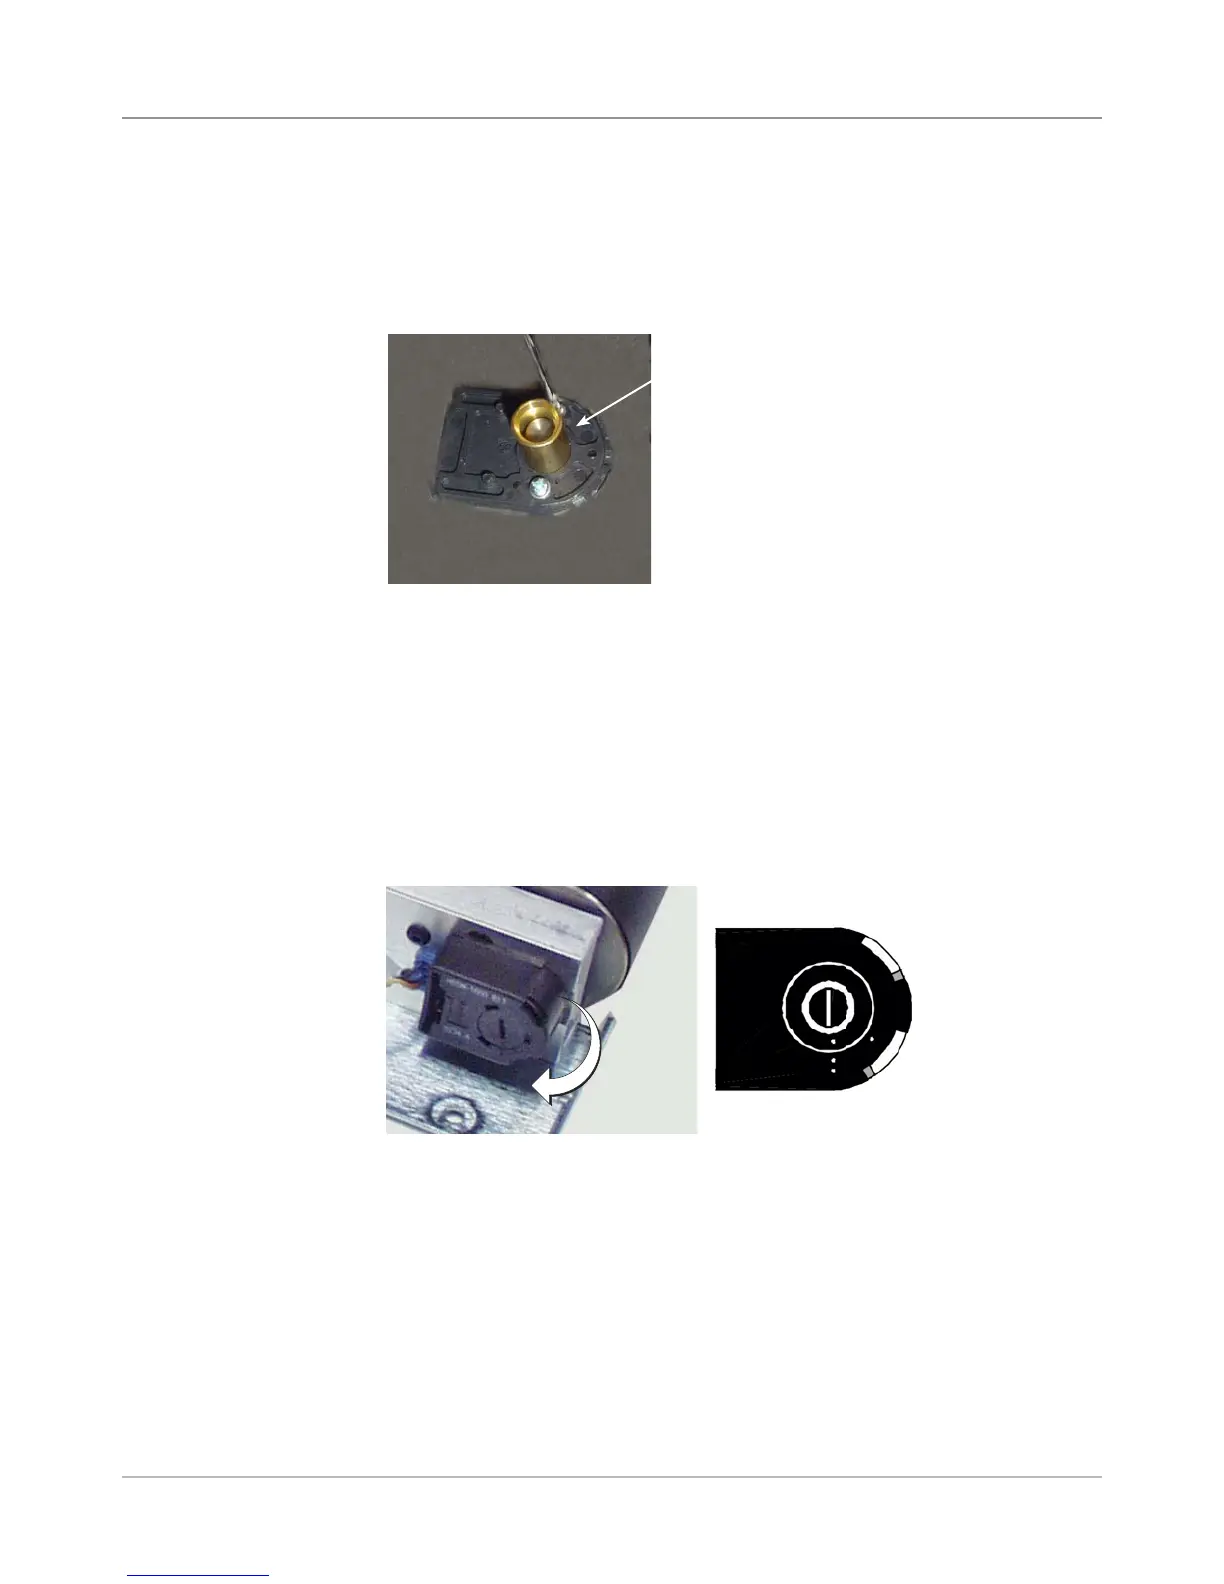
12. Use a large screwdriver to rotate the encoder disc lock screw clockwise
to the two dot (locked) position.
Alignment Bushing Tool
Two Dot Position
(Locked)
5.39 Encoder
Assembly
(continued)