DA80F/DA95F AddressRight™ Printers Service Manual (SV61962 Rev. A)
5-21
Removal and Replacement • 5
DA80F (WF81) Parts Removal
5.15 Print
Head Cables
and Print Head
Boards
1. Turn the power off and unplug the AC power cord.
2. Remove the rear cover (see section 5.2).
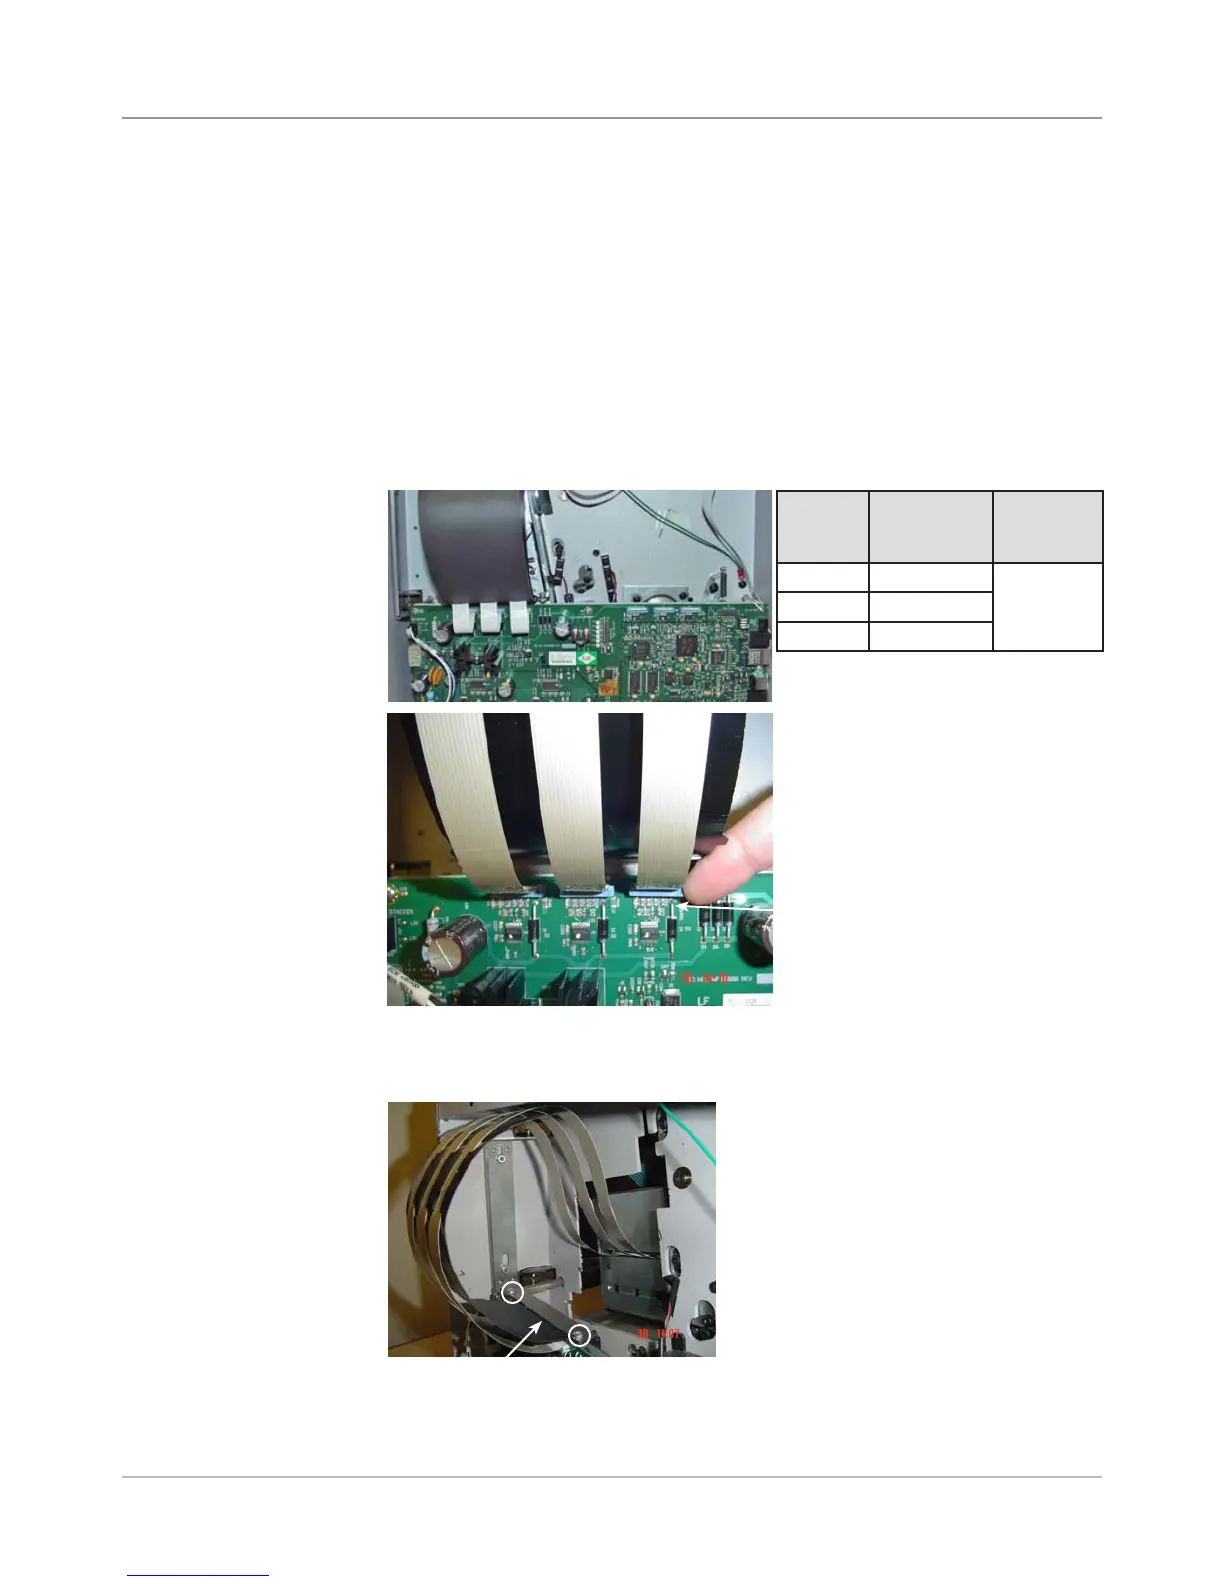
3. Disengage appropriate print head cables (J1 to J3) from the main board (see
figures below). Pull out slightly the blue piece on main board connector with
fingernail and simply remove cable (uses zero insertion force).
WARNING!
Disconnect power to processor board before removing or connecting the
print head assemblies or damage to components may occur.
J1 J2 J3
4. Unfasten two screws from clamp above main board to release print head
ribbon cable stiffener.
Clamp for Print Head Ribbon Cable
Stiffener (Screws Circled)
Location
on Main
Board
Description Comments
J1 Print Head 1 Bank (Set)
A
J2 Print Head 2
J3 Print Head 3
Main Board Showing all Three Print Head Cable Connections
Blue Piece on Main Board
Connector (use fingernail to
pull out slightly and release
pressure on cable so cable
can be removed)