5.
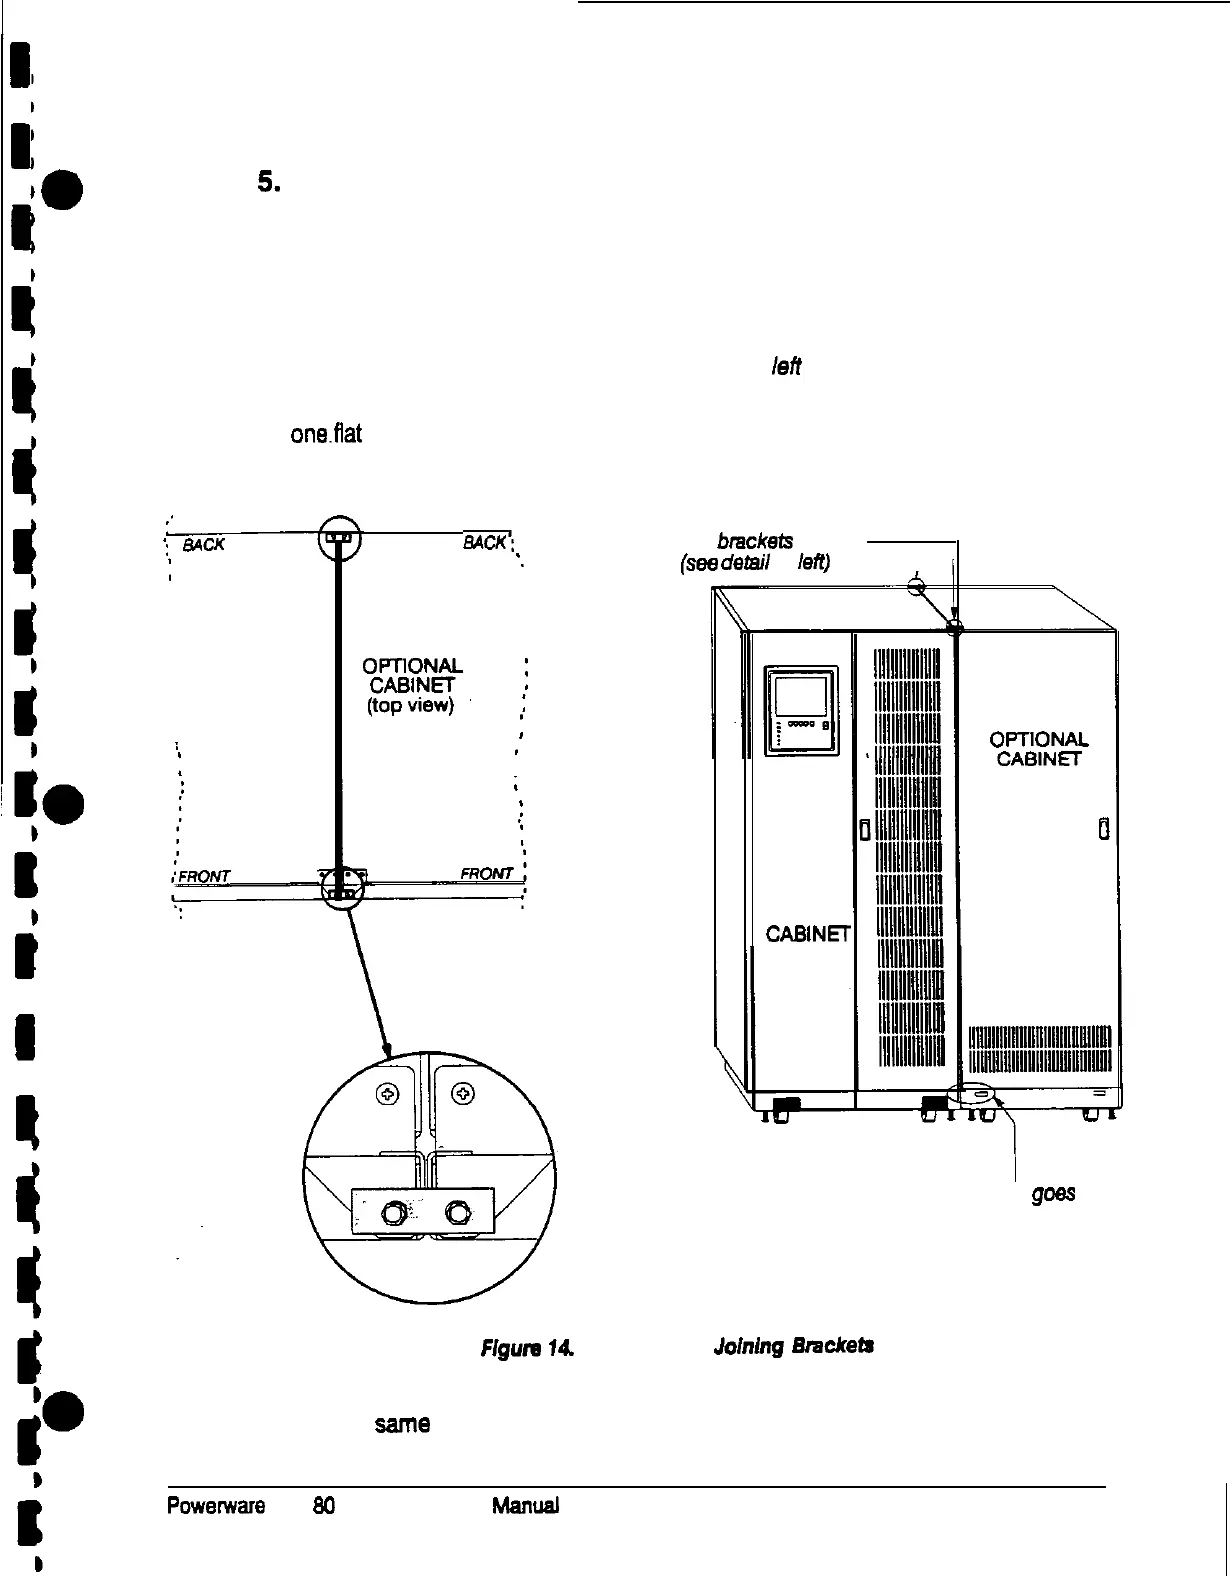
Three cabinet joining brackets are provided for securing each cabinet at the top
and bottom. Two flat brackets join the tops of the cabinets, one at the front and
one at the back. An angled bracket joins the cabinets at the bottom. Attach the
flat brackets to the cabinet tops first.
NOTE: The remaining steps show how to join an optional cabinet to the right
side of the UPS, and Figure 15 shows the tight angle bracket for joining
the cabinet bottoms. To join an optional cabinet to the left side of the
UPS, use the same procedure, but use the leti angle bracket.
Remove the screw from the top door hinge of each cabinet. Align the holes in
one.fiat bracket over the screw holes in the cabinet hinges, and replace the
screws (see Figure 14).
BACK:
Two flat
brackels
go here
*.
(see
detail
at
left)
I
UPS
CABINET
(top view)
UPS
CASINEI
1
Angled bracket
goes
here
(see Figure 15 on page 24)
Figure
14.
Placement of Joining Bnxkete
6.
Use the same method to install the second flat bracket over the screws at the
rear of the cabinet tops.
Powerware
Plus
80
UPS Installation
Manuaf
23