Installing Stand-Alone
‘lope
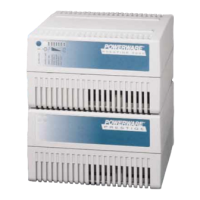
2 Battery Cabinets
Before
beginning the following procedures, be sure you have prepared the UPS for
installation of stand-alone
batt8r-y
cabinets
(see
page 17). Refer to figure 22 on
page 36 and Drawing 164200253-7 on page A-16 for the location of items
mentioned in these
prOC8dUreS.
lo
prepare
7ype
2
batfew
cabinets for stand-alone
fnstsllatlon:
1.
Unlock the
left
side door of the battery Cabinet using the key provided. Open
the door (press the top of the door latch, twist the latch lever clockwise
90’,
and
pull the door outward).
2. Remove the screws securing the right side door and open the door. Save the
hardware for later reuse.
WARNING:
LETHAL VOLTAGE WILL BE PRESENT WHEN
PERFORMING
THE
REMAINING STEPS IN THIS SECllON AND SUBSEQUENT SECTIONS.
3.
R8mOVe
th8
center
deadfront. Retain
it
and its hardware for later reuse.
4.
lf
you ar8 installing more than one battery cabinet, perform steps 1 through 3 for
each cabinet.
*
_
To
wh
stand-alone
TLpe
2 battery cabinets together:
1.
Battery cabinets will
arrfve
at your
site
wftfl
all battery
COnn8CtiOn
Strings
ek?ctricaky disconnected. R8mOVe the screws that Secure the left cable
connector, and remove the tiewrap See Figure 22 on page 36
for
connector
locations.
2. In the adjoining cabinet to the left, remove the screws securing th8 right
Cab18
conn8ctor.
3. Mate the
left
cable connector to the right cable connector in the adjoining
cabinet to the left
Se8 Figure 22 on page 38 to locate the cutout for routing of battery
Cab18
and
wire.
4. Repeat steps 1 through 3 of this procedure for each battery cabinet to be joined.
Powerware
Plus
80
UPS Installation
Manual
3.5