I
I
0
I
I
I
I
I
I
I
IO
I
I
I
I
I
I
,I
I0
I
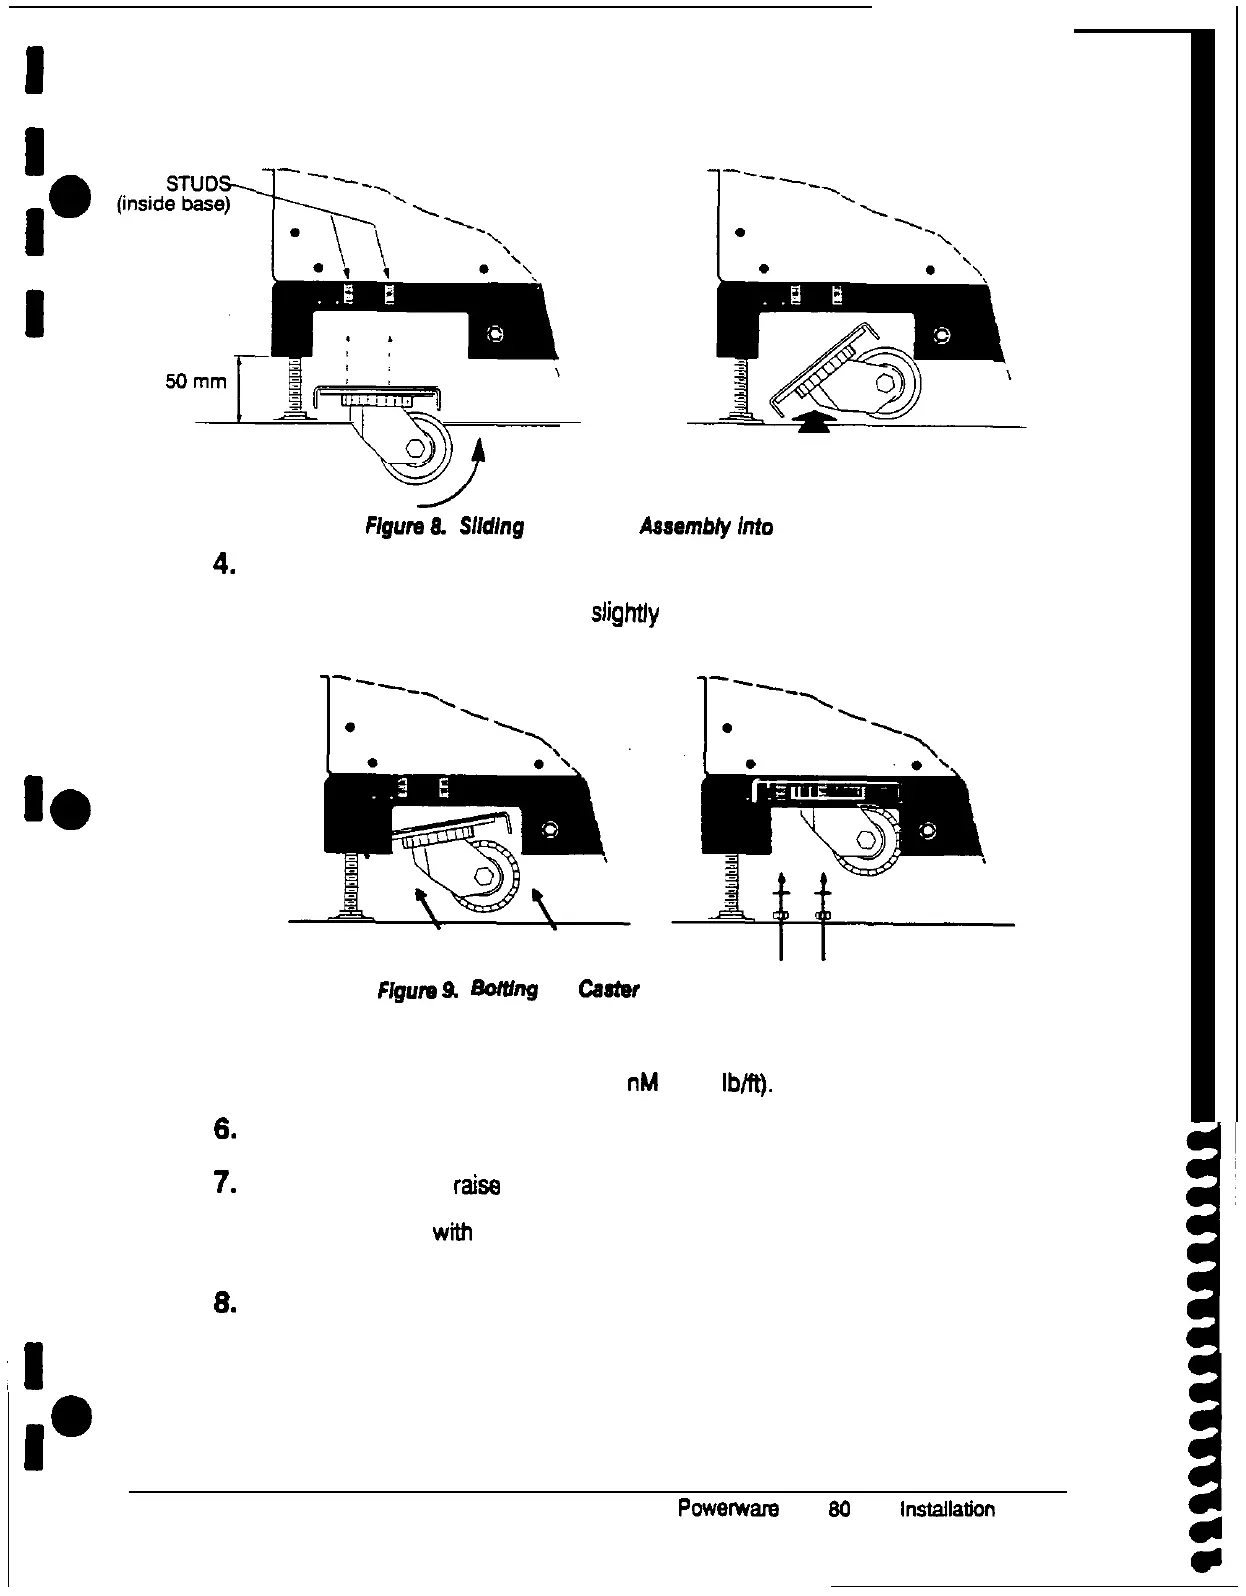
Flgure
8.
Slldlng
the Caster
Aaaembly
Into
the Channel
4.
When the ends of the assembly are flush with the outer ends of the channel, tilt
the assembly upward to rest against the top of the channel. You may have to
adjust the position of the assembly slightfy to slide it over the four studs
protruding into the channel (see Figure 9).
FIgurn
9. Bortlng
the
Caster
Assembly to me Cab/net
6. Place one lockwasher on each stud, then screw one nut onto each stud.
lighten the nuts securely: torque to 25 nM (19.4
lb@.
6.
Repeat steps 3 through 5 for the other caster assembly.
7.
To lower the cabinet, raise the leveling feet. (See page 14 for instructions on
how to use a hex wrench to raise the leveling feet.) Raise each leveling foot in
turn until it is flush with the base of the cabinet The casters now support the
cabinet.
6.
Roll the UPS cabinet carefully to the location where it will be installed.
16
Powerware
Plus
80
UPS Installation Manual
1
d
0