SECTION 3
OPERATING PRINTER
24
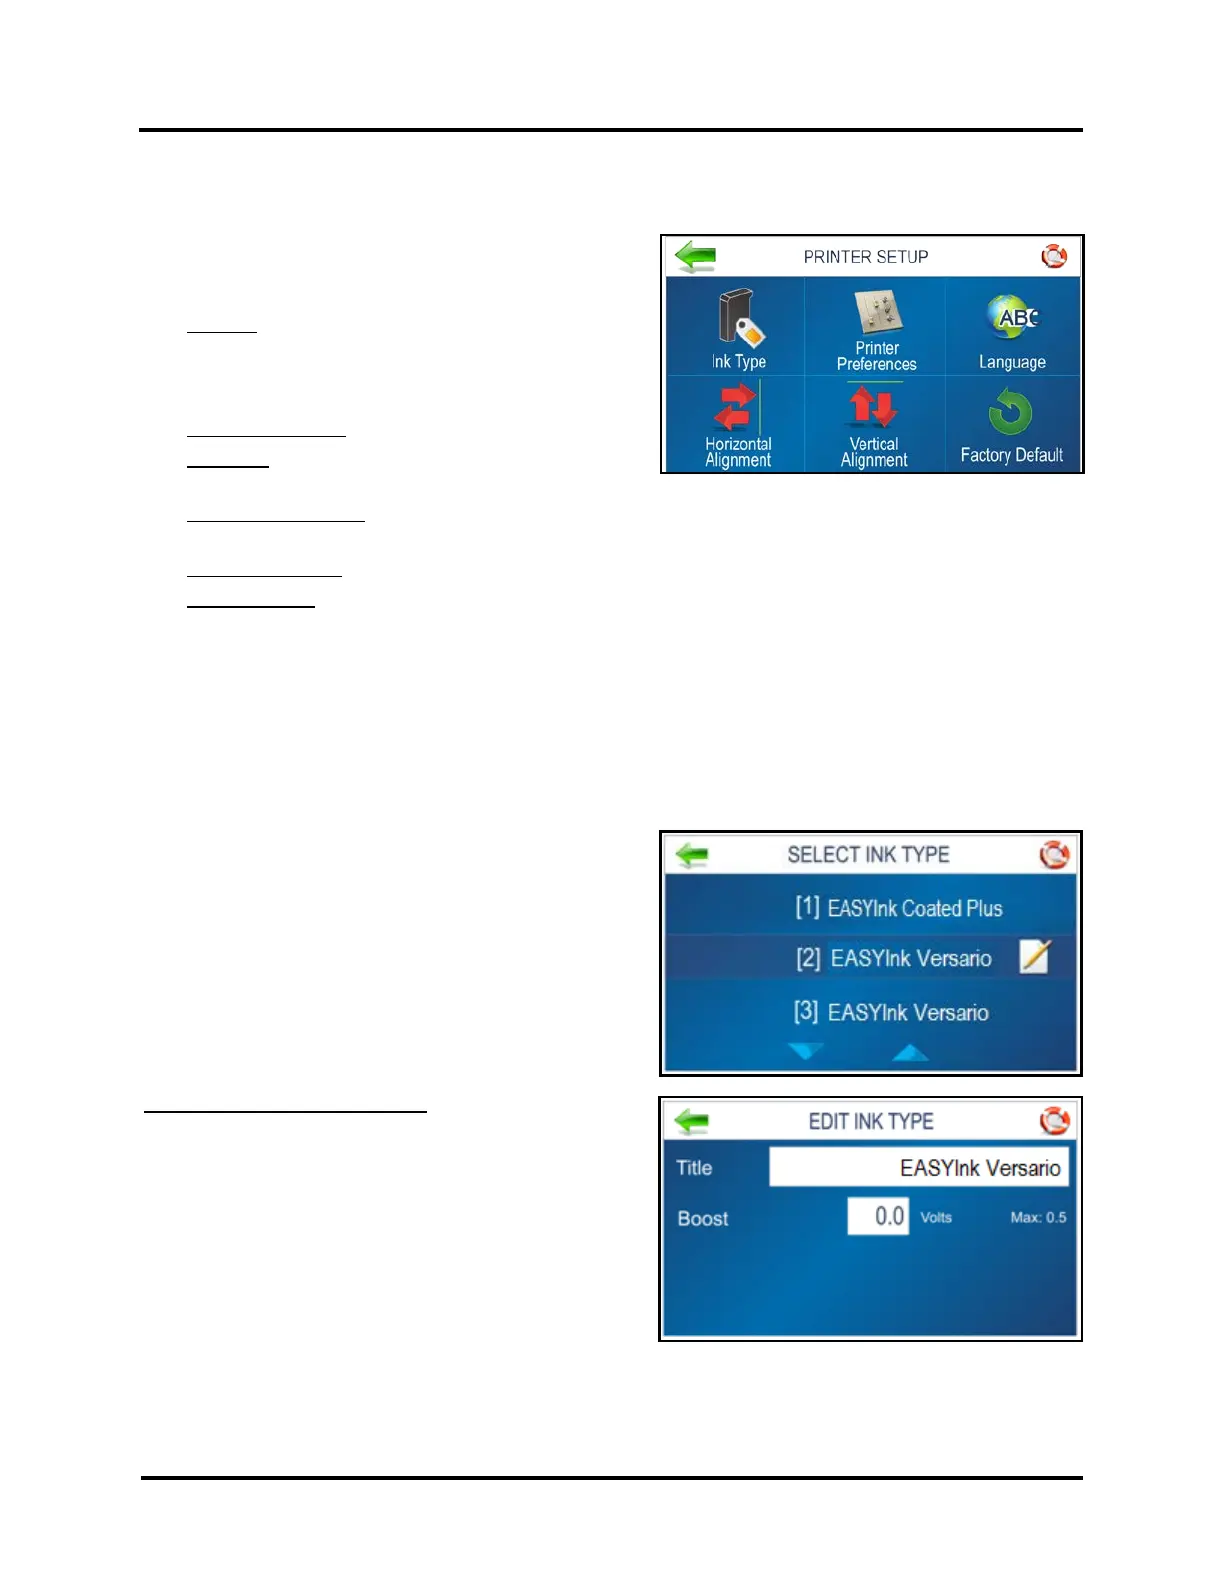
PRINTER SETUP Menu
Pressing Printer Setup on the Main Menu opens the Printer
Setup screen. Features on this screen allow you to set
Printer parameters to adjust the Printer to suit your needs.
Ink Type: Displays the Ink Types loaded in each of the
HEAD positions. Only authorized Ink Cartridges will
display. Selecting an Ink Cartridge, in a particular HEAD
position, provides access to the Edit option.
Printer Preferences: Use to select and set preferences.
Language: Select the language the Printer Touchscreen
will display.
Horizontal Alignment: Use to fine-tune the horizontal (side-to-side) alignment of an image printed between
adjacent Printheads.
Vertical Alignment: Use to fine-tune the nozzle/image overlap between adjacent Printheads.
Factory Default: Returns the Printer Setup to factory default settings.
INK TYPE Menu
Over time, the ink characteristics within a particular ink cartridge may change. If a particular ink cartridge isn’t
firing well (such as faded or fuzzy print), you can try to increase the Boost voltage to improve print performance.
Once entered, the Printer memory will recall this information even if the individual cartridge is removed and
reinstalled in this Printer at a later time or in a different HEAD position.
Pressing Ink Type, from the Printer Setup screen, opens the
“Select Ink Type” screen.
Press Up or Down Arrow to display the Ink Types currently
installed in other HEAD positions.
NOTE: Only authorized Inkjet Cartridges will be recognized
by the Printer. See section titled “Supplies – Compatible
Inkjet Cartridges”.
Tap on the desired Ink Cartridge (HEAD position) that you
would like to Edit.
Edit Ink Type (Paper & Pencil icon): Tap to open the Edit Ink
Type screen.
Tap the Boost entry box to open the Numeric Keyboard to
increase the voltage on the selected Ink Cartridge.
Max: Maximum Boost voltage that can be applied to
cartridge. This is based on the Ink Type.
Press …BACK to return to the previous screen.