SECTION 1
GETTING ACQUAINTED
7
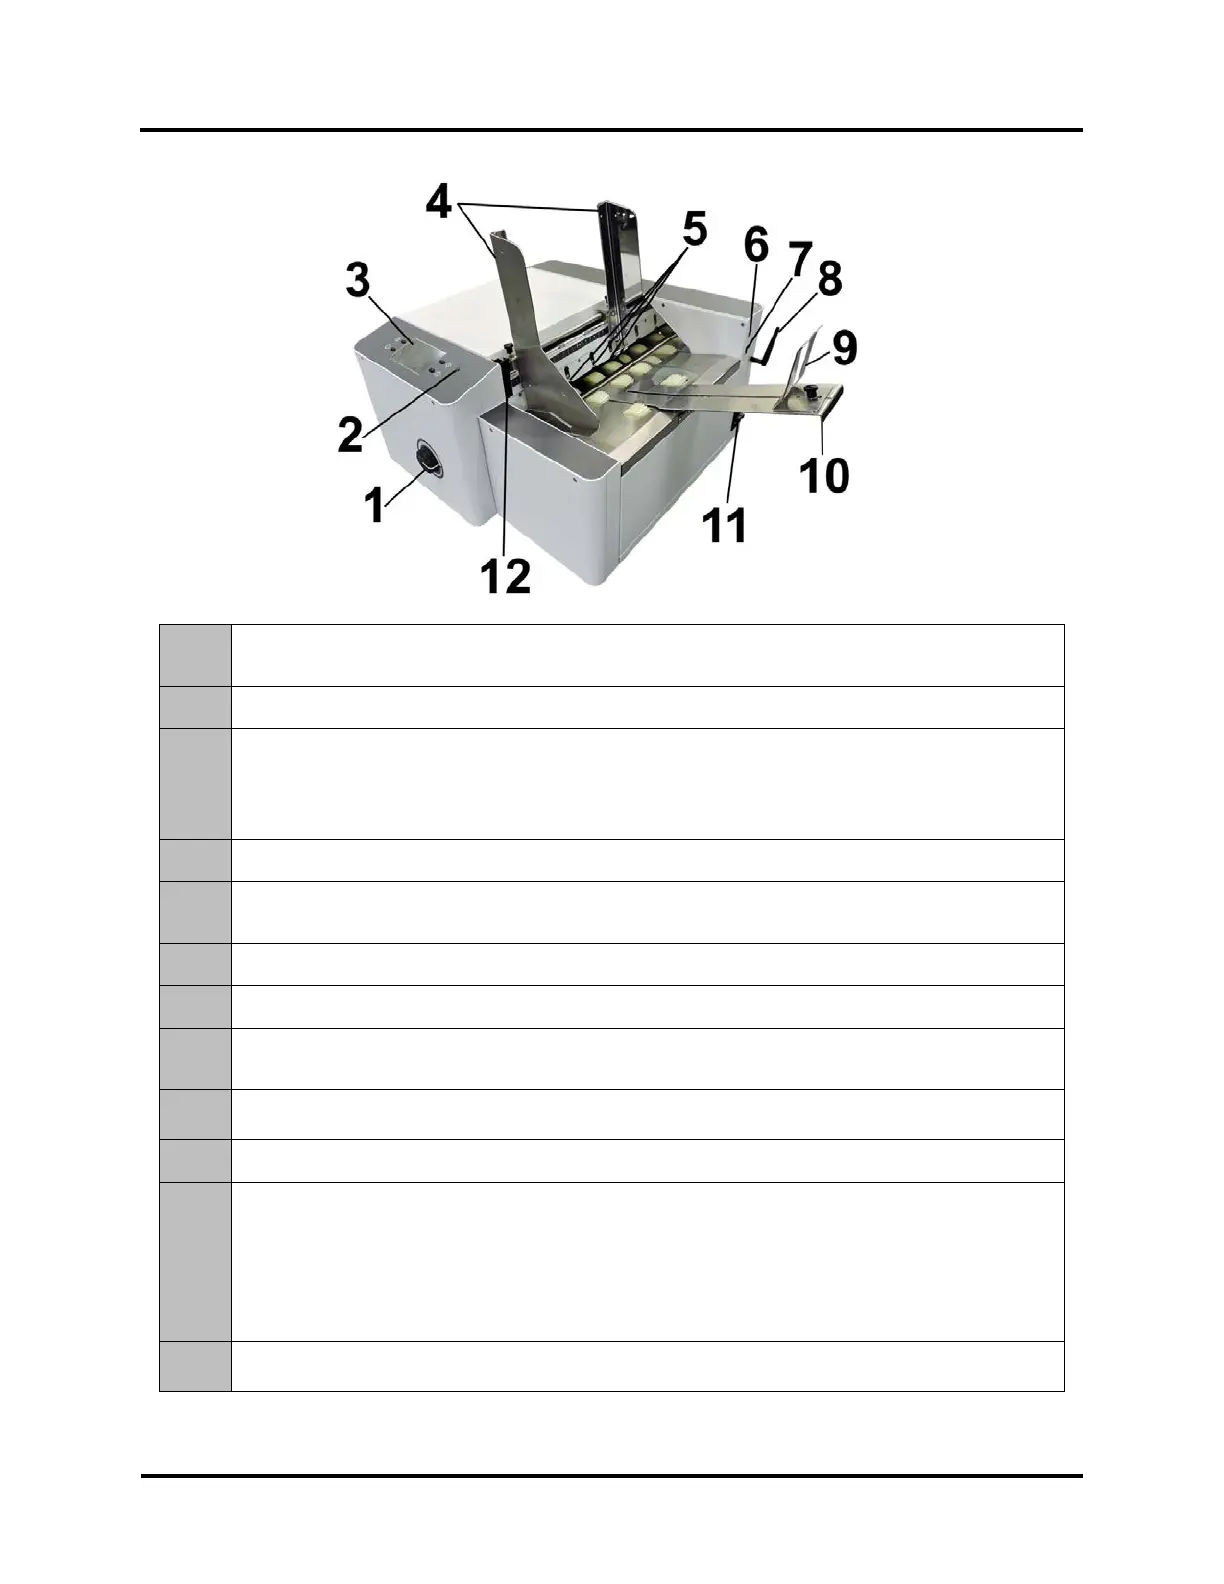
Rear View
1.
MEDIA THICKNESS ADJUSTMENT KNOB – Adjusts height of Printhead Carriage to compensate for
different media thicknesses.
2.
POWER INDICATOR LIGHT – ON (illuminated) when Main Power Switch is ON.
3.
CONTROL PANEL TOUCHSCREEN – Touchscreen allows access to Printer Menus and controls to set
up and operate the Printer.
The four Control Panel Keys are used to access commonly used Printer functions.
Quick Menu, Shutdown/Restart Menu, Transport Control Menu, Pause/Resume Job.
4.
MEDIA SIDE GUIDES – Used to position and guide media into the Printer.
5.
SHEET SEPARATORS – Used to separate a single piece of media from the stack. There are four
sheet separators on this printer.
6.
USB 3.0 (USB 3.1 Gen 1) PORT – Connects Printer to computer. (Also supports USB 2.0)
7.
ETHERNET PORT – Connects Printer to a network.
8.
WIFI PORT – Connect WiFi antenna (included) to monitor or operate Printer wirelessly through your
network.
9.
MEDIA SUPPORT WEDGE – Allows for adjustments in stack angle, based on media type and length.
Helps to force the media against the separation area.
10.
REAR MEDIA SUPPORT – Provides the proper angle to enhance paper feeding and separation.
11.
MAIN POWER SWITCH, POWER RECEPTACLE AND FUSES – Power cord plugs in here.
WARNING: Verify that the receptacle shows the correct voltage 115V or 220V selection.
Switch turns Main Power ON/OFF. Fuses provides over-current protection.
IMPORTANT: To safely power-down Printer, press the Shutdown/Restart Key, located on the control panel.
Then select “Shutdown”. Wait for cursor to stop blinking or disappear before turning OFF Main Power Switch.
CAUTION: Double pole/neutral fusing. For continued protection against risk of fire, replace only with same
12.
SEPARATOR LOCKING LEVER – Unlocks/locks Sheet Separators to adjust Separators for different
media thicknesses.