SECTION 3
OPERATING PRINTER
32
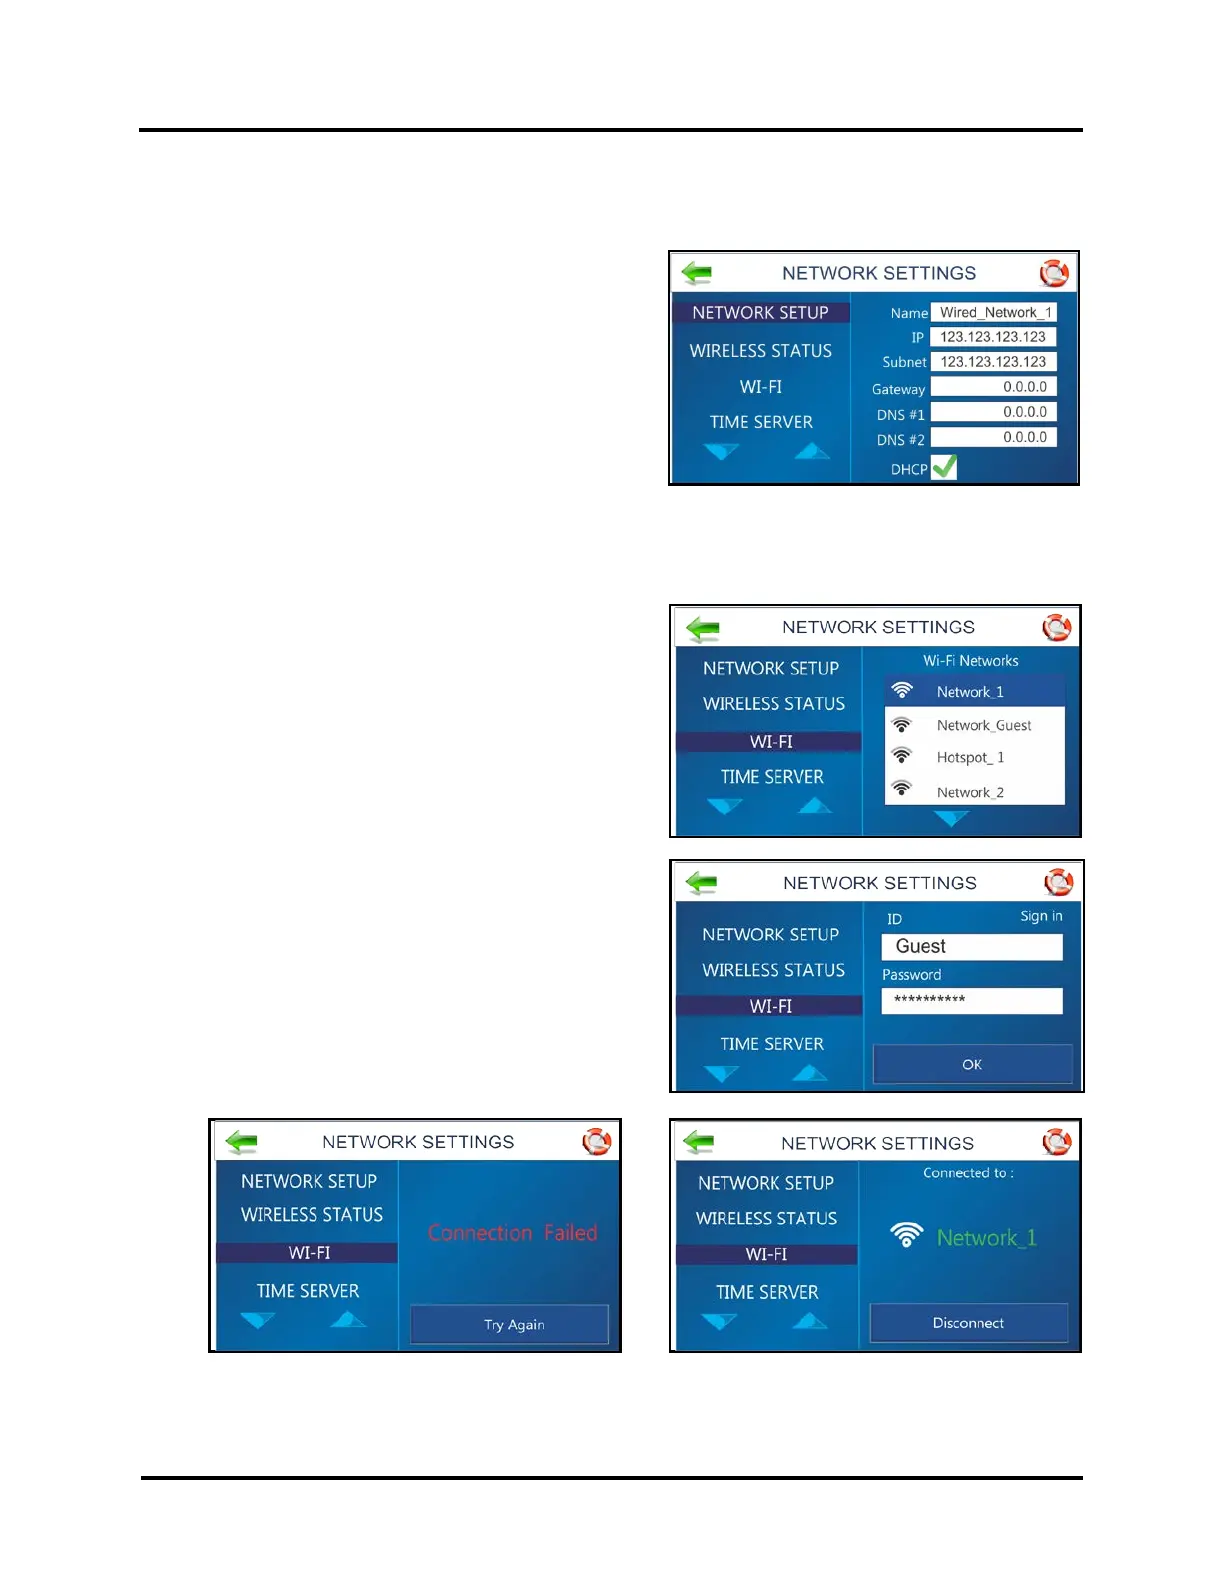
NETWORK SETTINGS Menu (NETWORK & WiFi SETUP)
Press the Network icon on the Tools screen to open the Network Settings screen.
NETWORK SETUP
Select Network Setup to enter the settings for connecting the
Printer to your network. Enter the Printer Name, IP address,
Subnet address, Gateway address, DNS #1 and DNS #2 and
select or deselect DHCP as needed. .
NOTE: It is strongly suggested to turn OFF (uncheck) DHCP
and enter a “static” IP Address, to avoid unwanted changes to
the printers IP address and loss of Printer Driver
communication.
WIFI SET-UP
Press the Network icon on the Tools screen to open the
Network Settings screen. Make sure the WiFi antenna
(included) is connected to the Printer's WiFi port.
1. Select WIFI.
2. Select the desired Network from the list of
WiFi Networks.
3. Enter User ID and Password. Click OK.
4. Screen will show if you are connected to the
Network. If connection fails, try again. Check that
you are connecting to the correct Network. Check
User ID and Password.
5. Click Disconnect to end connection.