SECTION 3
OPERATING PRINTER
16
Setting up Media Feed and Transport System
Sheet Separation & Guide Adjustments
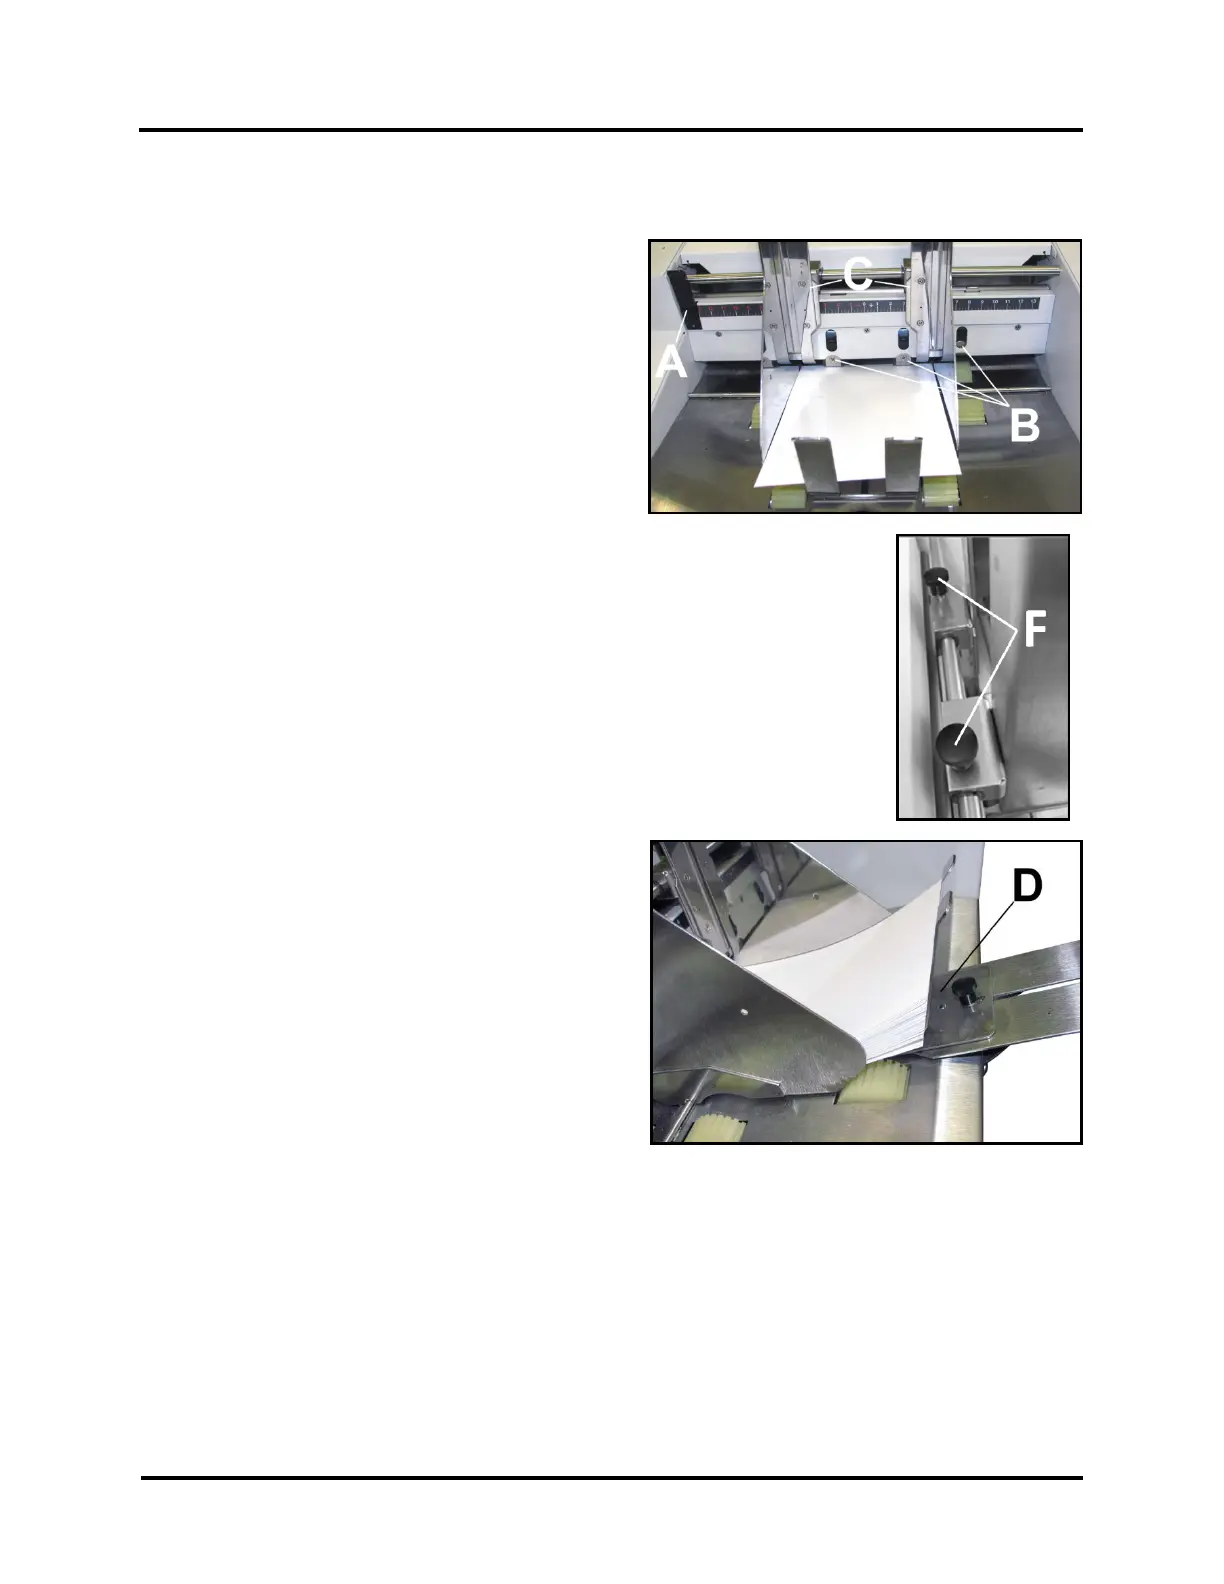
1. Release Separator Locking Lever [A] by grasping it
at the top of the Lever and rotating it down. This
will release all four Sheet Separators [B] so they
can be adjusted.
2. Lift all four Separators [B] so they are in the
“up and locked” position.
TIP: To make it easier to access Separators, loosen
Media Side Guide Locking Knobs [F] and move
Media Side Guides [C] to outermost positions.
3. Place one piece of Media in center of Feed Table
(Feeder/Hopper) and under the Separators [B].
4. Lower Separators that have Media under them, so they rest on surface of Media.
IMPORTANT: To avoid damaging Separators and Feed Rollers, be sure to raise and
lock Separators that do not have Media under them.
5. Rotate Separator Locking Lever [A] up, to lock the Separators in place.
6. Loosen Media Side Guide Locking Knobs [F].
7. Adjust Side Guides [C] to within 1/32" (0.8 mm) of Media.
8. Tighten Media Side Guide Locking Knobs [F] to secure Side Guide positions.
9. Place a stack of Media into the hopper. Make sure
the stack is fanned so the bottom piece is closer to
the Separators than the top pieces.
TIP: When loading an empty hopper. Place one
piece of media so it is directly against the tips of the
separators. Then place the fanned stack of media
on top of this single piece. This will help to reduce
the chance of double-feeding (overlapping media)
issues when you start feeding.
10. Adjust Media Support Wedge [D] so trailing edge of
Media stack is raised about 1/2" (12 mm) and rests
on curve of Wedge. Then tighten Locking Knob.
TIP: When running heavy/stiff media, or media longer than 10" (254 mm), try positioning the Media
Support Wedge so that it just touches (does not lift) the trailing edge of the Media. This should provide
more Media to Feed Roller contact, which is commonly needed for this type of Media.