113
©2006 Sunrise Medical
SEATING SECTION
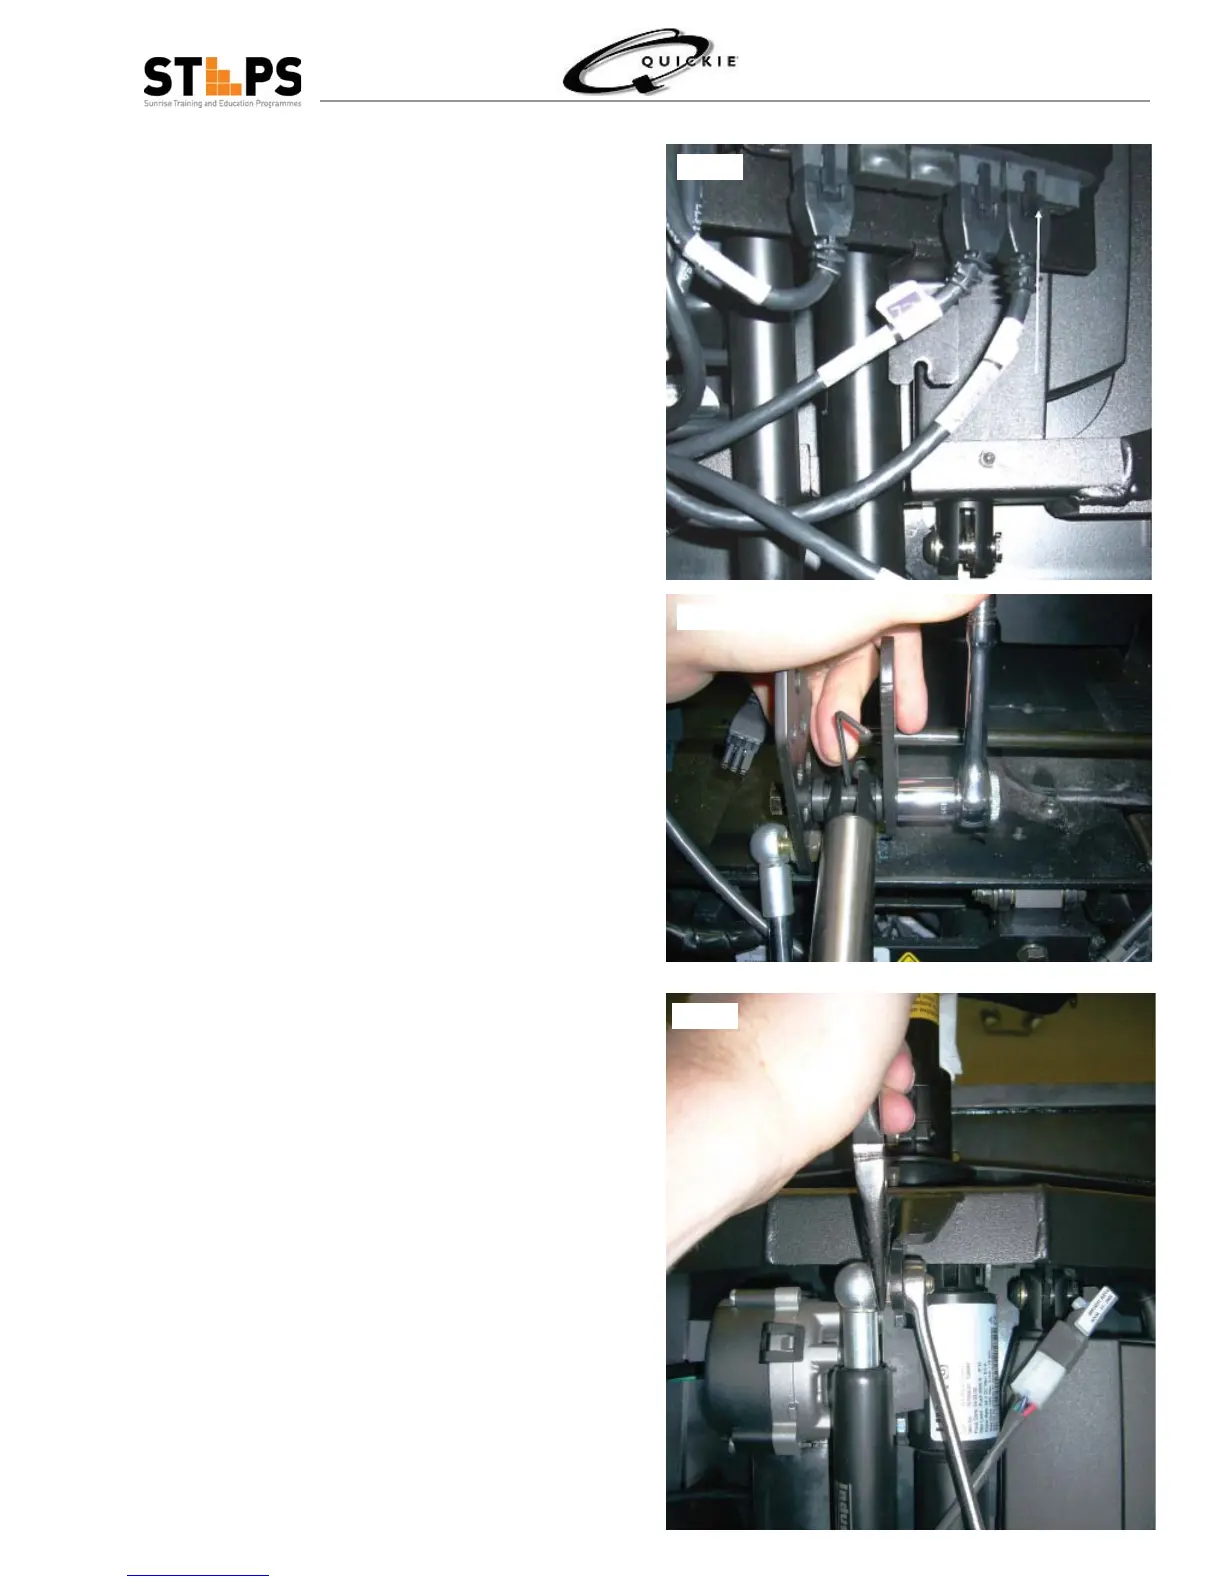
Once both screws are loosened, lift the QR-MAC 5.
mount up and place it to the side (Fig 3.18).
WARNING
During the next steps, you will be removing the Gas
Strut. It is under pressure. Be sure to use caution
when removing the Recline Actuator from the chair.
Once the Recline Actuator is detached from its
mount, the Gas Strut will be allowed to fully extend.
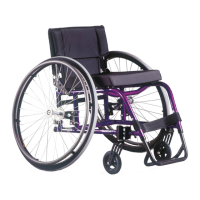
Use a 9/16” socket and ratchet to remove the bolts 6.
that attach the bottom of the recline actuator.
Note: in order to stop the center spacer from ro-7.
tating, a small hex wrench must be inserted into
the small hole located in the middle of the spacer.
(Fig 3.20)
Once one bolt is removed, the same technique 8.
may be used to remove the other side of the lower
recline actuator mount.
Note: prior to removal of Recline Actuator, ob-9.
serve the position of bottom bracket to ensure
that it is mounted in the same position during
re-assembly.
WARNING
It is suggested to have a second person pull back
on the wheelchair back to help compress the gas
strut while removing the bottom bolts.
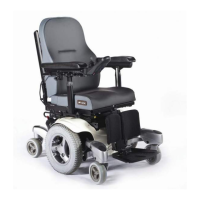
Use a pair of needle nose pliers and a ½” box-end 10.
wrench to remove the gas strut from its upper
mount after the bottom recline actuator mount is
disconnected (Fig 3.21).
Note: you do not have to fully disconnect the 11.
gas strut. Once the top mount is disconnected;
rotate the gas strut down and out of the way to
work on the other components of the wheelchair.
Fig 3.118
Fig 3.120
Fig 3.121