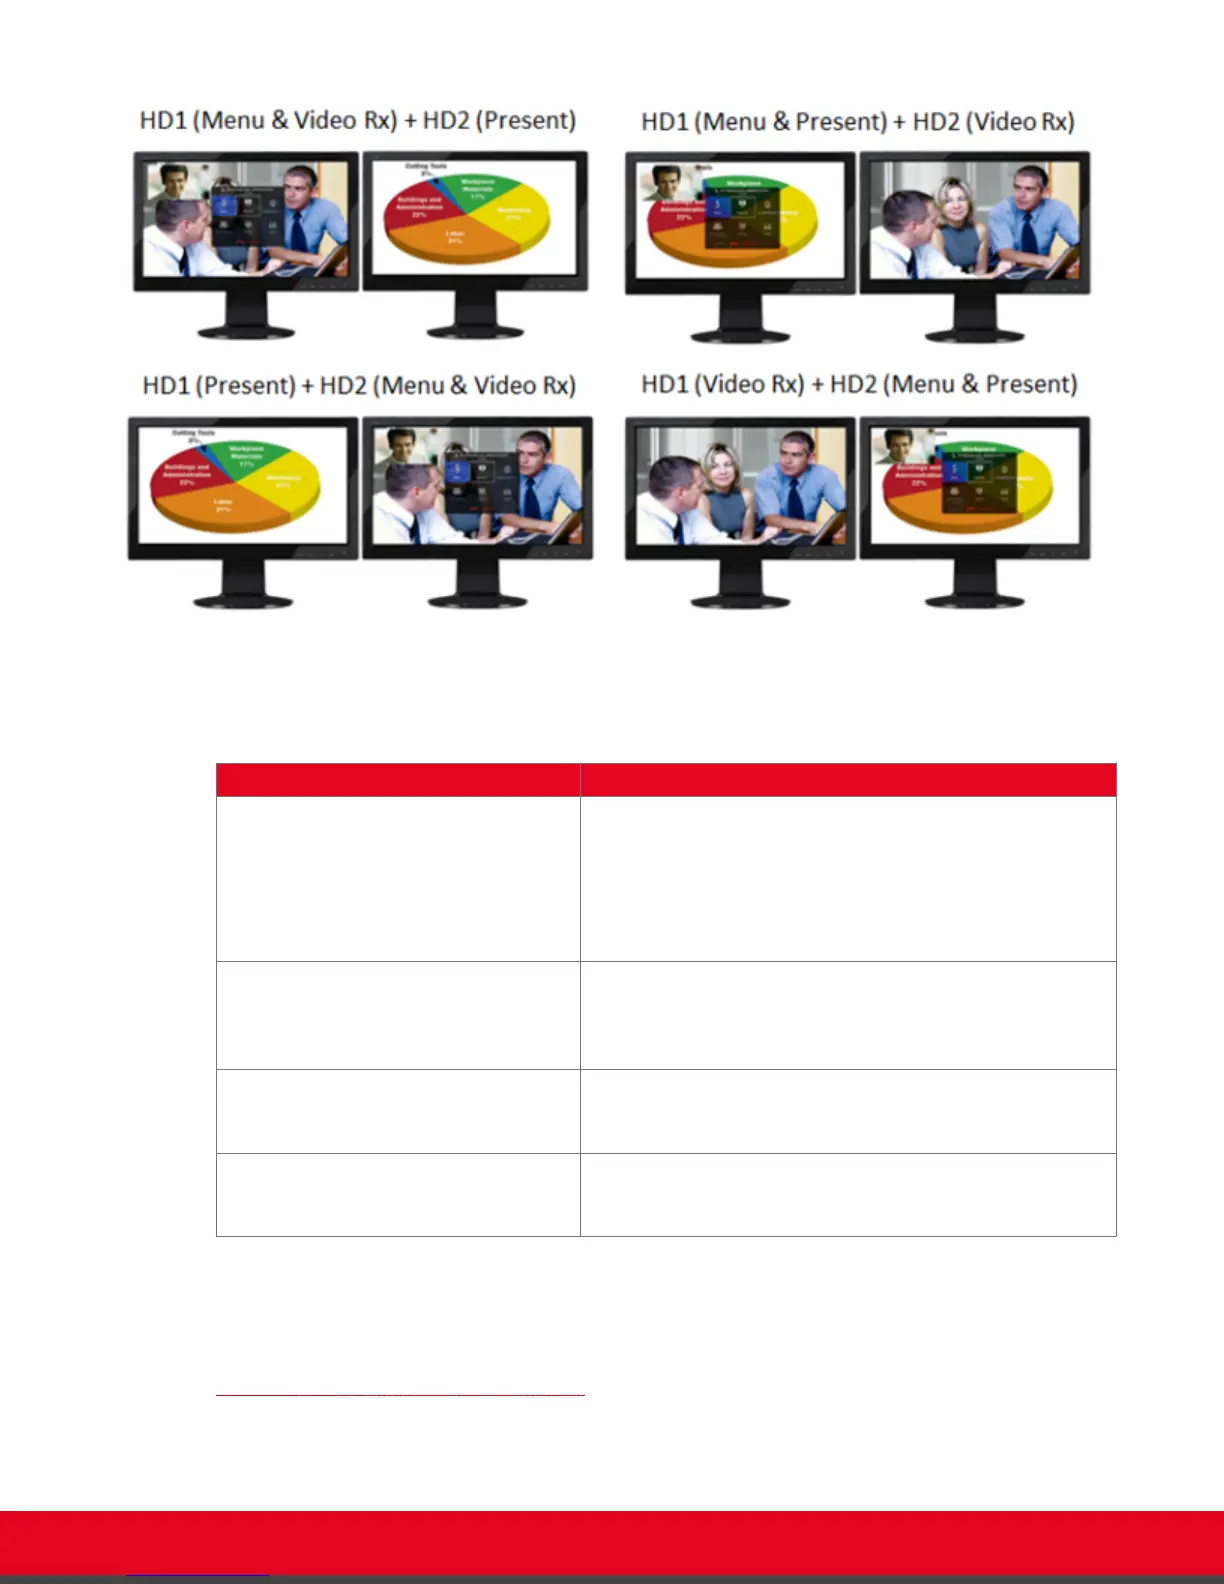
Figure 44: Video configuration options with two monitors
Table 9: Video configuration options with two monitors
Layout Description
HD1 (Menu & Video Rx) + HD2
(Present)
The main monitor (HD1) shows the system menus, the
received video, and local video. The local video is in a small
overlapping window, also called a PIP (Picture in Picture)
view. The auxiliary monitor (HD2) shows the presentation
(local or remote), if available. The audio is enabled on HD1.
This is the default configuration.
HD1 (Menu & Present) + HD2 (Video
Rx)
HD1 shows the system menus, the presentation (local or
remote) if available, and the local video in a small
overlapping window. HD2 shows the received video. The
audio is automatically enabled on HD1.
HD1 (Present) + HD2 (Menu & Video
Rx)
HD1 shows the presentation (local or remote), if available.
HD2 shows the system menus, the received video, and the
local video in a small overlapping window.
HD1 (Video Rx) + HD2 (Menu &
Present)
HD1 shows the received video. HD2 shows the system
menus, the presentation (local or remote) if available, and
the local camera image in a small overlapping window.
For more information about configuring your monitor views, see Administrator Guide for Scopia XT
Series.
During a call, you can also define the relative size of the windows. For example, two images side by side
and at the same size in one monitor is called PaP (Picture and Picture) view. For more information, see
Changing the Video Layout During the Call on page 61.
User Guide for Scopia XT5000 Series Version 3.2 During Your Videoconference | 60
 Loading...