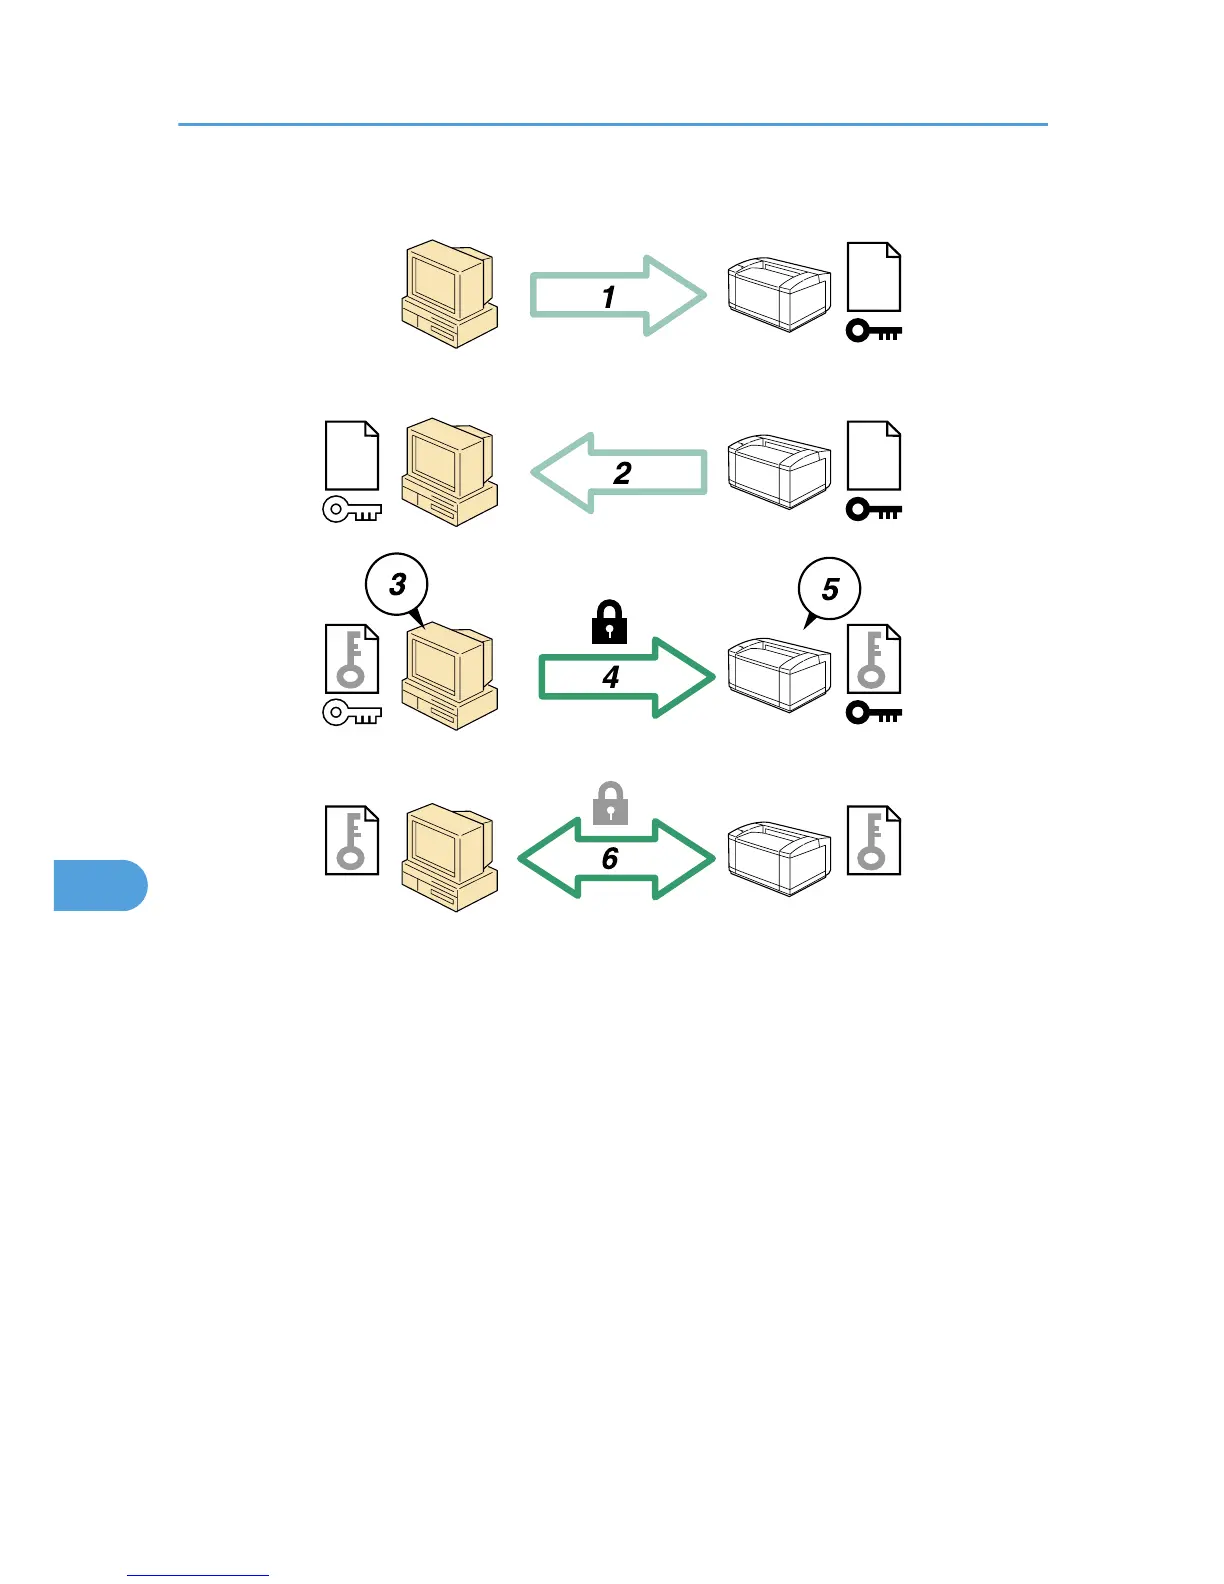
1. To access the machine from a user's computer, request the SSL device certificate and public key.
2. The device certificate and public key are sent from the machine to the user's computer.
3. Create a shared key from the user's computer, and then encrypt it using the public key.
4. The encrypted shared key is sent to the machine.
5. The encrypted shared key is decrypted in the machine using the private key.
6. Transmit the encrypted data using the shared key, and the data is then decrypted at the machine to
attain secure transmission.
Configuration flow (self-signed certificate)
1. Creating and installing the device certificate
Install the device certificate using Web Image Monitor.
2. Enabling SSL
Enable the "SSL/TLS" setting using Web Image Monitor.
8. Security Measures Provided by this Printer
338
 Loading...


