INSTALLATION PROCEDURE 31 October 2001
1-22
1.2.5 ADDITIONAL DRUMS (OPTION)
There are two types of drum units:
A3 Size: Color drum
A4 Size: Black drum (Black ink only)
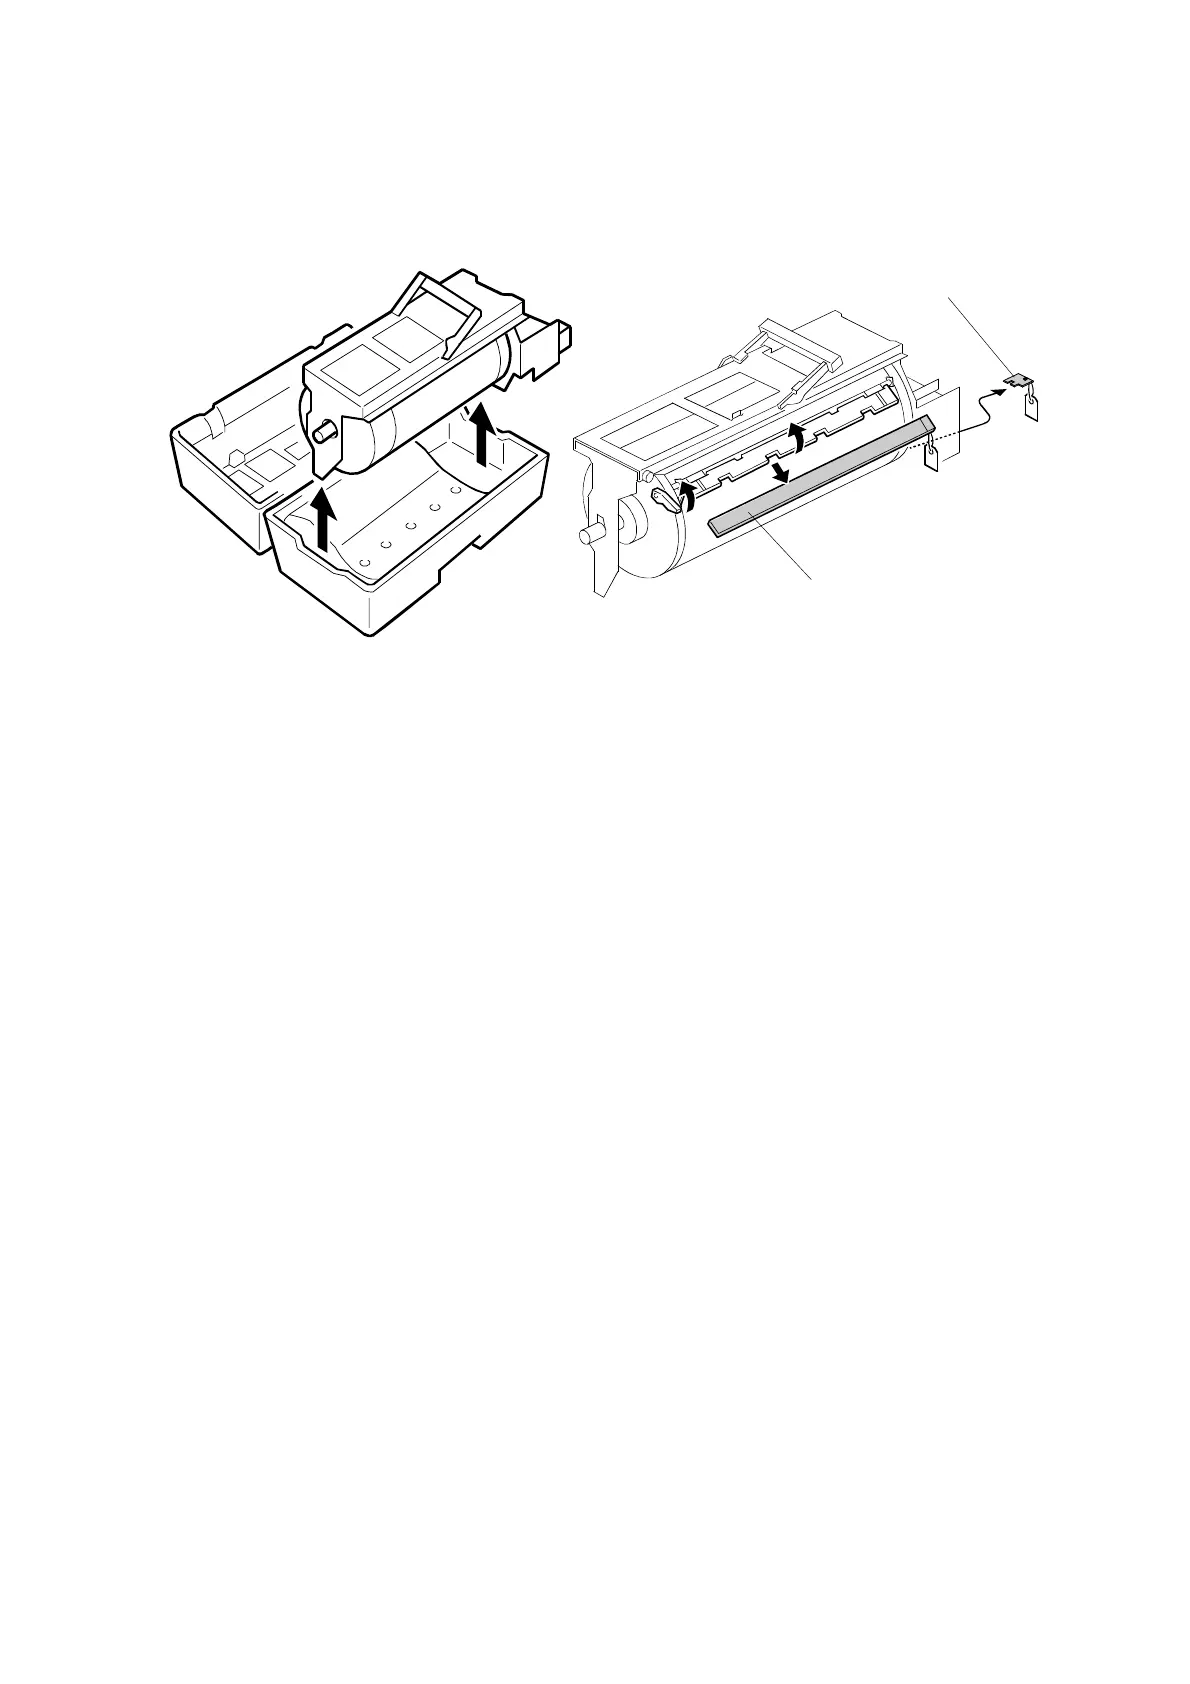
1. Remove the protective sheet [A] and the lock [B] from the drum unit.
2. Remove the tape securing the ink holder.
3. Attach a color indicator decal to the drum case. The decal must be the same
color as the ink in use.
4. Remove the drum unit.
5. Leave the master wrapped around the removed drum to protect the drum from
dust and from drying.
6. Keep the removed drum unit in the drum case.
7. Install the drum unit.
NOTE: The color drum indicator (or A4 drum indicator) on the operation panel
stays lit when a drum is mounted in the machine.
8. Remove the ink cartridge cap.
9. Insert the ink cartridge in the ink holder.
C238I534.WMF
C238I020.WMF
[A]
[B]