MASTER FEED 31 October 2001
3-12
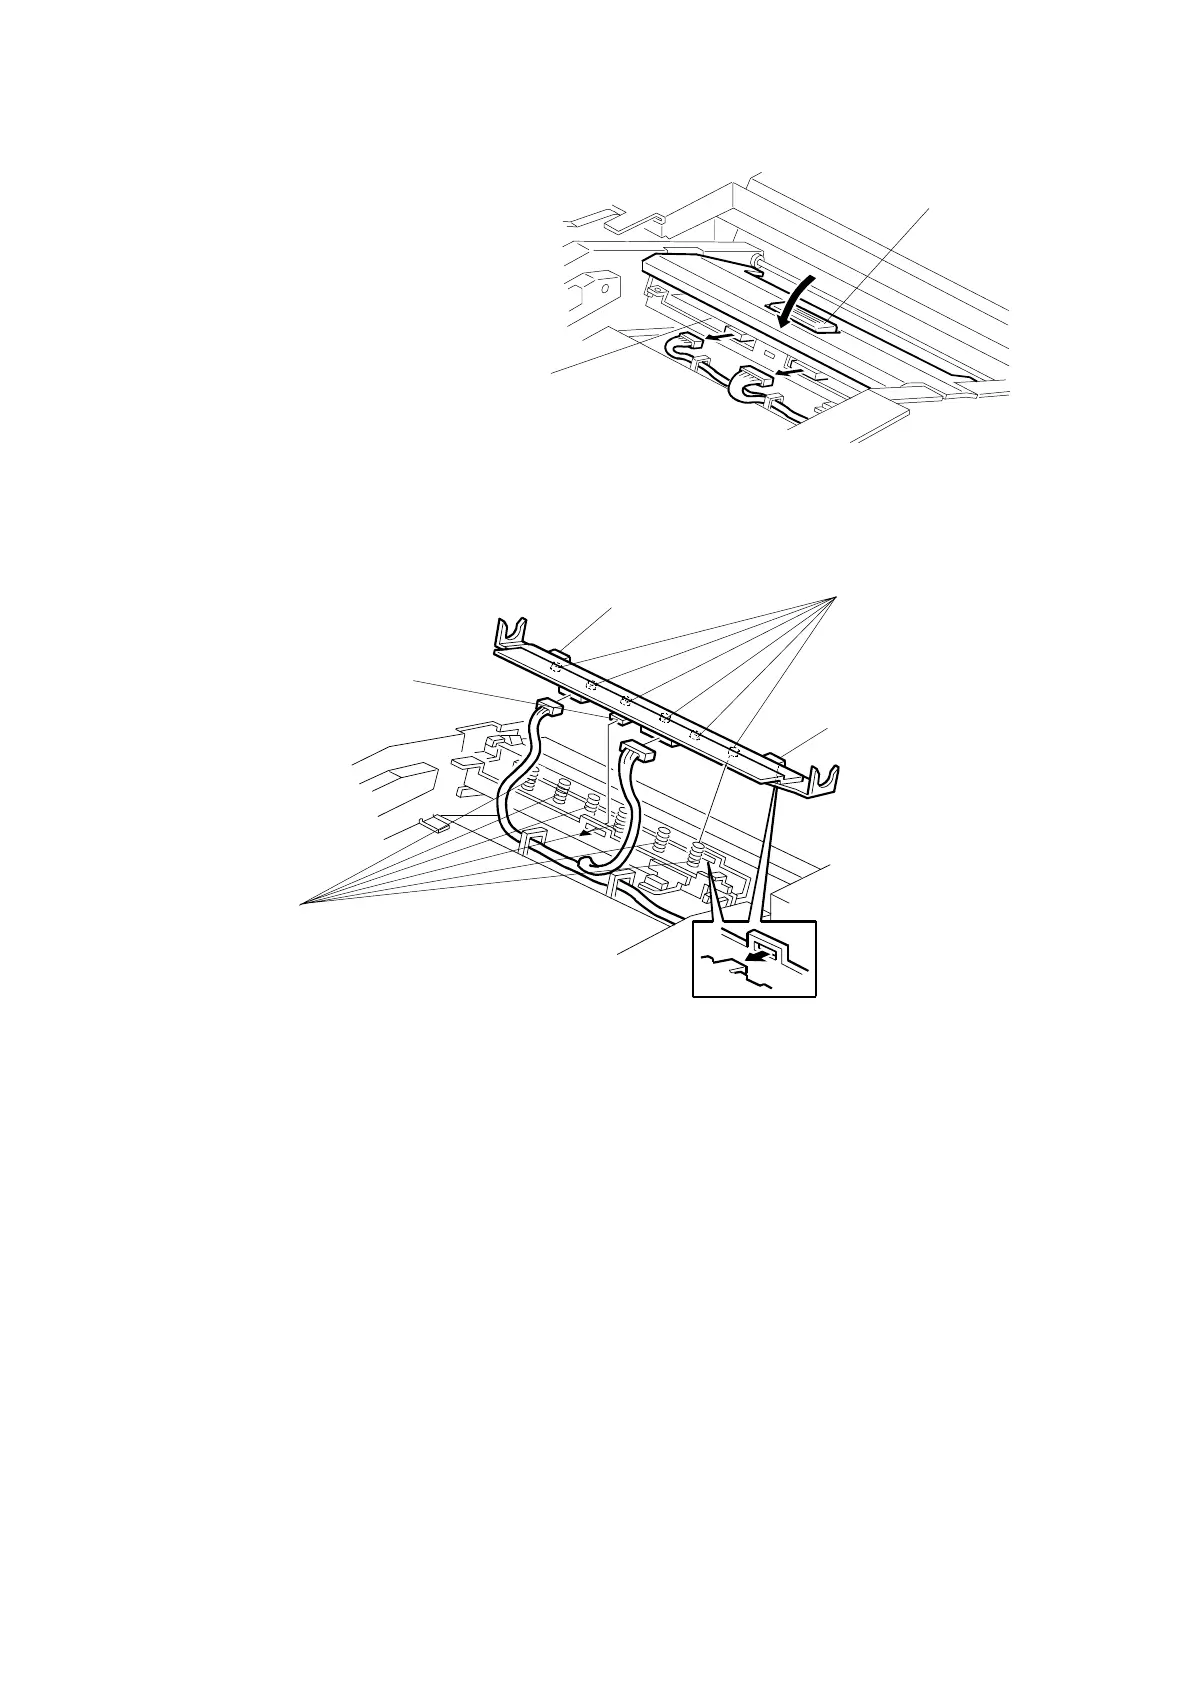
• Close the platen roller unit [1].
[C]: Thermal head (" x 2)
Installation
If the following remarks are not followed, the thermal head will be installed
incorrectly.
1) Fit the base’s springs [D] over the protrusions [E] on the underside of the
thermal head (6 points).
2) While fitting the tops of the springs [D] over the protrusions on the underside
of the thermal head, hook the lock pawls [F] of the thermal head onto the
base (3 lock pawls). Make sure to set the front side (the paper table side)
first.
3) Make sure that all protrusions are properly fitted into the springs.
CAUTION: Adjust the thermal head voltage (☛ 3.5.3) after installing the new
thermal head.
C238R050.WMF
C238R030.WMF
[1]
[C]
[F]
[F]
[F]
[D]
[E]