31 October 2001 MAIN MENU NO.6: ADJUSTMENT
5-9
Service
Tables
5.7 MAIN MENU NO.6: ADJUSTMENT
5.7.1 SP TABLE
No. Menu Items Default Settings
6-1 Main-scan position – platen mode – -5.0 to 5.0 mm (☛ 5.7.3)
6-2 Main-scan position - ADF mode 0 -5.0 to 5.0 mm (☛ 5.7.3)
6-3 Scanning start position - platen mode – -5.0 to 5.0 mm (☛ 5.7.3)
6-4 Scanning start position - ADF mode 0 -5.0 to 5.0 mm (☛ 5.7.3)
6-5 Scanning speed - platen mode – -5.0 to 5.0 % (☛ 5.7.3)
6-6 Scanning speed - ADF mode 0 -5.0 to 5.0 % (☛ 5.7.3)
6-10 Master writing speed – -5.0 to 5.0 % (☛ 5.7.3)
6-20 Registration buckle (Not used) 18 0 to100 pluses (☛ 5.7.5)
6-21 Paper registration position – -5.0 to 5.0 mm (☛ 5.7.3)
6-30 Master making density 1 0: Pale, 1: Normal, 2: Dark
6-31 SBU calibration Off On/Off (☛ 5.7.4)
6-40 Ink detection adjustment – (☛ 5.7.2)
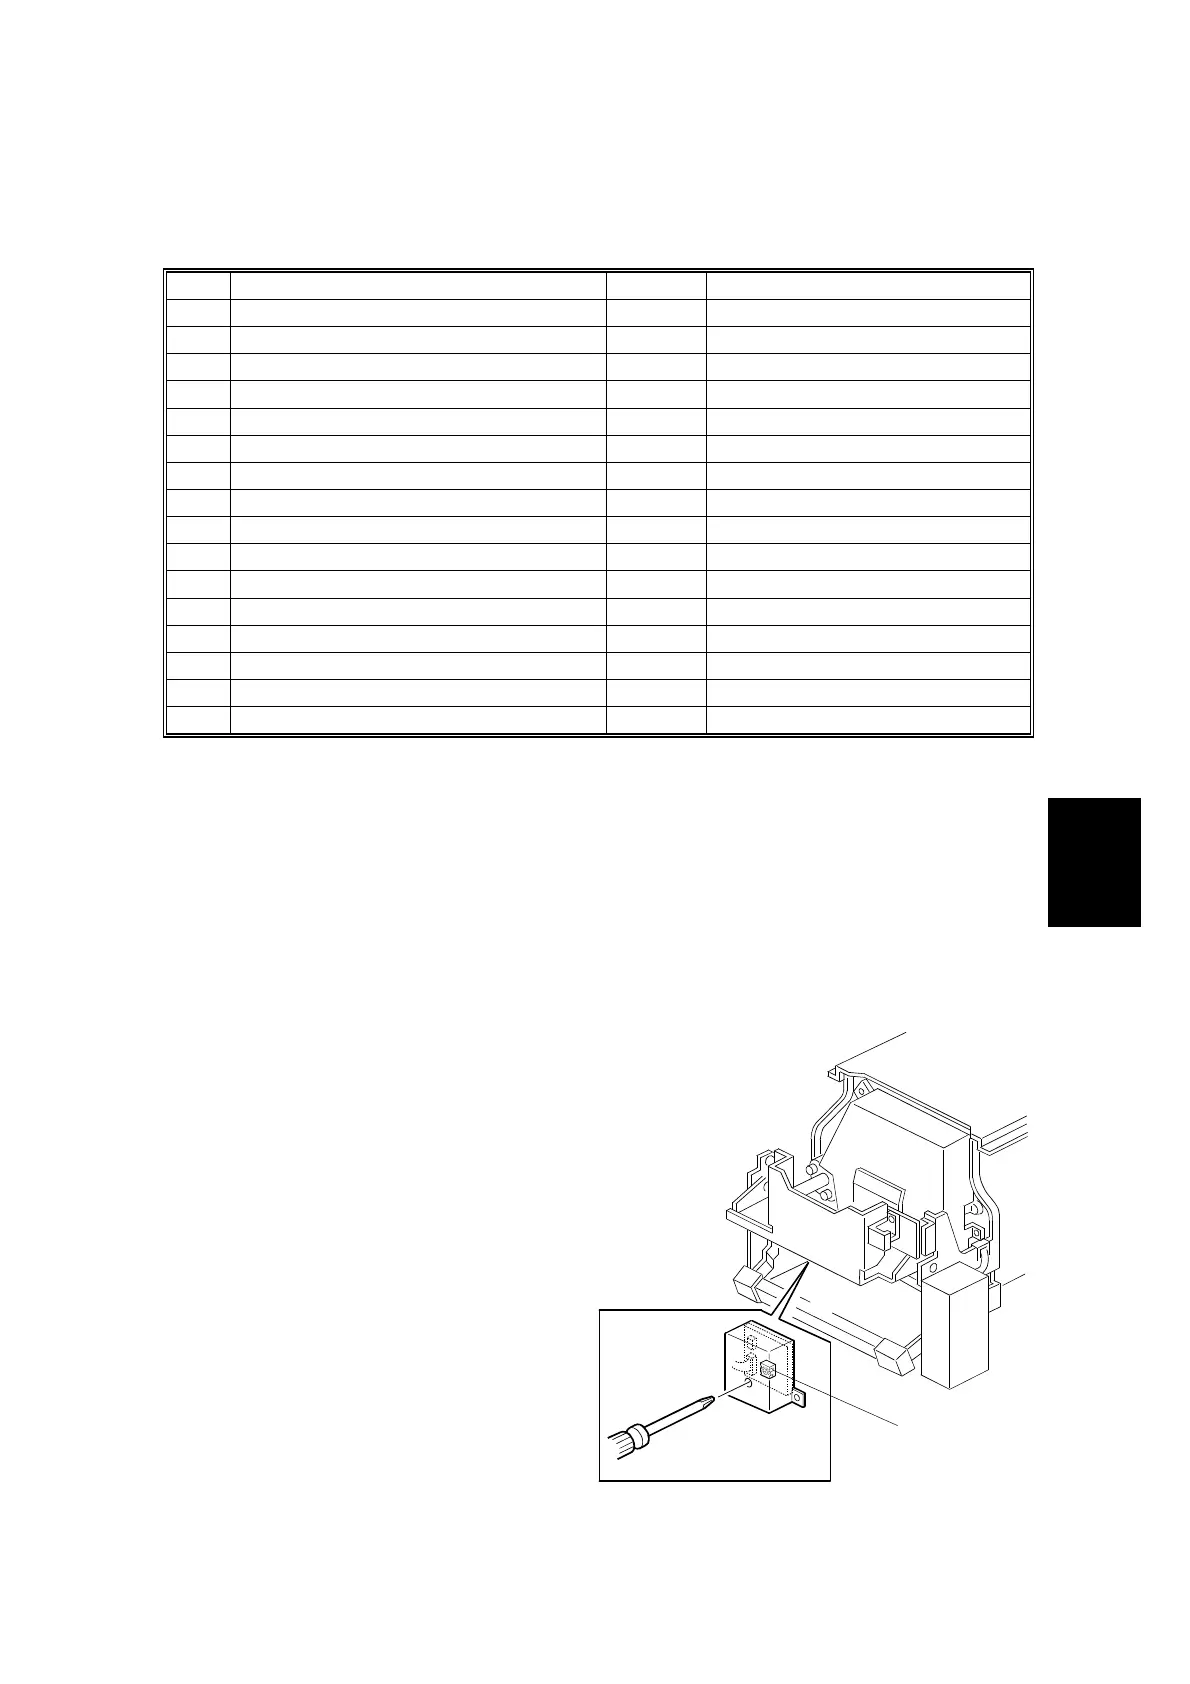
5.7.2 SP6-40: INK DETECTION ADJUSTMENT
Purpose: To ensure that the CPU detects a no ink condition.
CAUTION: Before attempting this procedure, wipe off the ink around the ink roller.
To do this, set SP2-10 (ink detection) to OFF, and feed paper until ink
ends. After finishing the procedure, do not forget to return SP2-10 to
the default (ink detection on).
Access SP6-40, and open the door cover,
then turn the VR1 [A] on the ink detection
board until the display becomes “6.0 u” (6
µs).
NOTE: When the drum has ink inside,
the machine displays “----“.
C238S013.WMF
[A]