31 October 2001 DRUM
3-27
Replacement
Adjustment
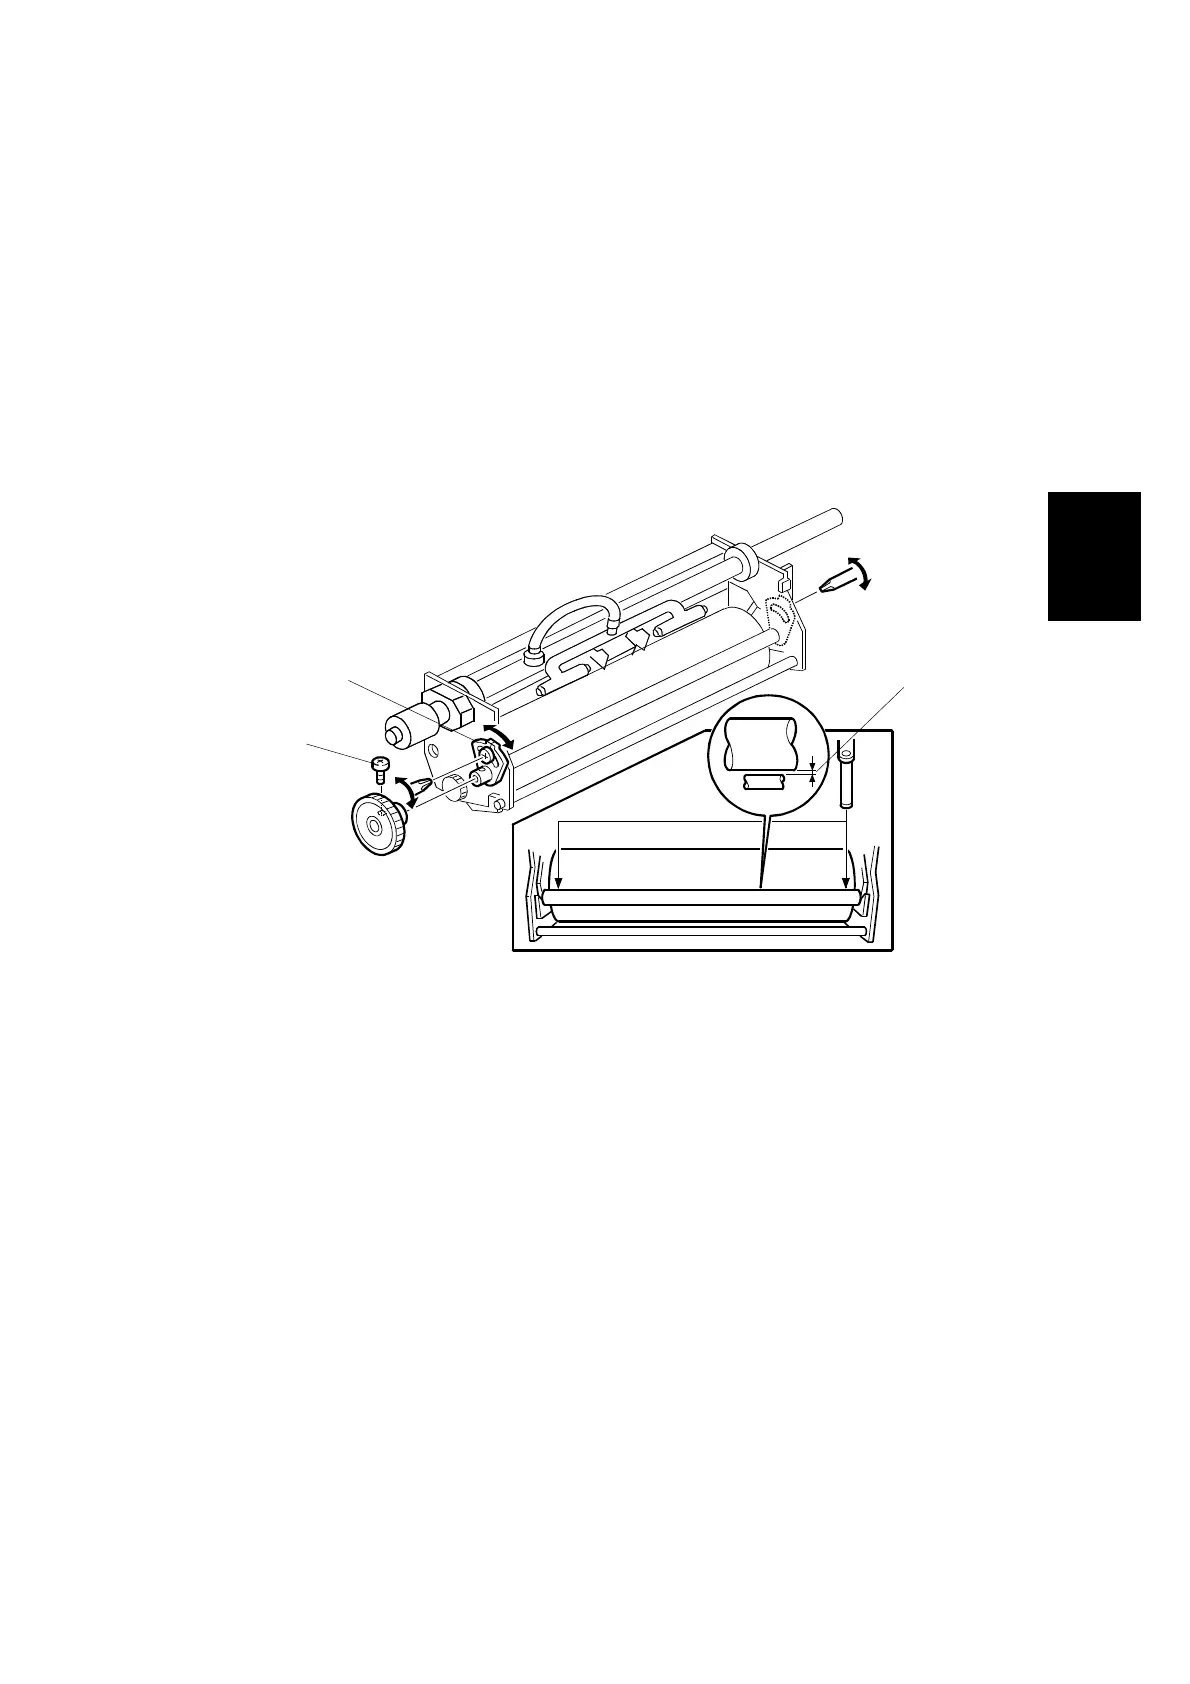
3.8.6 DOCTOR ROLLER GAP ADJUSTMENT
Purpose: To control the ink thickness around the ink roller.
Standard: 0.08 mm gauge passes, 0.10 mm gauge does not.
Tools: Thickness gauge
CAUTION: Normally the doctor roller gap is not adjusted or changed. It tends to be
difficult to change in the field. If the gap is too narrow, an uneven image
may appear on the prints. If it is too wide, too much ink will be applied
to the drum screens, resulting in ink leakage from the drum.
• Ink roller unit (☛ 3.8.5)
1. Make sure that a 0.08 mm gap gauge goes through the gap [A] between the ink
and doctor rollers, and that a 0.10 mm gap gauge does not.
NOTE: 1) The gap should be checked at both ends of the doctor roller. Insert a
gap gauge at each end of the roller. The gap tends to be larger for
the center.
2) While the gap gauge is inserted, hold the doctor and ink rollers with
your fingers in order to stop the rollers from rotating.
3) While the gap gauge is inserted, hold the end of the gap gauge.
2. If the gap is out of the standard, loosen the screw [B] and adjust the gap by
turning the cam bushing [C] for the front and for the rear.
NOTE: Make sure to repeat the adjustment for both ends of the rollers.
C238R004.WMF
[A]
[B]
[C]
 Loading...