EasyManuals Logo

Ricoh JP3000 User Manual

Ricoh JP3000
152 pages
To Next Page IconTo Next Page
To Previous Page IconTo Previous Page
Page #43 background imageLoading...
Page #43 background image
SCANNER 31 October 2001
3-8
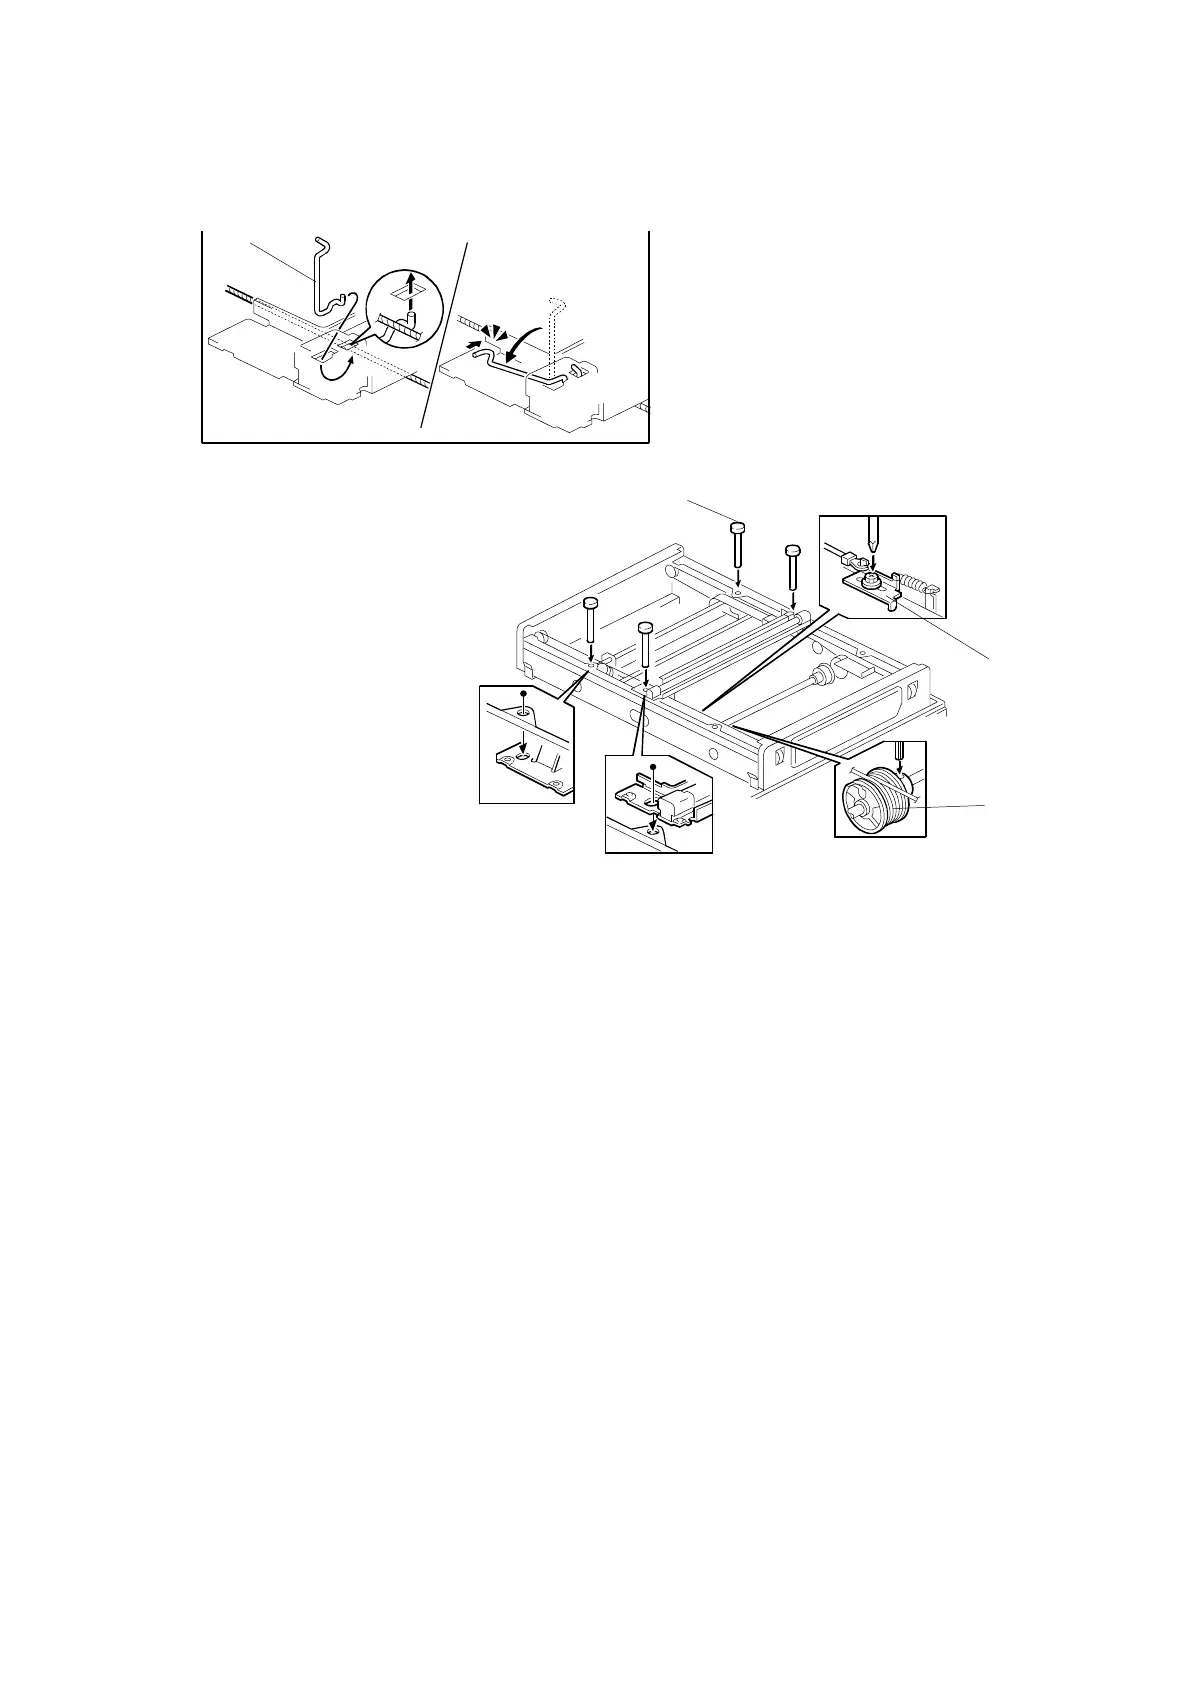
8. Secure the first scanner with the pins [E].
9. Tighten the screw securing the tension bracket [F].
10. Secure the scanner drive pulley [G] (1 Allen screw).
11. Remove the scanner positioning pins [I] (P/N: #A0069104).
12. Slide the scanner to the left and right several times, then set the scanner
positioning pins to check the clamp position and wire tension bracket position
again.
C238R047.WMF
C238R048.WMF
[E]
[F]
[G]
[I]

Table of Contents

Questions and Answers:

Question and Answer IconNeed help?

Do you have a question about the Ricoh JP3000 and is the answer not in the manual?

Ricoh JP3000 Specifications

General IconGeneral
BrandRicoh
ModelJP3000
CategoryAll in One Printer
LanguageEnglish

Related product manuals