Before Starting to Use
Connection with a Computer (Option)
14
Connection with a Computer (Option)
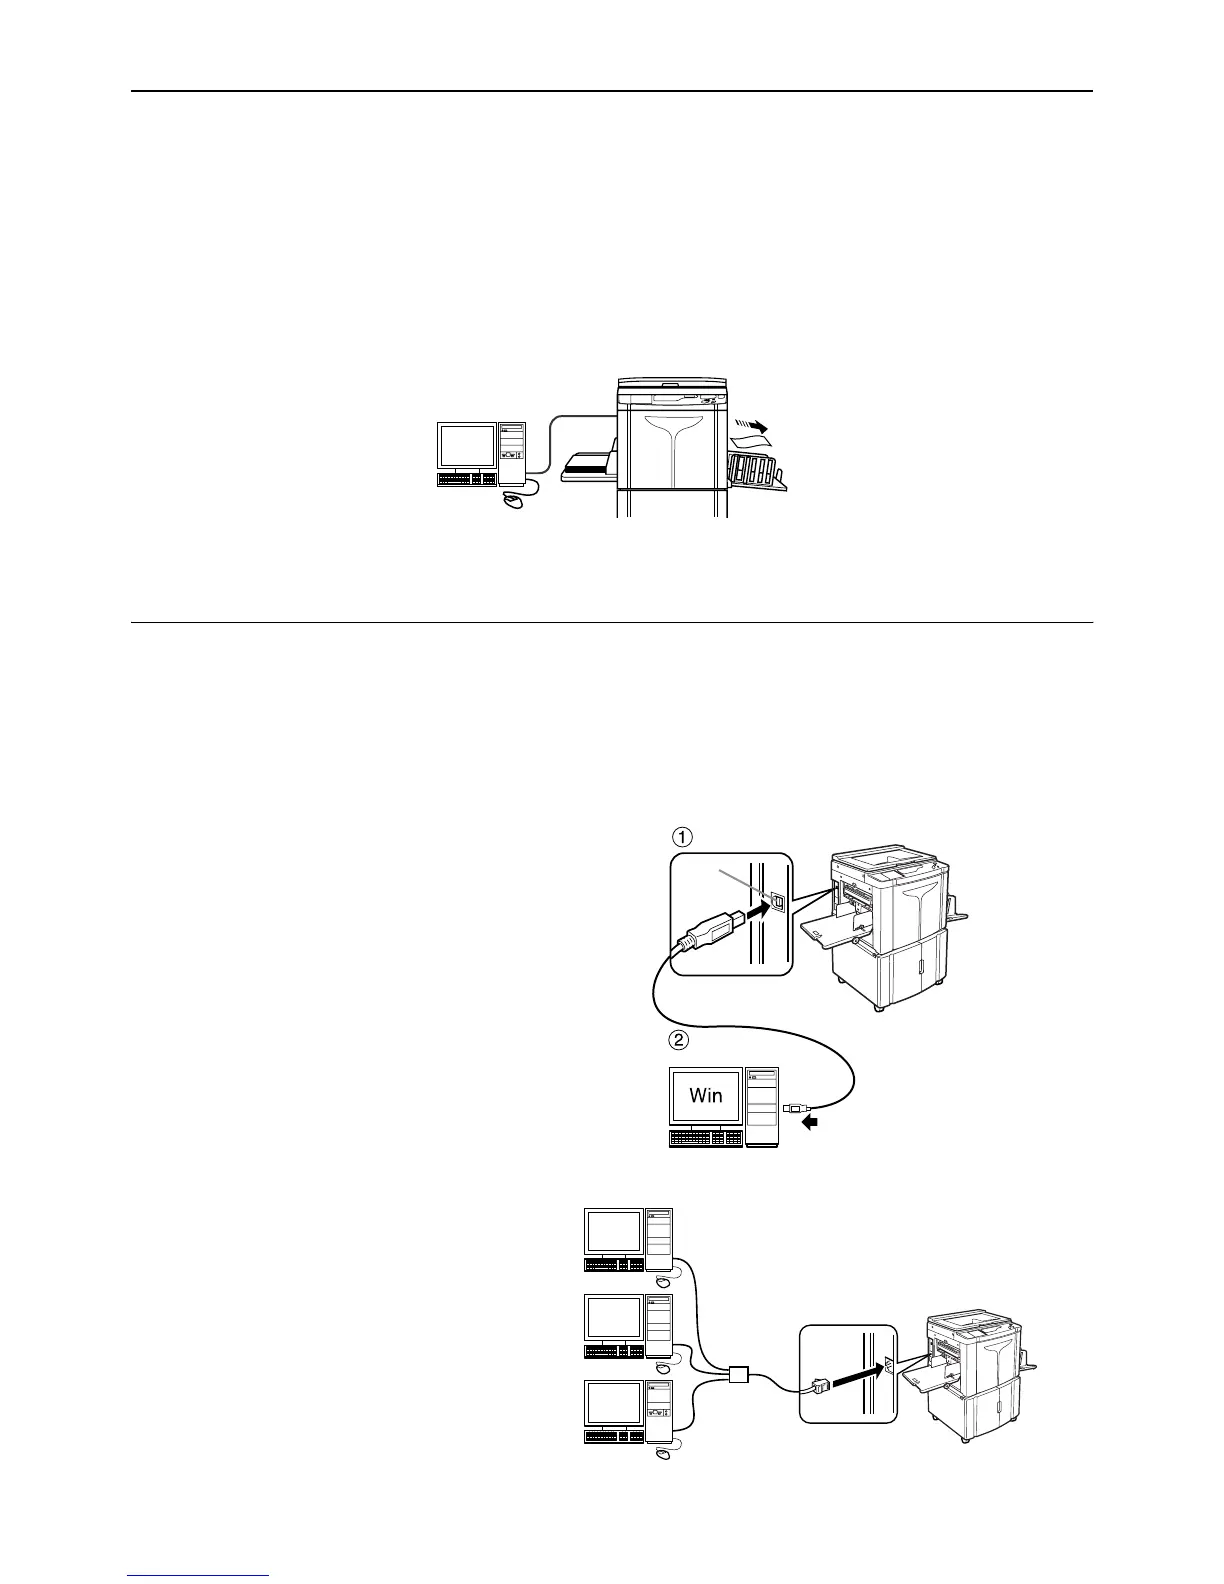
With an optional interface board (RISO PC Interface Card USB2.0) installed, you can directly send data from a con-
nected computer to the machine as an original for printing. Because digital data itself is used for making a master, the
finish of prints becomes outstanding.
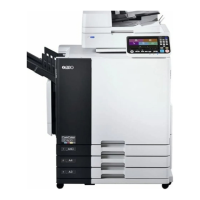
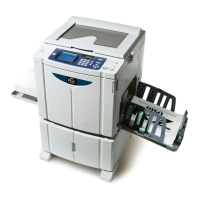
Connection Method
Important!:
• Before making the USB connections, turn on both the machine and computer, and wait until the initial screen is dis-
played.
• Before making the Ethernet connections, turn off both the machine and computer.
• The maximum allowable voltage for USB connector input and output is 5 V.
z One-to-one connection with a Windows
PC
•Cable:
USB cable
3m (10 feet) Hi-Speed USB
Note:
• The RISO PC Interface Card USB2.0
(option) is required.
z Network connections
•Cable:
Ethernet cable
Shielded cable that supports 10BASE-T
or 100BASE-TX
Note:
• The RISO PC Interface Card USB2.0
and the RISO Network Card (both
options) are required.
USB port on the machine
USB port on
your computer
USB
port