AUTO IDLE
CONFIDENTIAL
REDUCE
ENLARGE
1 : 1
ZOOM
PRINT POSITION
DENSITY
LIGHT DARK
DUO
LINE
START
STOP
AUTO IMAGE
PROCESS
TEST
PRINT
RESET
PHOTO PRINT
MASTER
MAKING
AUTO
PROCESS
SLOW FAST
CENTER
PROGRAM
MEMORY
NORMAL
NORMAL
SPEED
CUSTOM
SETTING
SCANNING
CONTRAST
MULTI-UP
PRINT
DOT
PHOTO
BOUND
ORIGINAL
DATA
PC/SCAN
28
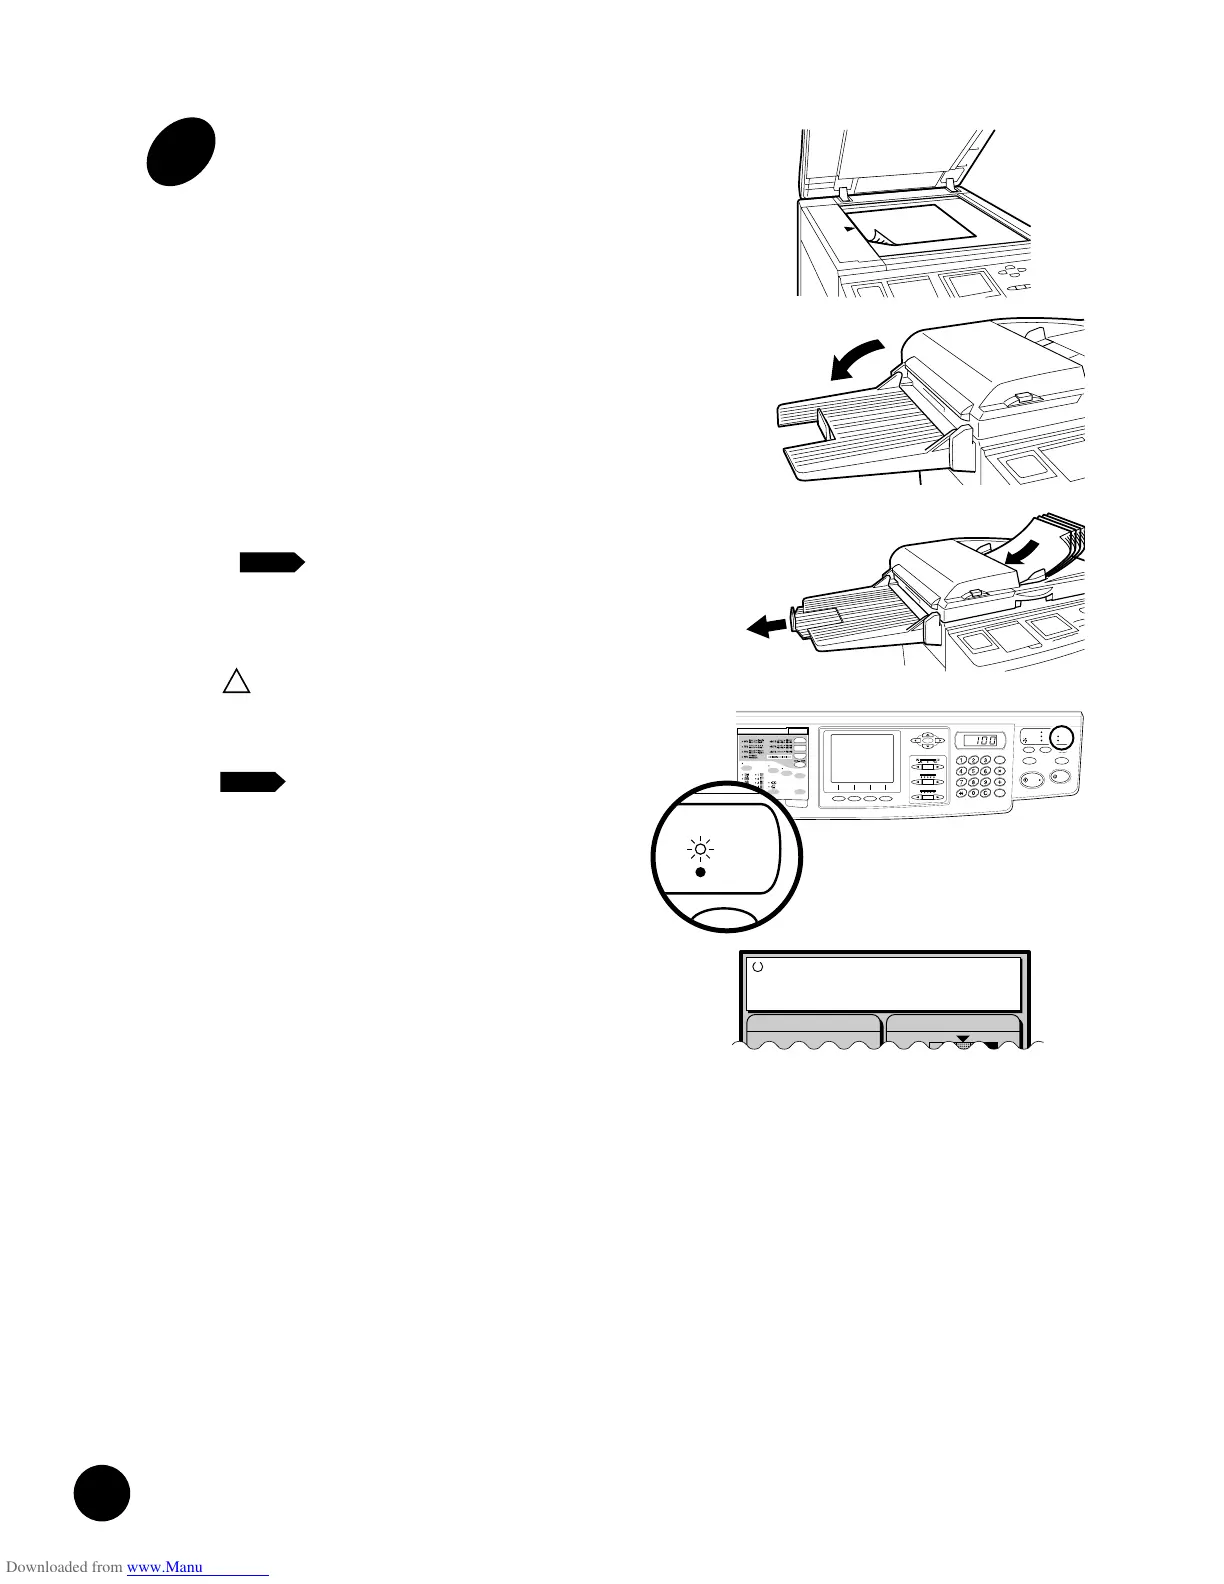
Do not force the cover down
on top of a bound original
placed on the Stage Glass.
When an original is in place, the process
automatically changes to master-making
from printing. The "Ready to Make
Master" message appears in the Main
Display while the MASTER-MAKING
indicator on the control panel lights.
NOTE
Basic Operation
PROCESS
O PRINT
MASTER
MAKING
3
Place an original on the Stage
Glass or in the optional ADF Unit.
- If placing originals on the Stage Glass, open the
Stage Cover and place an original face down.
Position the original according to the indicators
on the left-hand side of the glass.
Close the cover, resting it gently on the original.
- If placing originals in the optional ADF Unit, turn
open the ADF Original Receiving Tray, adjust
the position of the ADF Original Stop to the
length of the originals and adjust the ADF
Original Guides to the width of the originals.
Then insert the originals face down into the
ADF Unit until they stop. The originals are
automatically fed and set into place.
A maximum of 50 originals can be set
into place on the ADF Tray at one time.
NOTE
Caution
!
Photo
Image Processing Scanning Contrast
Ready to Print
25
Basic Processes
The basic processes of your RISOGRAPH can be divided into two stages: making a
master of an original/PC data (master-making), and then printing copies from the
master.
Your RISOGRAPH has been designed so that these two processes flow smoothly
from one to the other, with the current action shown clearly in the display.
Master-Making
When you create a master, an original is scanned. The master is imaged and then
automatically placed on the Print Cylinder (Drum).
1
Set an original in place.
2
Scan the original.
3
Create a master.
The master is placed on the Print Cylinder (Drum)
and a proof copy is produced.
When document data is sent from a PC to your RISOGRAPH,
the first 2 steps (original scanning) are skipped.
NOTE
4
Enter the number of copies you
want.
5
Start printing.
Printing
When you print, the Print Cylinder (Drum) rotates to print the specified number of
copies.