16
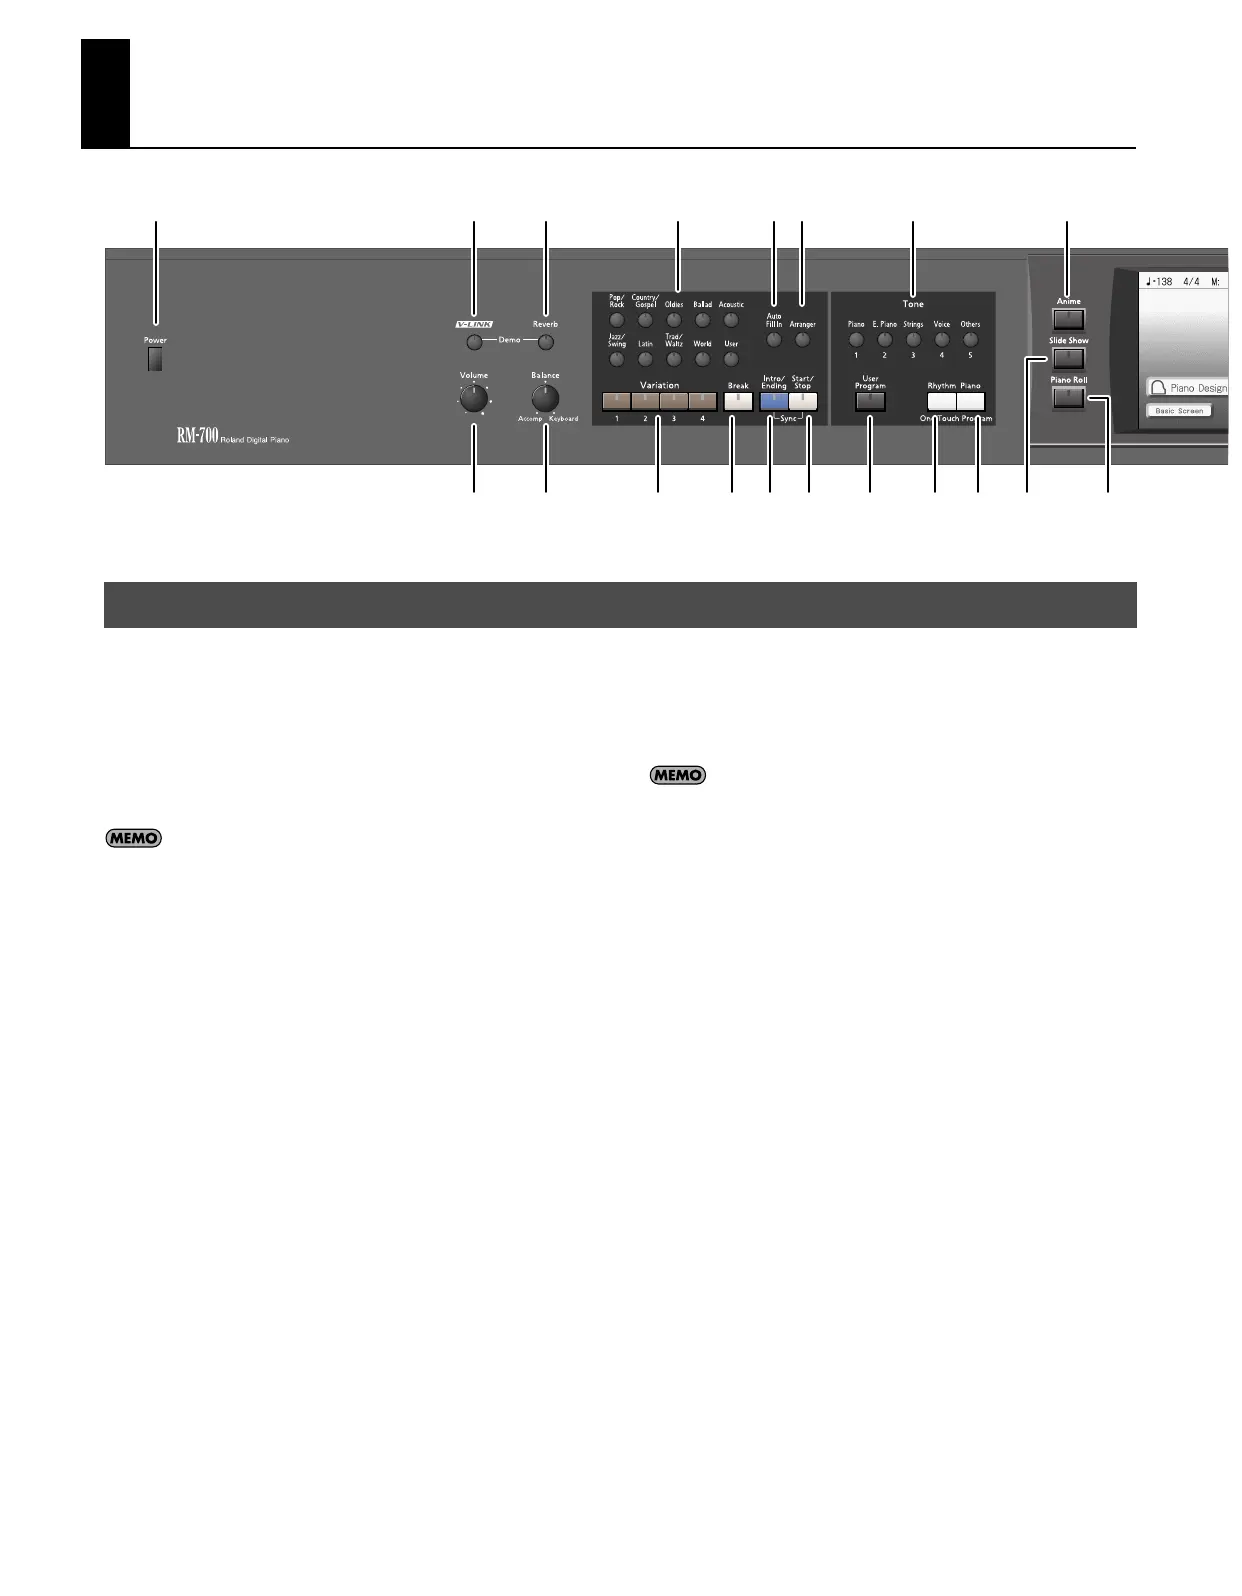
Panel Descriptions
1.
[Power] switch
Pressed to switch the power on and off (p. 21).
2.
[V-LINK] button
This button turns the V-LINK function on/off (p. 196).
3.
[Reverb] button
Adds reverberation to the sound (p. 42).
By holding down the [V-LINK] button and pressing the [Reverb]
button you can access the Demo screen (p. 26).
4.
[Volume] knob
Adjusts the overall volume (p. 22).
5.
[Balance] knob
Changes the volume balance for sounds played with the keyboard
and for songs and accompaniments (p. 70).
6.
Rhythm buttons
Selects a Music Style for automatic accompaniment (p. 59).
Pressing the [User] button selects a User Style that you’ve made
yourself or a Music Style on external memory (p. 61).
7.
[Auto Fill In] button
A fill-in will automatically be added when you press a [Variation]
button to change the accompaniment or Rhythm arrangement (p.
66).
8.
[Arranger] button
This button turns the Arranger function on/off (p. 62).
9.
Variation [1]–[4] buttons
Pressed to switch the arrangement of the accompaniment (p. 66).
10.
[Break] button
Stop the Rhythm at the end of that measure (Break; p. 66).
11.
[Intro/Ending] button
Play an intro or ending during automatic accompaniment (p. 54).
12.
[Start/Stop] button
Starts and stops automatic accompaniment (p. 63).
By holding down the [Intro/Ending] button and pressing the
[Start/Stop] button you can enable the Synchro Start setting (p.
63).
13.
[Tone] buttons
Select the Tones that will be played from the keyboard (p. 34).
14.
[User Program] button
Used to call up or register a user program (p. 149).
15.
One Touch Program [Rhythm] button
Makes the optimal settings for playing with automatic
accompaniment (p. 54).
16.
One Touch Program [Piano] button
Makes the optimal settings for a piano performance (p. 28).
17.
[Anime] button
This button lets you change the image in time with your
performance (p. 94).
18.
[Slide Show] button
This button switches to the slide show screen (p. 90).
19.
[Piano Roll] button
This button switches to the piano roll screen (p. 96).
20.
Touch Screen
This lets you perform a variety of operations just by touching the
screen.
21.
[DigiScore] button
This button switches to the musical score display (p. 106).
Front Panel
1 2 3
45
6 7 8 13 17
9 10 11 12 14 15 16 18 19
RM-700_e.book 16 ページ 2009年3月18日 水曜日 午前11時5分