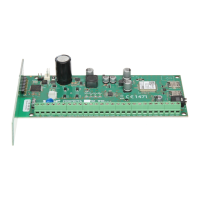
SATEL VERSA 27
corresponding to one of the following confirmation manners (see: ENTERING DIGITS) and
press key:
0. On LED is on, when the control panel has acknowledged receiving
information on pressing a button
1. Output 1 state LED is on, when the selected output is active
2. Output 2 state
3. Output 3 state
4. Output 4 state
5. Output 5 state
6. Output 6 state
7. Output 7 state
8. Output 8 state
9. Output 9 state
10. Output 10 state
11. Output 11 state
12. Output 12 state
13. Arming: Partition 1 LED is ON when partition 1 is armed
14. Arming: Partition 2 LED is ON when partition 2 is armed
15. Arming: Partition 1 or 2 LED is ON when partition 1 or 2 is armed
16. Arming: Partition 1 and 2 LED is ON when partitions 1 and 2 are armed
17. Partition 1 – Full arm LED is lit when partition 1 is armed in full mode
18. Partition 1 – Night arm LED is lit when partition 1 is armed in night mode
19. Partition 1 – Day arm LED is lit when partition 1 is armed in day mode
20. Partition 2 – Full arm LED is lit when partition 2 is armed in full mode
21. Partition 2 – Night arm LED is lit when partition 2 is armed in night mode
22. Partition 2 – Day arm LED is lit when partition 2 is armed in day mode
23. Partition 1 – Alarm LED is ON when there is alarm in partition 1
24. Partition 2 – Alarm LED is ON when there is alarm in partition 2
25. Partition 1 or 2 – Alarm LED is ON when there is alarm in partition 1 or 2
26. Trouble LED is ON when there is trouble in the system
255. NOT PRESENT LED will not be used for confirmation
24. Step 6j. Selecting confirmation for LED 2 in APT-100 keyfob. Proceed in the same
way as in Step 6i, and then press the key.
25. Step 6k. Selecting confirmation for LED 3 in APT-100 keyfob. Proceed in the same
way as in Step 6i, and then press the key.
Note: Pressing the key between Step 6a and 6k will cancel the keyfob adding, but will
not terminate the user adding procedure.
26. Step 7. Adding proximity card. If a proximity card arm/disarm device is connected to the
control panel, the user can be assigned a proximity card. To add a card, press in
succession the and keys (if the card is not to be added, just press the
key, or any other key with number from 2 to 9, and then press key).
27. Step 7a. Selecting card addition method. Press the key at once, if the card code
is to be entered, or select one of the proximity card arm/disarm device connected to the
control panel, by means of which the card code will be read. In the LCD keypad, you can