32
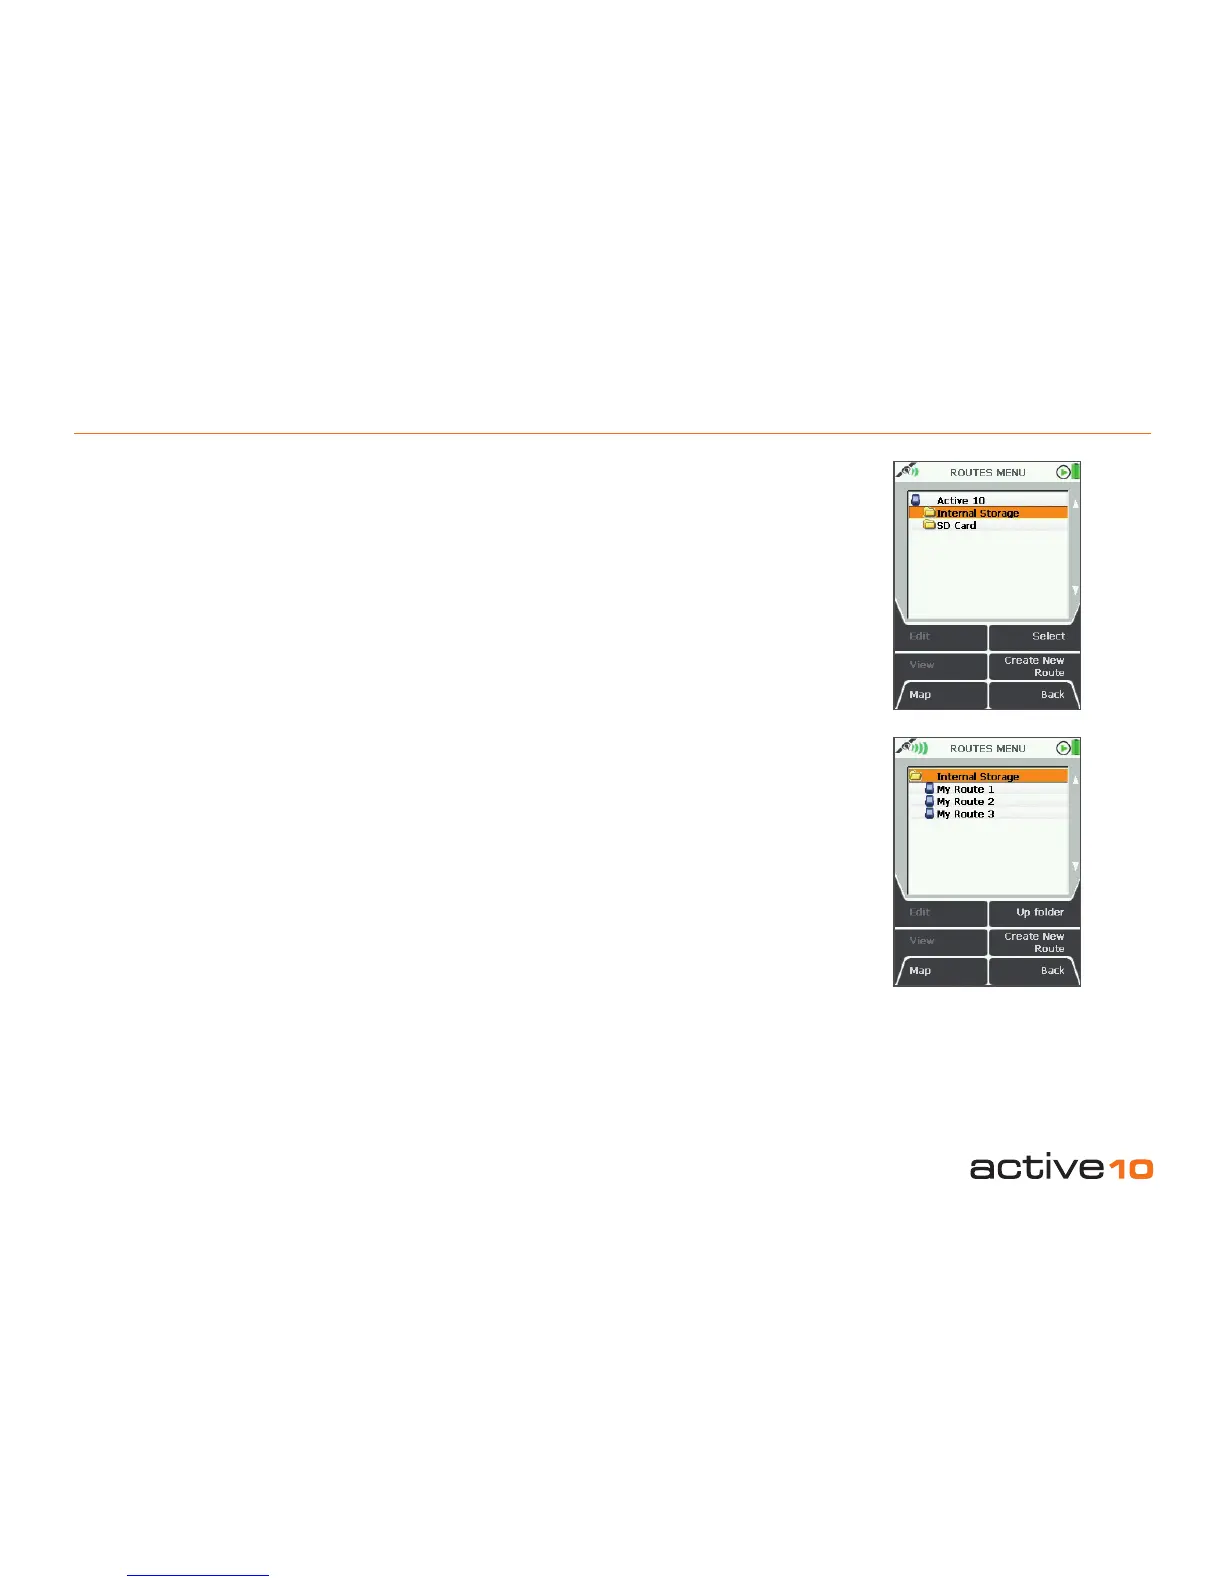
7.00 ROUTES MENU
7.00 ROUTES MENU Page
(GPS Map → MAIN MENU → ROUTES
MENU)
Alternative access:
GPS Map → PLANNING → ROUTES MENU
via lower left button
The ROUTES MENU contains the listing of
routes, stored in a series of folders.
The rst route created is entitled ‘My Route 1’.
Rename it via the Edit button (section 7.02).
‘My Track 1’ is the name given to a converted
trail.
An ‘activated’ route is indicated with a tick.
This means that on map screens the route is
shown as a yellow highlighted line with red
arrowheads indicating the direction of travel.
Inactive routes are shown as grey highlighted
lines.
Inactive routes may be hidden or have just
their start points shown (section 5.12). Routes
may be reversed (section 7.02c).
To use a route, follow the yellow line. The next
waypoint along the route is targeted by being
shown as a blue dot and the current leg has
blue edging and blue arrowheads. As you
pass this point, the waypoint name is
displayed (section 7.02e) and the unit will
sound beeps. Also, the blue dot will change to
green, whilst In turn the next waypoint marker
will change to blue.
An activated route has relevant data choices
available for display on the GPS Map screen
in either 2 or 4 data box overlays (sections
5.04, 5.05 & 5.06). Changing an activated
route during a trip will reset the log data.
Buttons:
Edit
Go to ROUTE EDIT page (section 7.02)
Enabled when a route is highlighted.
View
Go to ROUTE MAP page (section 7.03)
Enabled when a route is highlighted.
Map
Return to last map screen
Up folder / Select / Activate / No route active
Move up to a higher level folder, or when a
route is highlighted, toggle between activating
it and selecting no route active.
Create New Route
Go to CREATE ROUTE (section 7.01)
Back
Return to MAIN MENU (section 4.01)
Figure 7.00