46
9.06c EDIT POIs
9.06c Edit Location by Grid
(GPS Map → MAIN MENU → POI Menu →
(folder/category) → Select → Edit → Edit
Location by Grid)
Press the Add POI button to go to the
SETTING page. Use the joystick moving left/
right to go to boxes, then up/down to change
box entries.
Under the grid reference boxes are the
Conversions for the grid reference shown
initially. Once the joystick has been moved
vertically (changing the grid reference),
these conversions gures are greyed out.
Pressing the Convert button will update the
conversions.
9.06d Edit Location by Map
(GPS Map → MAIN MENU → POI Menu →
(folder/category) → Select → Edit → Edit
Location by Map)
On selecting Edit Location by Map, an
additional POI icon is shown just inside the
locator circle. Use the joystick to move the
icon to the new position and conrm either
by pressing the Add POI button or by centre
pressing the joystick.
If you wish to remove the POI icon, press the
Remove POI button.
Press the Lock to GPS button to return to the
last map screen.
9.06h Edit POI Icon*
(GPS Map → MAIN MENU → POI Menu →
(folder/category) → Select → Edit → Edit POI
Icon)
Use the joystick to select a POI icon. Press
Done to return to the EDIT POI.
*Available once POI collection has been
downloaded from satmap.com. Using
SatSYNC (section 2.03), ‘Import’ the zipped
folder named ‘My POI Icons’ and save to the
‘Internal Memory’. (This means you always
have access to the icons no matter what SD
card you are using). Make sure the les are
not extracted – only the zipped folder can be
imported into SatSYNC in this instance.
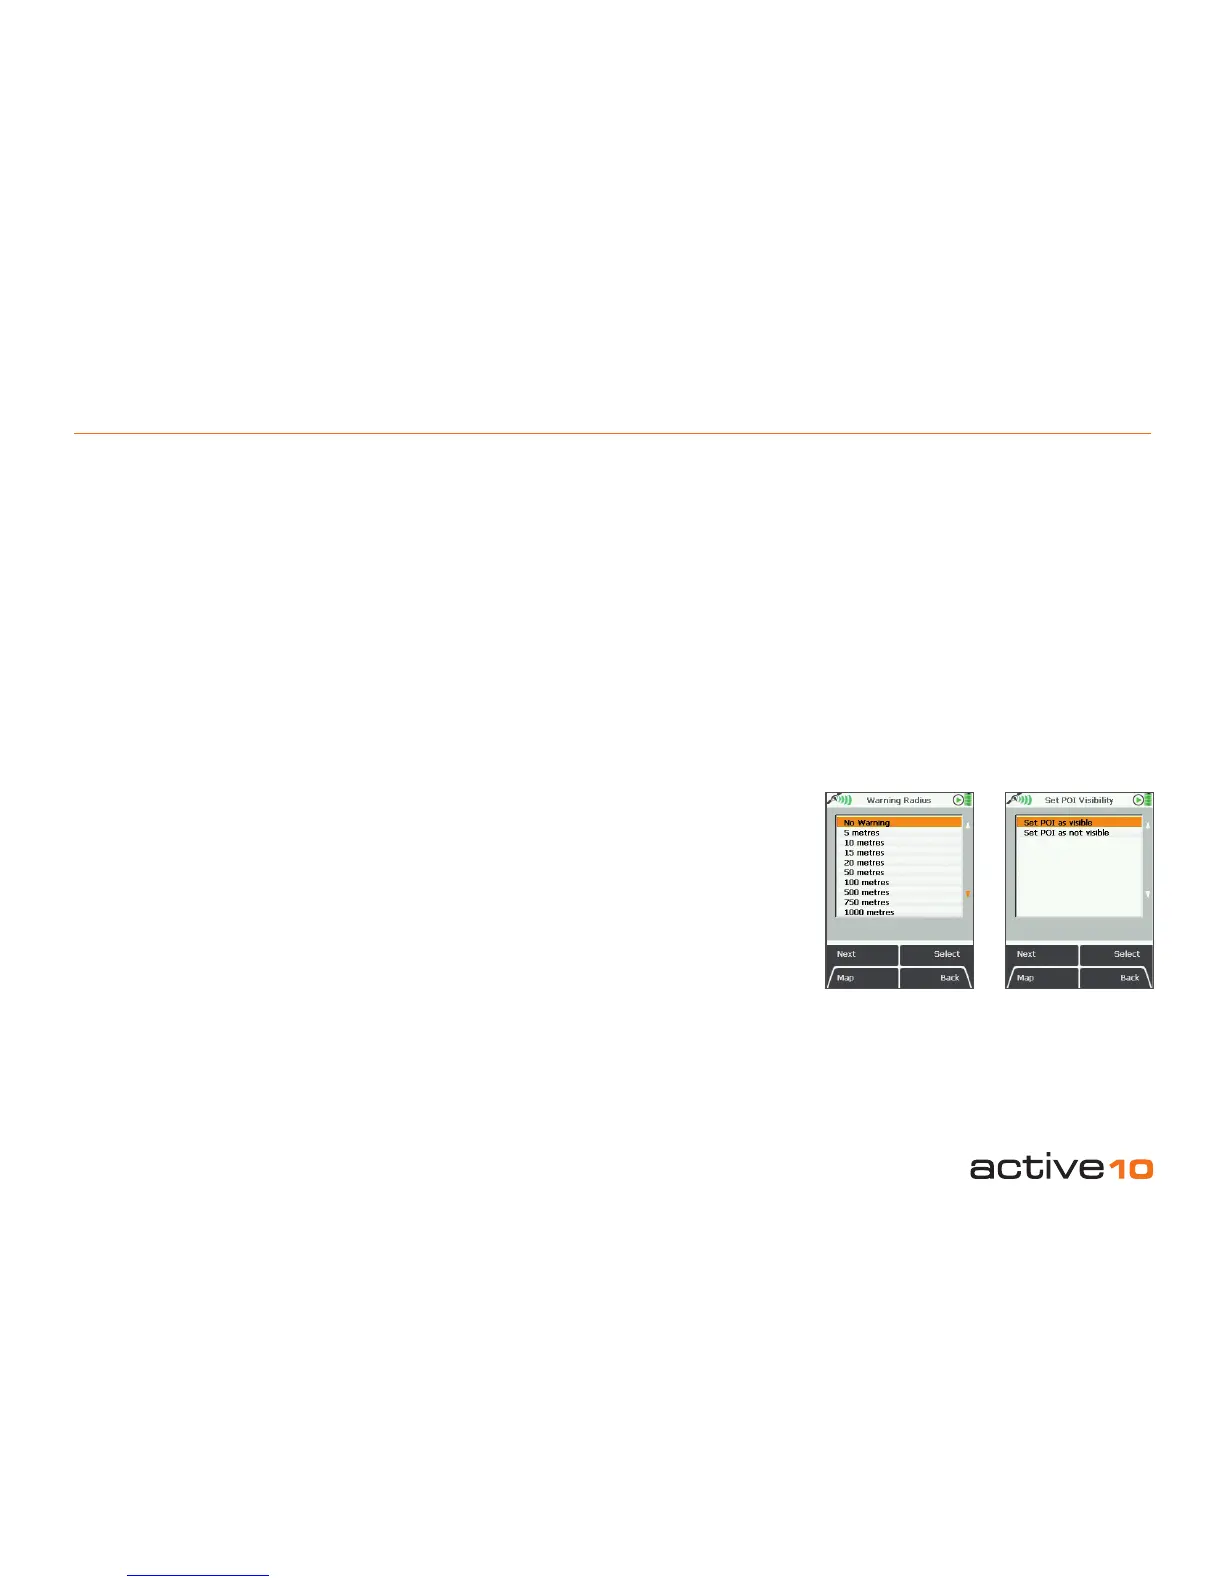
9.06e Edit Warning Radius
(GPS Map → MAIN MENU → POI Menu →
(folder/category) → Select → Edit → Edit
Warning Radius)
Press Edit to access the Warning Radius
page. Use the Select button to choose a
radius at which the unit will sound warning
beeps indicating the vicinity of a POI, Go To
point or a route.
To see what the current warning radius is set
at, highlight Edit Warning Radius on the
EDIT POI page (section 9.06). The gure is
displayed under the menu.
9.06f Edit Visibility
(GPS Map → MAIN MENU → POI Menu →
(folder/category) → Select → Edit → Edit
Visibility)
Press the Edit button to access the Set
POI Visibility page. Choosing Set POI as
not Visible removes the icon from the map
screens but keeps the location as a POI.
9.06g Delete
(GPS Map → MAIN MENU → POI Menu →
(folder/category) → Select → Edit → Delete)
To delete a POI from My POIs, press Edit,
then Delete. A prompt page asks whether
you are sure you wish to delete. Select
Delete and go to My POIs, or use Cancel
and return to the EDIT POI page.
Figure 9.06e Figure 9.06f