44
POI Menu
9.04h Copy to SD Card
(GPS Map → MAIN MENU → POI Menu
→ (folder/category) → Edit → Copy → Up
Folder)
(This option is only available if a mapcard is
inserted).
Highlight Copy to SD Card and either
press Copy or centre press the joystick.
(Subsequently this option becomes Copy from
SD Card). The screen will go to the POI Menu.
9.05 My POIs Page
(GPS Map → MAIN MENU → POI Menu →
(folder/category) → Select)
(This page is only available once a POI has
been added).
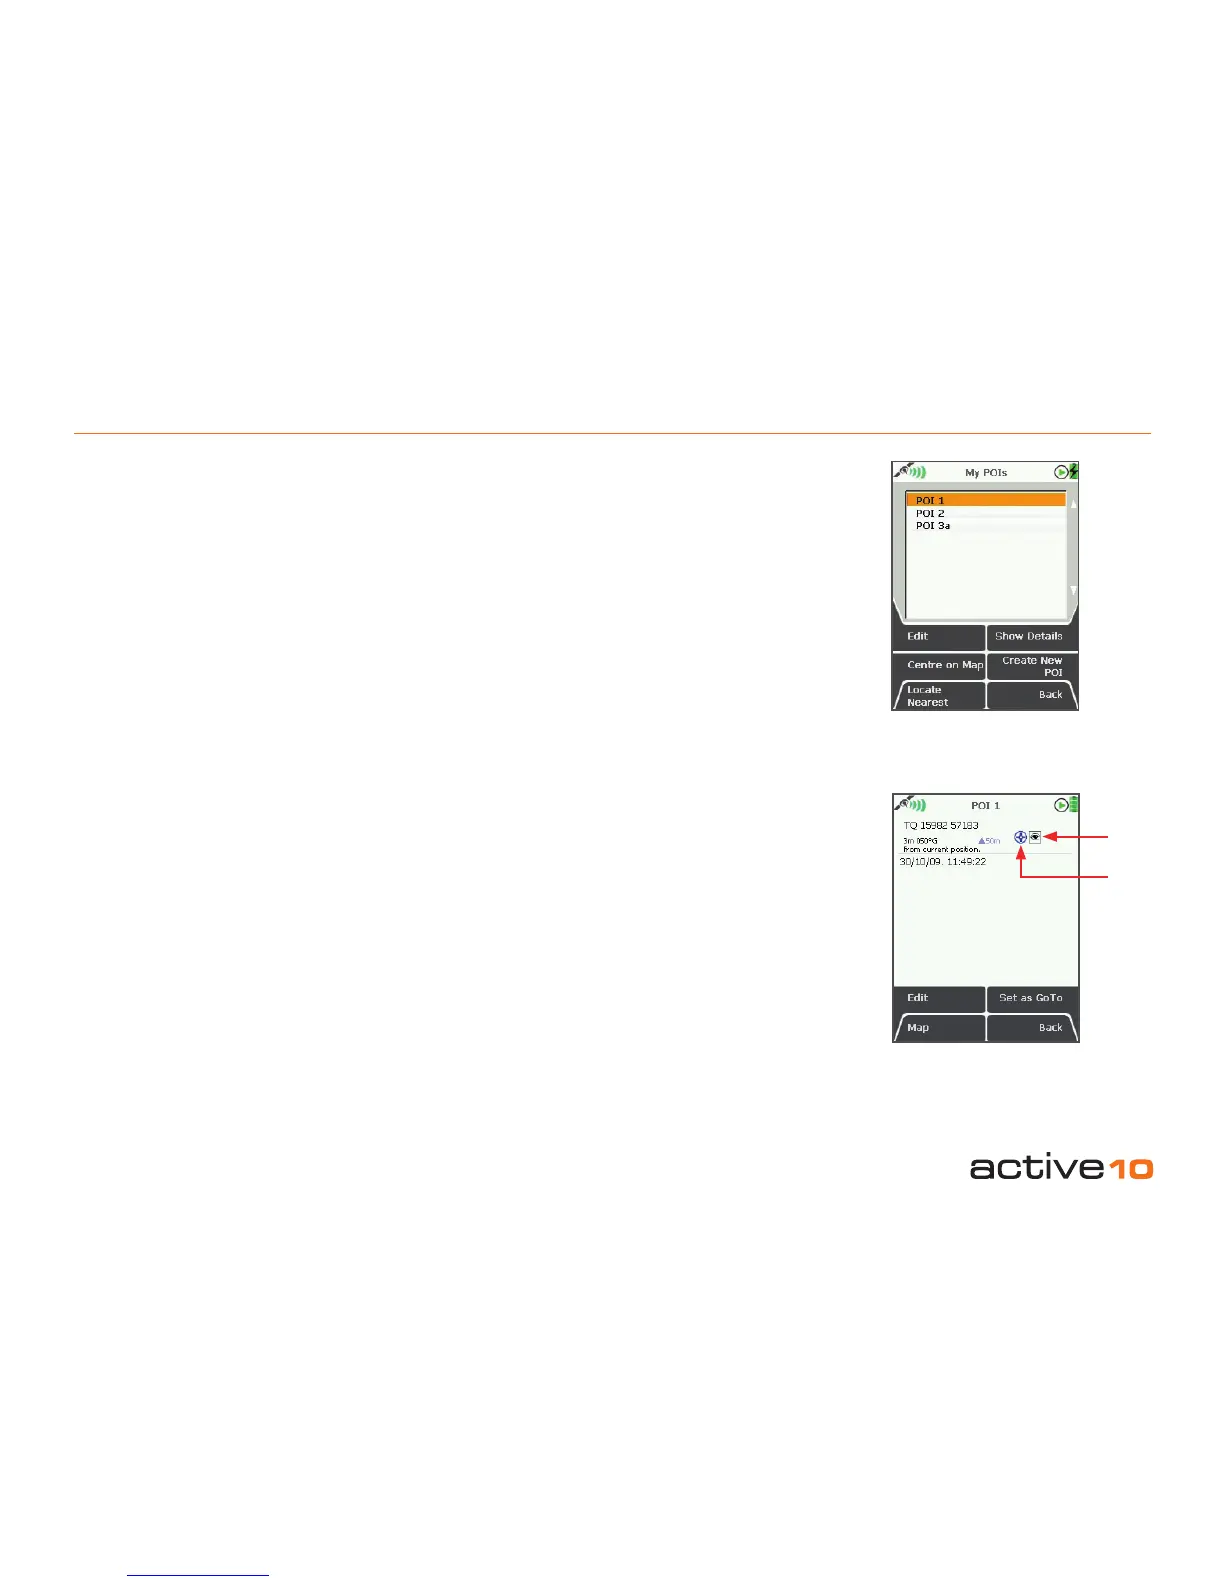
The My POIs page lists the POIs in a
category.
Buttons:
Edit
Go to EDIT POI page (section 9.06)
Centre on Map
Go to PLANNING screen with the POI in the
centre
Locate Nearest
Go to the PLANNING screen with the POI
nearest your last known location in the centre
Show Details
Go to POI 1 page (section 9.05a)
Create New POI
Go to the Add New POI page (section 9.01)
Back
Return to the POI Menu (section 9.00)
9.05a POI 1 Page
(GPS Map → MAIN MENU → POI Menu →
(folder/category) → POI 1 → Show Details)
This page summarises details of the POI. A
POI is labelled POI 1 by default until renamed
(section 9.06a).
POIs are date and time ‘stamped’, and the
following information is given:
• Name of the POI (eg. The Welcome Inn)
• Grid reference (section 5.07)
• Distance and bearing from current location
• Elevation
Also shown are the POI icon and an eye icon.
If the eye icon has a red diagonal line through
it, the POI icon is not shown on the map
screen (section 9.06f).
Figure 9.05
Figure 9.05a
POI icon
ʻeyeʼ icon