36
7.03 ROUTE MAP & ROUTE PLAN
7.03 ROUTE MAP Page
(GPS Map → MAIN MENU → ROUTES
MENU → (folder/route) → View)
Alternative access:
In PLANNING move the crosshairs over a
route and centre press the joystick. A prompt
asks you to select the information type. Select
the route using the joystick, then centre press
the joystick.
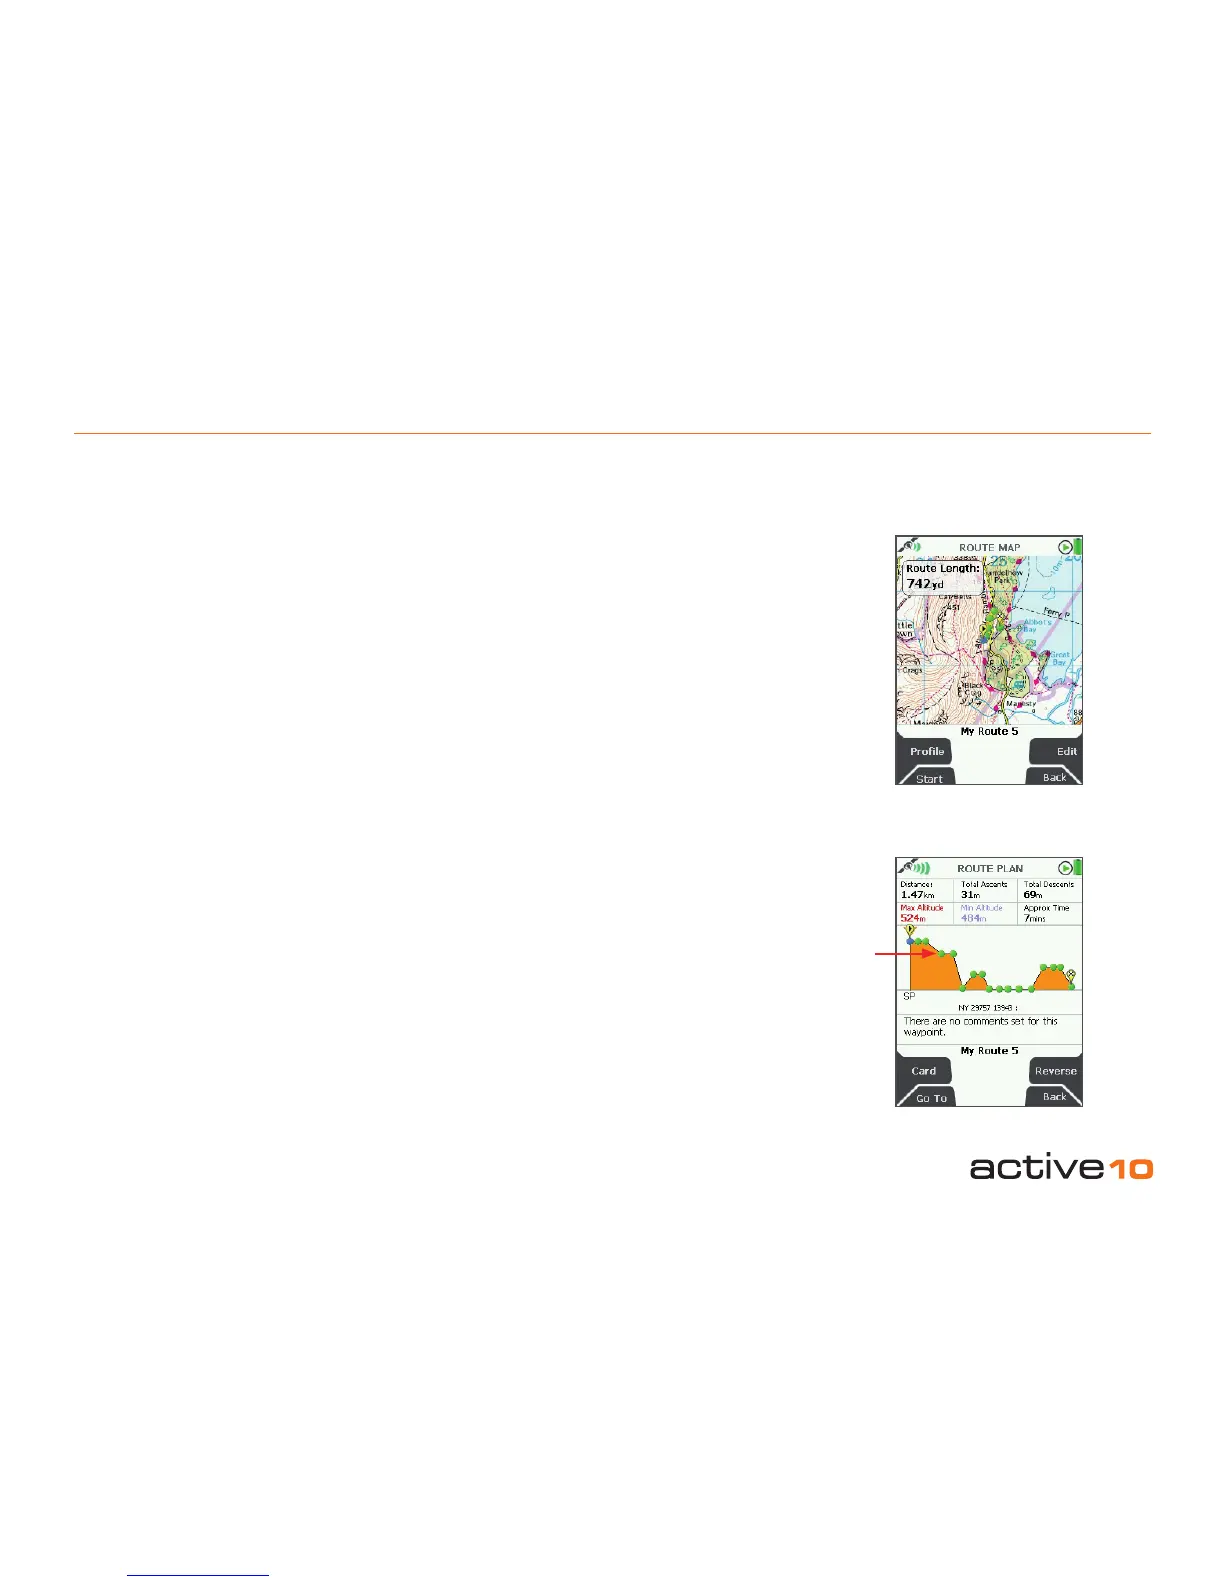
A map showing the planned route is shown
to an appropriate scale. The route length is
given in a window.
From this page you can either examine details
of the route via the Prole button (section
7.03a), or edit the route via the Edit button
(section 7.02).
To return to the PLANNING screen, either
press Back or centre press the joystick.
Buttons:
Prole
Go to ROUTE PLAN page (section 7.03a)
Start
Go to the start of the route on the PLANNING
screen (section 6.00)
Edit
Go to the ROUTE EDIT page (section 7.02)
Back
Go to PLANNING
7.03a ROUTE PLAN Page
(GPS Map → MAIN MENU → ROUTES
MENU → (folder/route) → View → Prole)
This page shows an elevation prole of the
route together with six data elds:
• Distance
• Total Ascents
• Total Descents
• Maximum Altitude
• Minimum Altitude
• Approximate Time
The ROUTE PLAN page is accessed from
the ROUTE MAP page by pressing the
Prole button.
Move the joystick left/right to move a vertical
line indicating waypoints. The waypoint label
on the map, its coordinates and comments
appear under the elevation prole. Below a
total of fty waypoints, individual waypoints
are shown along the prole as green dots. If
a route is a ‘track’, ie. a converted trail, the
comment eld contains date, time, speed etc.
as recorded by the Active 10.
Buttons:
Card
Go to ROUTE CARD page (section 7.03b)
Go To
Go to PLANNING screen (section 6.00),
centred on the indicated waypoint
Reverse
Press to reverse the route
Figure 7.03
Back
Go to previous screen
Figure 7.03a
Waypoint