90
©
Scania CV AB 2011, Sweden
01:03-02
6 Insert the connecting rod bearing shell in the
connecting rod cap, lubricate the bearing
surface and fit the connecting rod cap.
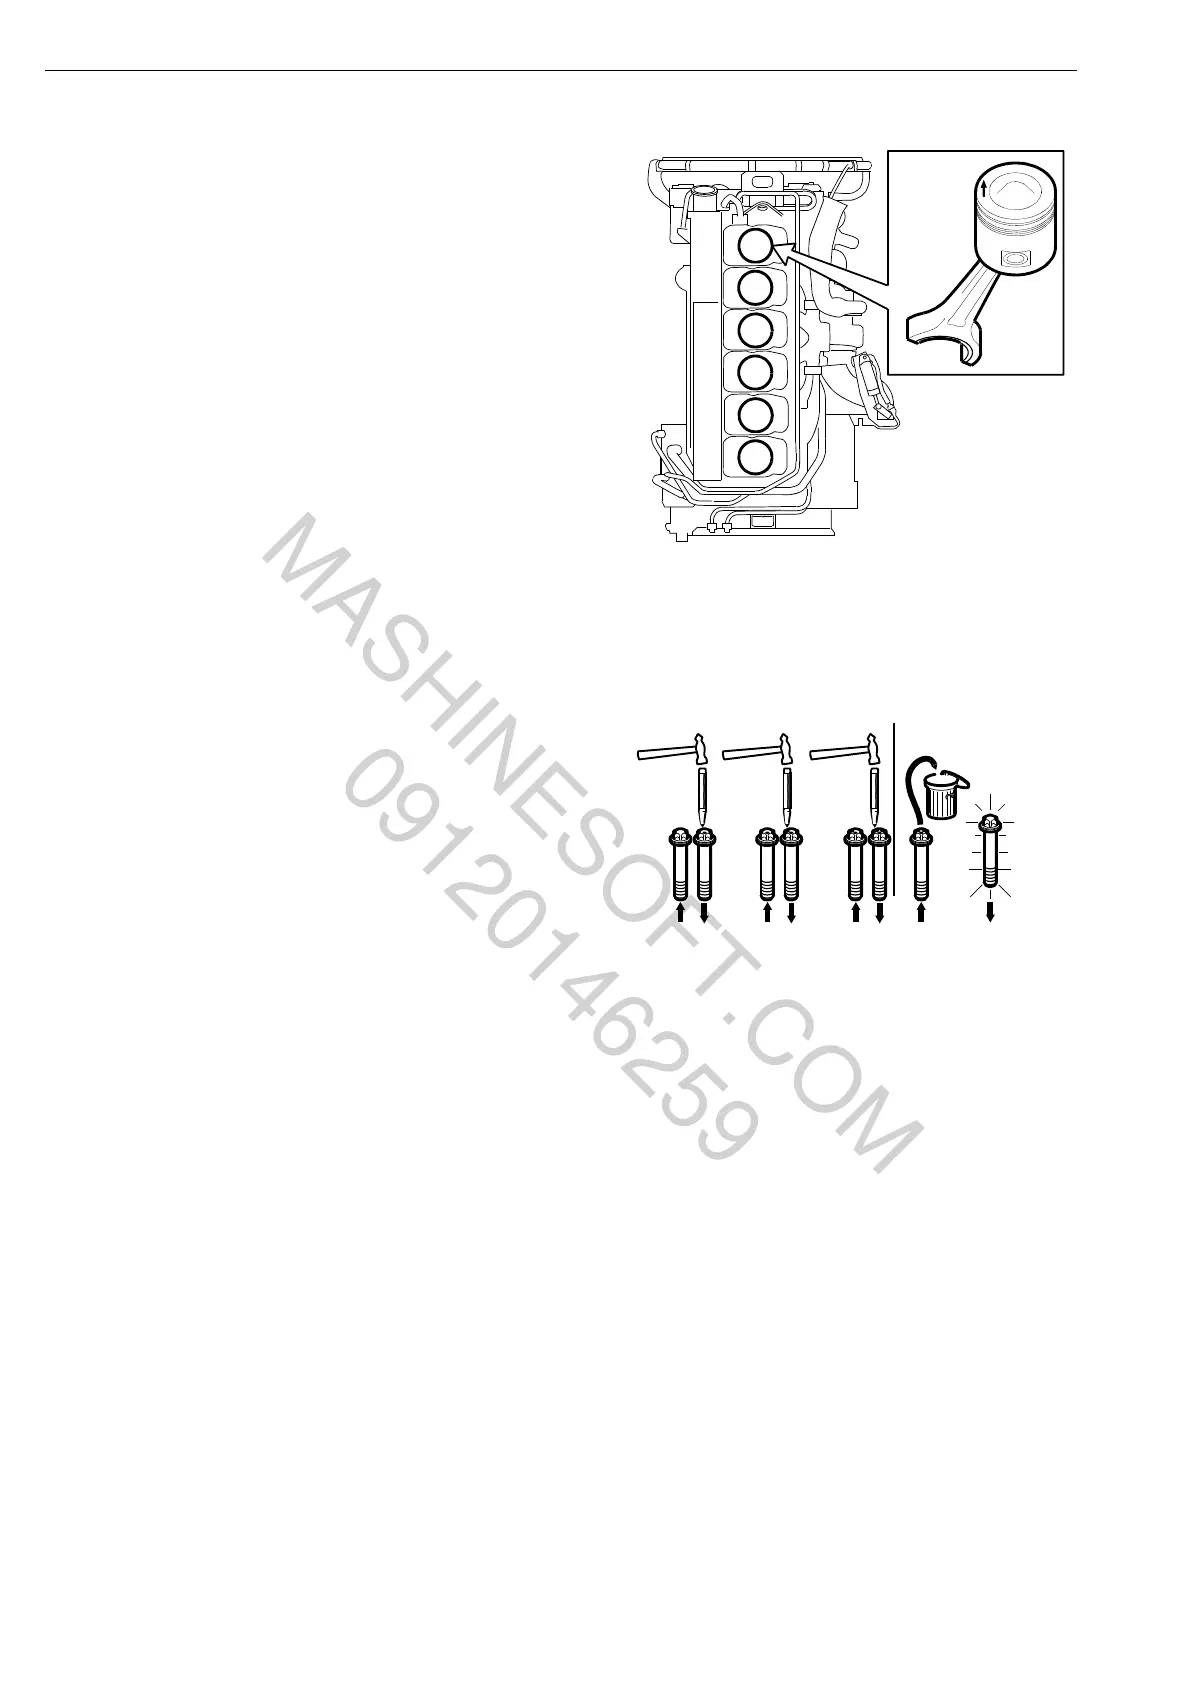
7 Fit the connecting rod and piston. The arrow
on the piston must be facing the front of the
engine. Applies only to aluminium pistons;
steel pistons are symmetrical. Clamp the
piston ring compressor 98 212 and push the
piston into the cylinder.
The arrow must be facing forwards in the
direction of the engine.
8 For connecting rod cap with four bolts:
Lubricate the bolts, fit them and torque
tighten to 20 Nm + 90°. The bolts may only
be reused a maximum of 3 times. Mark the
bolt with a punch mark each time you reuse
it; see figure. If a bolt already has three
marks, it must be renewed.
For connecting rod cap with two bolts:
The bolts must not be reused. Always
replace the bolts with new ones. Lubricate
the bolts, fit them and torque tighten to
50 Nm + 90°.
9 Fit the piston cooling nozzle. Tightening
torque 23 Nm.
IMPORTANT! The piston cooling nozzle must
not be damaged. The oil jet must hit the piston
precisely. If it does not, the piston will become
too warm, resulting in engine breakdown.
Damaged nozzles must not be re-aligned; renew
them instead.
10 Fit the oil sump.
11 Fit the cylinder head. Tighten the cylinder
head bolts according to the section Fitting
the cylinder head.
Crank mechanism
MASHINESOFT.COM
09120146259