8.2
SEL-387-0, -5, -6 Relay Instruction Manual Date Code 20170601
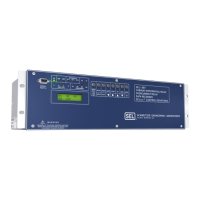
Front-Panel Interface
Front-Panel Operation
Displays
The LCD display is controlled by the pushbuttons, automatic messages the
relay generates, and user-programmed Display Points. Display Points and
LCD scrolling controls are discussed at the end of this section in more detail.
The default display is a scroll through any active, nonblank Display Points. If
none are active, the relay scrolls through up to four two-line displays of the
A-, B-, and C-phase currents in the four windings in primary amperes. If the
Analog Input Label settings (IAW1, etc.) have been renamed, these will appear
in the display as set. The two-line current display for a Winding “n” is turned
off if both of the settings E87Wn and EOCn are set to “N.” Each display
(except for the SEL-387-0) remains for Global setting SCROLD (seconds)
before scrolling continues. Any message generated by the relay due to an
alarm condition takes precedence over the normal default display. The {EXIT}
button returns the display to the default display, if some other front-panel
function is being performed.
Error messages such as self-test failures are displayed on the LCD in place of
the default display when they occur. Do not power down the relay if this
occurs; refer to Section 10: Testing and Troubleshooting for further
instructions.
During power up and when executing the R_S command to reset factory
default settings, the LCD displays
Initializing. It will then scroll through
the winding current displays until the relay is again enabled. When the EN
LED indicates the relay is enabled, the active Display Points will be scrolled.
Menu choices on the LCD display are listed horizontally on the second line.
The first character of the menu choice is underlined. The left and right arrow
buttons move the underline to the adjacent menu selection. Once the underline
indicates your selection, use the {SELECT} pushbutton to proceed.
Target LEDs
The target LEDs are an indication of what the relay has detected on the power
system and how the relay has reacted. The front-panel legend gives a brief
description of each target, but Section 4: Control Logic describes each target
LED in detail.
The only times the target LEDs do not illuminate according to their labels is
when one of the following occurs:
1. LEDA, LEDB, or LEDC has been reprogrammed by the user to
respond to a SEL
OGIC
®
control equation
2. The TAR F command is issued through one of the serial ports
The TAR F command remaps the second row of LEDs to follow a particular
row in the Relay Word bits, such that a Relay Word bit that is asserted will
light the corresponding LED position. Refer to Section 7: Serial Port
Communications and Commands for a complete description of the TAR F
command.
The states of the 12 dedicated LEDs (all but EN, A, B, C) are stored in
nonvolatile memory. If power to the relay is lost, these 12 targets will return to
their last state when power is restored. EN responds only to internal self-test
routines, while A, B, and C respond to the present state of their Global settings,
which are SEL
OGIC control equations.
Password Access
Commands that are at Access Level 2 (2AC) or the Breaker Access Level
(BAC) are password protected from the front panel. Access Level 1
commands are not password protected. The front panel is normally active at
Access Level 1. If you issue a command from the front panel that requires a
Level B or Level 2 password, the relay prompts you for a password. After you
 Loading...