100
The following problems do not always denote a broken this Unit.
Perform the checks listed below before calling service.
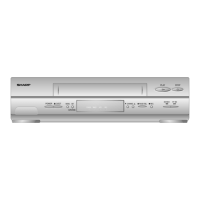
■ VCR/DVD
■ VCR
Troubleshooting
Problem
• No power
• The remote control does not work.
• No picture
• DEW
Suggested Solution
• Is the power cord connected properly?
• Is the power cord firmly plugged into the power outlet?
• One of the safety mechanisms may be operating. In this event,
unplug the Unit from the power outlet briefly and then plug it in
again.
• Are the batteries loaded correctly?
• Are the batteries flat?
• Is the signal emitter on the remote control pointing at the Unit?
• Is the remote control too far from the Unit, or is there any obstacle
between the remote control and the Unit?
• Did the VCR/DVD CHANGE Switch change correctly?
• Did the VCR/DVD SELECTOR change correctly?
• See page 5 for information.
Possible Cause/Solutions
• Use the CHANNEL PRESET screen to change from AIR mode to
CATV. (See Channel Setting on page 32.)
• Turn on the power.
• Press EJECT several times.
• Safety device in this Unit is functioning. Unplug the Unit and plug it
in again after a few minutes.
• Cassette erasure protection tab is removed. Use a different
cassette or place adhesive tape over the tab opening.
• Check for a cassette loaded in the unit.
• Make sure the VCR is not in PAUSE/STILL mode.
• Make sure the tape has not reached the end or beginning.
• Make sure the TV is set to the same channel as the Unit’s 3 ↔ 4
OUTPUT CHANNEL selector.
• Check all connecting cables.
• Make sure there is no other cassette inside.
• Make sure the cassette is properly positioned and reinsert.
• Power failure may have occurred.
• If the clock display is blinking, set the clock and try again.
• Adjust the tracking manually by pressing CH (TRACKING) '/".
• In some cases, with a worn or damaged tape, noise cannot be
eliminated completely.
• The VCR may not be set to external input mode.
Press INPUT to set the VCR to external input mode. (See Tape
Dubbing on page 73.)
• Keep the Unit away from electrical and magnetic appliances. Be
sure to position the Unit at least “8” away from your TV or video
monitor.
Problem
• VCR does not receive CATV chan-
nels.
• VCR does not operate.
• VCR does not record.
• No tape movement.
• No picture appears during playback.
• Cassette cannot be loaded.
• Timer recording does not work.
• Noise appears on the screen when
the automatic tracking control
system is operating.
• Cannot record a signal through the
rear external input jack.
• Picture or sound is not stable during
playback.