Preparation
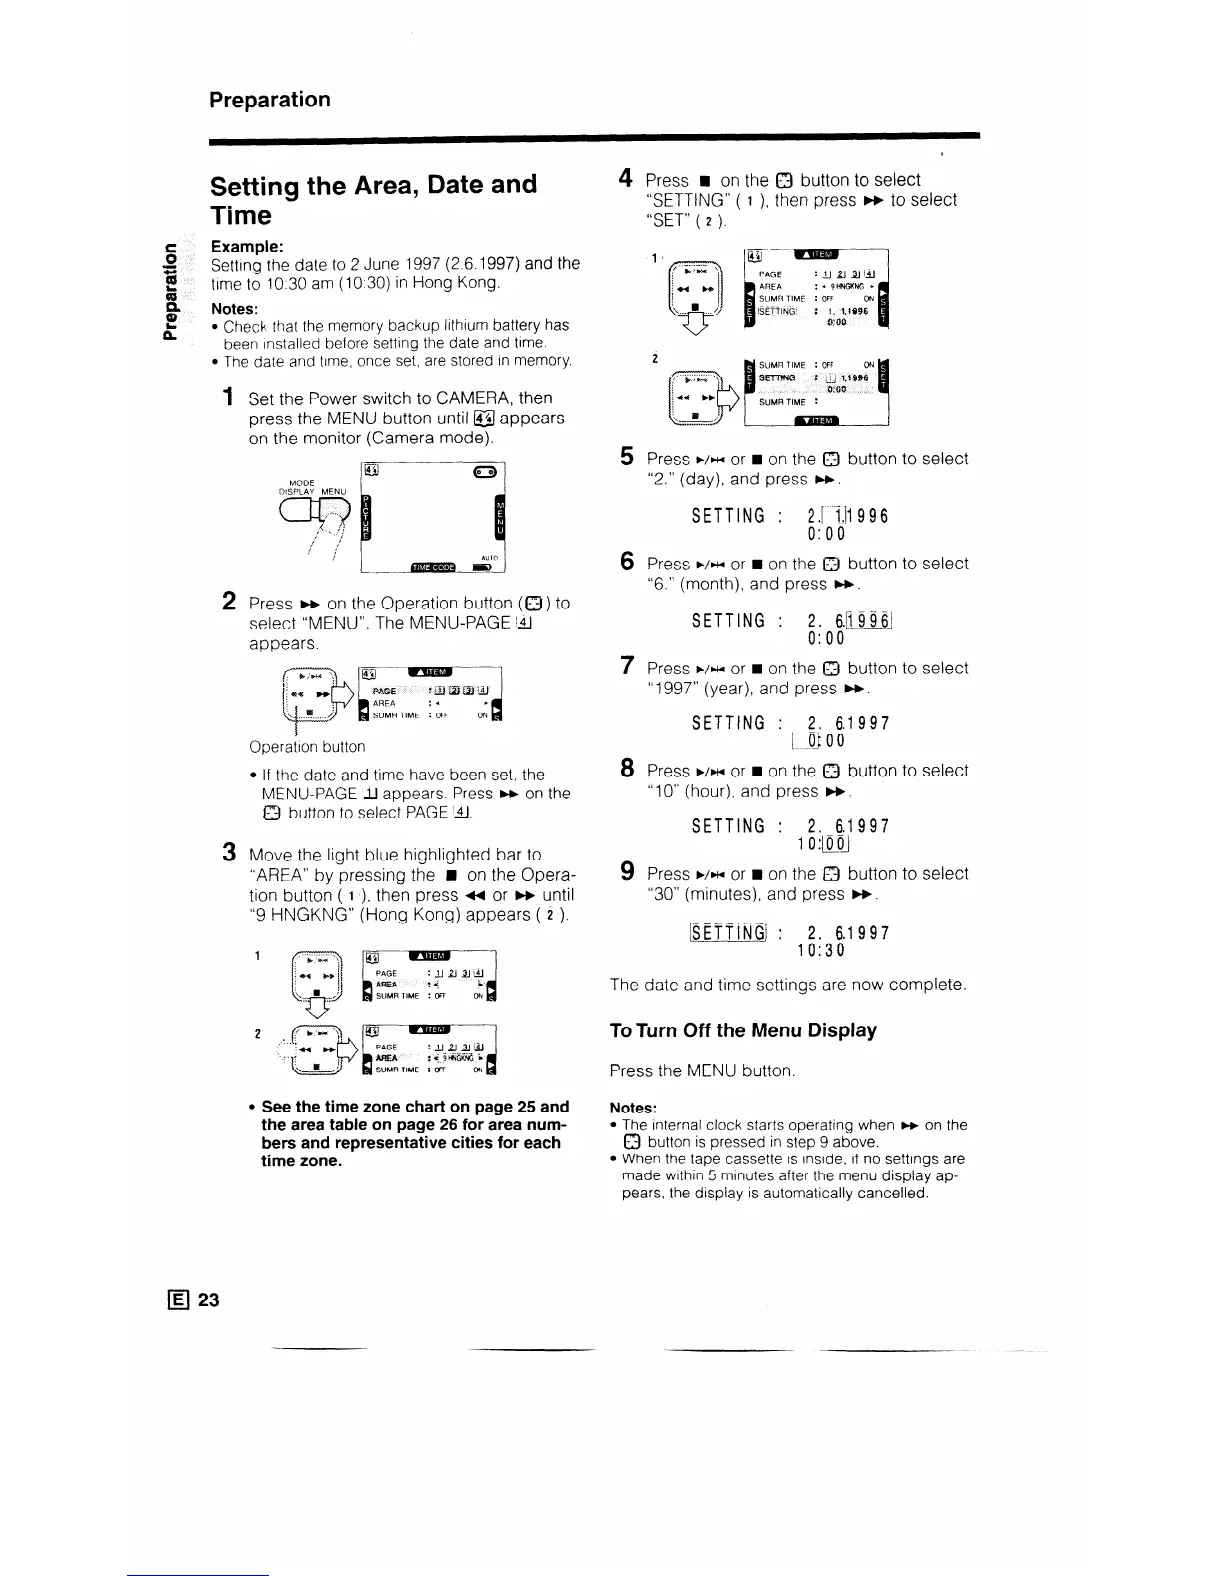
Setting the Area, Date and
Time
Example:
Setttng the date to 2 June 1997 (2.6.1997) and the
time to 10.30 am (10:30) in Hong Kong.
Notes:
l Check that the memory backup lithium battery has
been Installed before setting the date and time.
l The date and time, once set, are stored in memory.
1 Set the Power switch to CAMERA, then
press the MENU button until a appears
on the monitor (Camera mode).
L
__-
2 Press b on the Operation button (a ) to
select “MENU”. The MENU-PAGE 141
appears.
~~~~~
Operation button
l If the date and time have been set, the
MENU-PAGE Ll appears. Press w on the
Q button to select PAGE ‘&.I.
3 Move the light blue highlighted bar to
“AREA” by pressing the n on the Opera-
tion button ( I ), then press ++ or w until
“9 HNGKNG” (Hong Kong) appears ( 2 ).
PAGE
:UU2J&l
nm3
: 4.
i
SUMR TIME : OFF
Oh
d
l See the time zone chart on page 25 and
the area table on page 26 for area num-
bers and representative cities for each
time zone.
4 Press n on the 0 button to select
“SETTING” ( I ), then press w to select
“SET” ( 2 ).
PAGE
s ----
:uuJJij,J
AREA
:-SHNGKNG l
SUMR TIME : OFF
s
ON
ISETTING’ : 1. 1.1996
o:oo
2 ~/~~~;+%~qj
5 Press ww or n on the Q button to select
“2.” (day), and press W.
SETTING : 2.jl1996
0:oo
6 Press ./HI or n on the 0 button to select
“6.” (month), and press W.
SETTING : 2. s.b996]
0:oo
7 Press ./HI or n on the a button to select
“ 1997” (year), and press W.
SETTING : 2. 6.1997
[__Q 0 0
8 Press ./HI or n on the 0 button to select
“10” (hour), and press W.
SETTING : 2. 6.1997
10:~
9 Press WH or n on the 0 button to select
“30” (minutes), and press W.
The date and time settings are now complete.
ToTurn Off the Menu Display
Press the MENU button.
Notes:
l The internal clock starts operating when w on the
0 button is pressed in step 9 above.
l When the tape cassette is inside, if no settings are
made within 5 minutes after the menu display ap-
pears, the display is automatically cancelled.