Connections and Editing
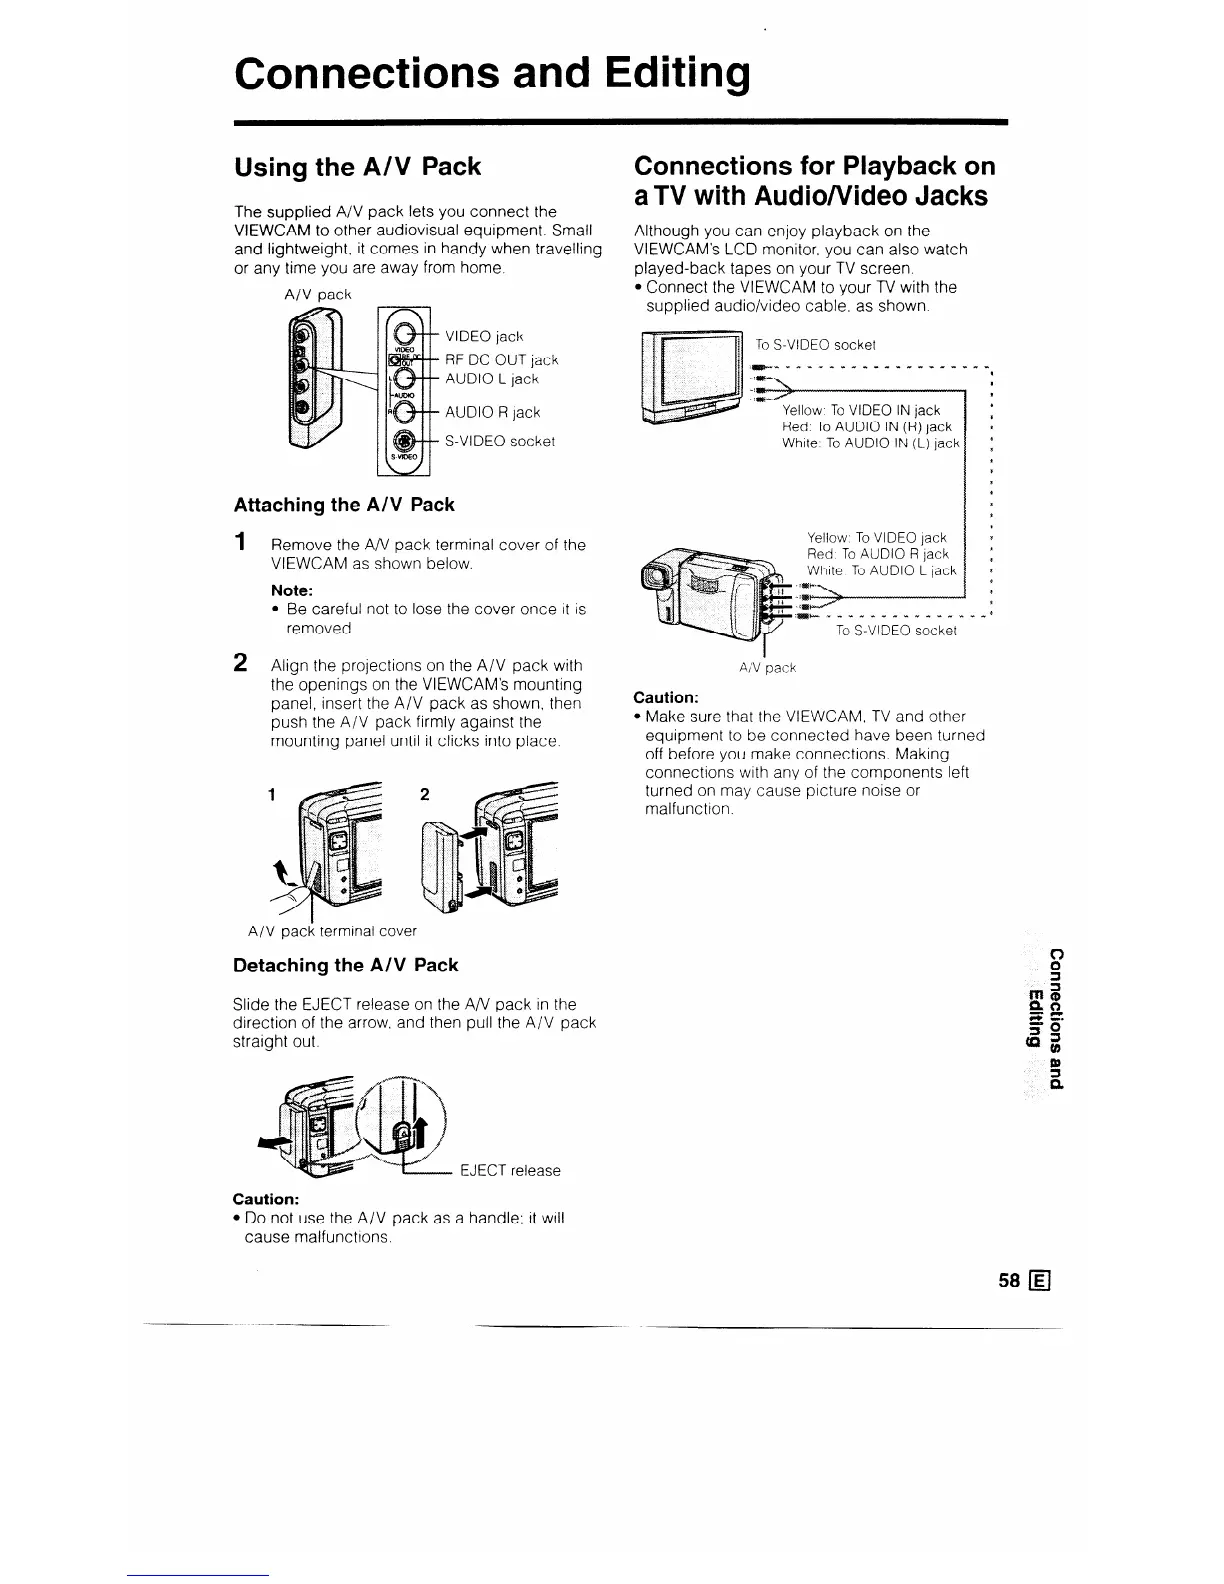
Using the A/V Pack
The supplied A/V pack lets you connect the
VIEWCAM to other audiovisual equipment. Small
and lightweight, it comes in handy when travelling
or any time you are away from home.
A/V pack
VIDEO jack
RF DC OUT jack
AUDIO L jack
AUDIO R lack
S-VIDEO socket
Attaching the AN Pack
1 Remove the A/V pack terminal cover of the
VIEWCAM as shown below.
Note:
l Be careful not to lose the cover once it is
removed.
2
Align the projections on the A/V pack with
the openings on the VIEWCAM’s mounting
panel, insert the A/V pack as shown, then
push the A/V pack firmly against the
mounting panel until it clicks into place.
A/V pack terminal cover
Detaching the A/V Pack
Slide the EJECT release on the A/V pack in the
direction of the arrow. and then pull the A/V pack
straight out.
EJECT release
Caution:
l Do not use the A/V pack as a handle: it will
cause malfunctions.
Connections for Playback on
aTV with Audio/Video Jacks
Although you can enjoy playback on the
VIEWCAM’s LCD monitor. you can also watch
played-back tapes on your TV screen.
l Connect the VIEWCAM to your TV with the
supplied audio/video cable. as shown.
To S-VIDEO socket
Yellow. To VIDEO IN jack
Red. To AUDIO IN (R) jack
White, To AUDIO IN (L) jack
Yellow To VIDEO lack
Red To AUDIO R jack
White To AUDIO L jack
:m* ” . 1 I . I I .” ?. . .” *
To S-VIDEO socket
AI’V ‘pack
Caution:
l Make sure that the VIEWCAM, TV and other
equipment to be connected have been turned
off before you make connections. Making
connections with any of the components left
turned on may cause picture noise or
malfunction.
58 q