36
8012707/ZVF9/V2-1/2019-04 | SICKOPERATING INSTRUCTIONS | GM32
Subject to change without notice
4 START-UP
4.12 Installing the SR-unit on the device flange
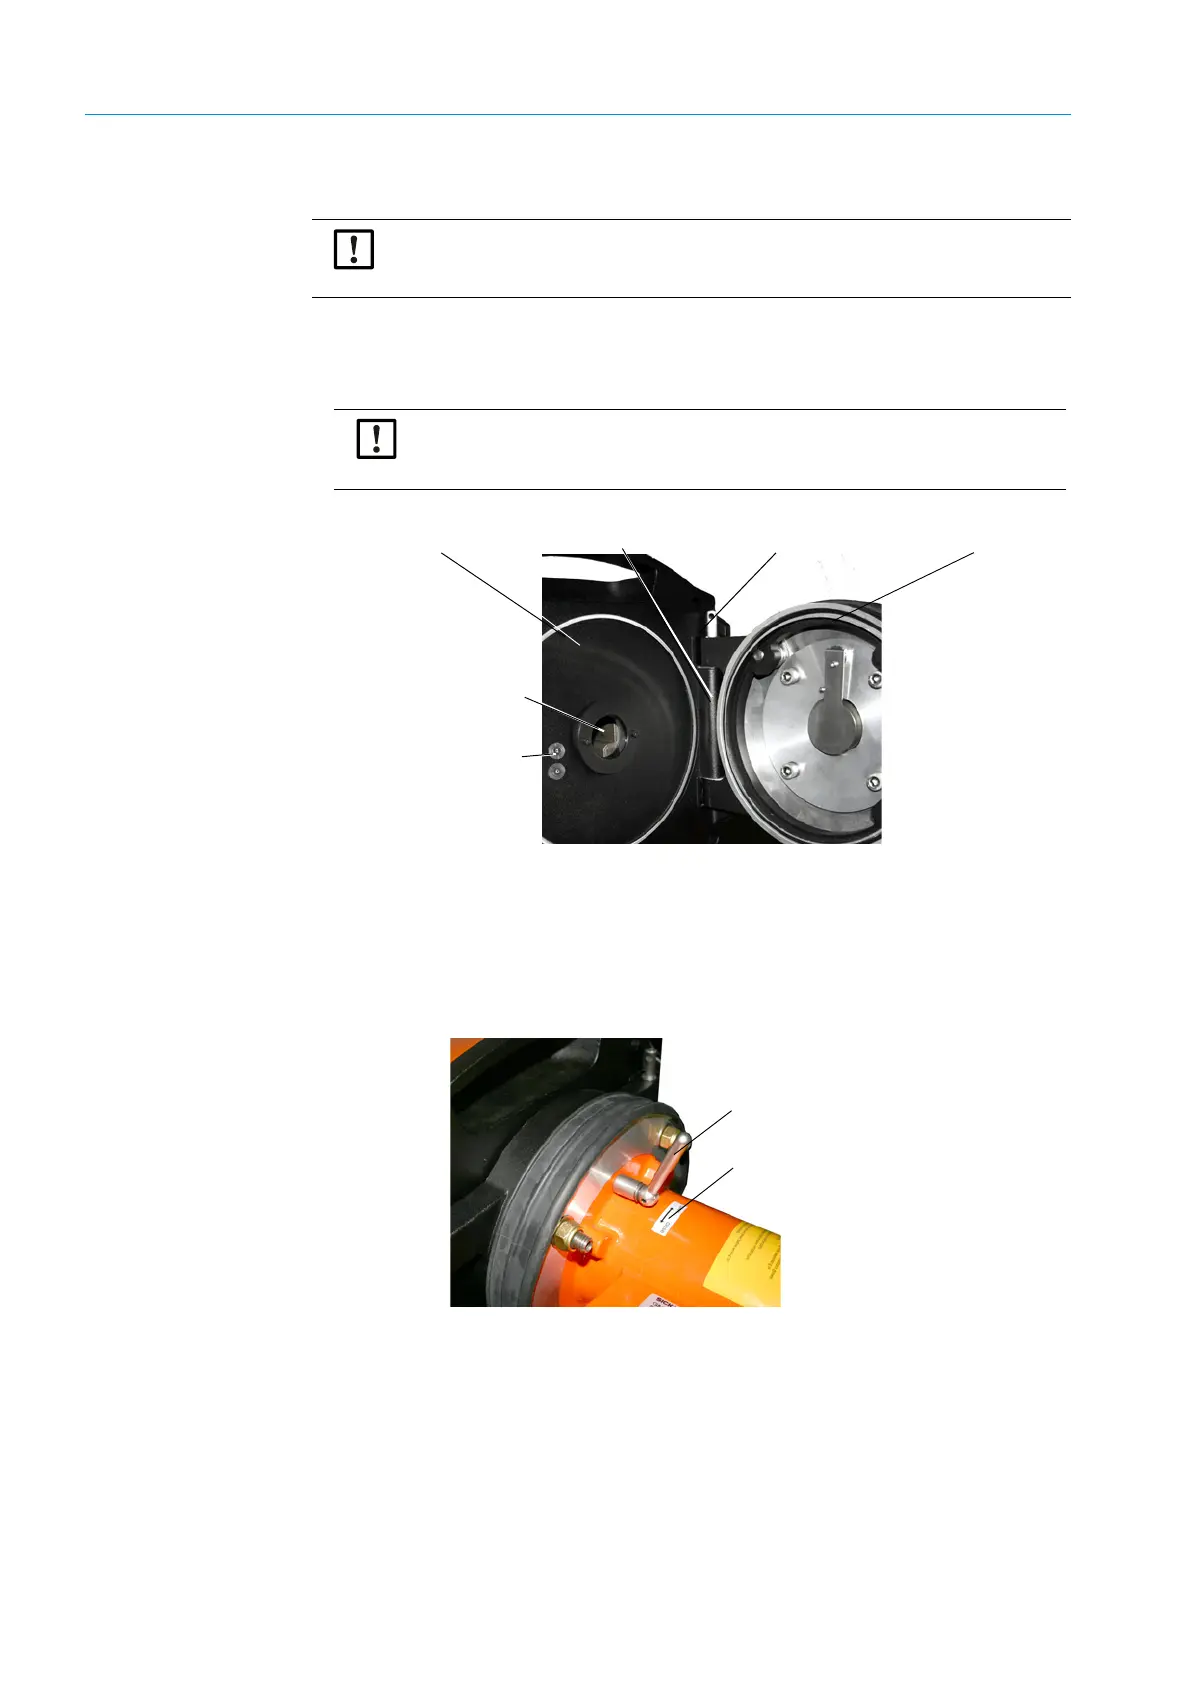
1 Install the SR-unit:
a) Fit the SR-unit on the device flange into the hinge (swiveling-out direction preferably to
the “left”).
b) Insert the hinge pin from above.
Fig. 19: Install the SR-unit:
c) Check the window for cleanness and clean, if required, see “Cleaning the window”,
page 50.
d) Check the desiccant cartridge is dry, see “Checking and replacing the desiccant car-
tridges”, page 50.
e) Close the SR-unit with the 4 quick-release fasteners.
f) For GMP probe: Set the lever on the purge air fixture to the “open” position.
Fig. 20: Lever of the locking device (for GMP probe)
4.13 Optical fine alignment of the SR-unit
Optical alignment of the SR-unit:
▸ With SOPAS ET: → Leave this work to a skilled person familiar with SOPAS ET.
▸ With operating unit: see page 45
NOTE: Hazard of dropping down
SR-unit and probe are heavy.
▸ Always install the SR-unit and the probe separately.
NOTE: If the hinge pin has not been correctly inserted, the SR-unit can
drop when swiveled out.
▸ Ensure the hinge pin is fully inserted.
Hinge pin
Hinge
Device flange
SR-unit
Window
Desiccant
cartridges
Lever of the
locking device
Marking
„open” or „close”

 Loading...


