49
8012707/ZVF9/V2-1/2019-04 | SICK OPERATING INSTRUCTIONS | GM32
Subject to change without notice
MAINTENANCE 6
6.3 Swiveling out and removing the SR-unit
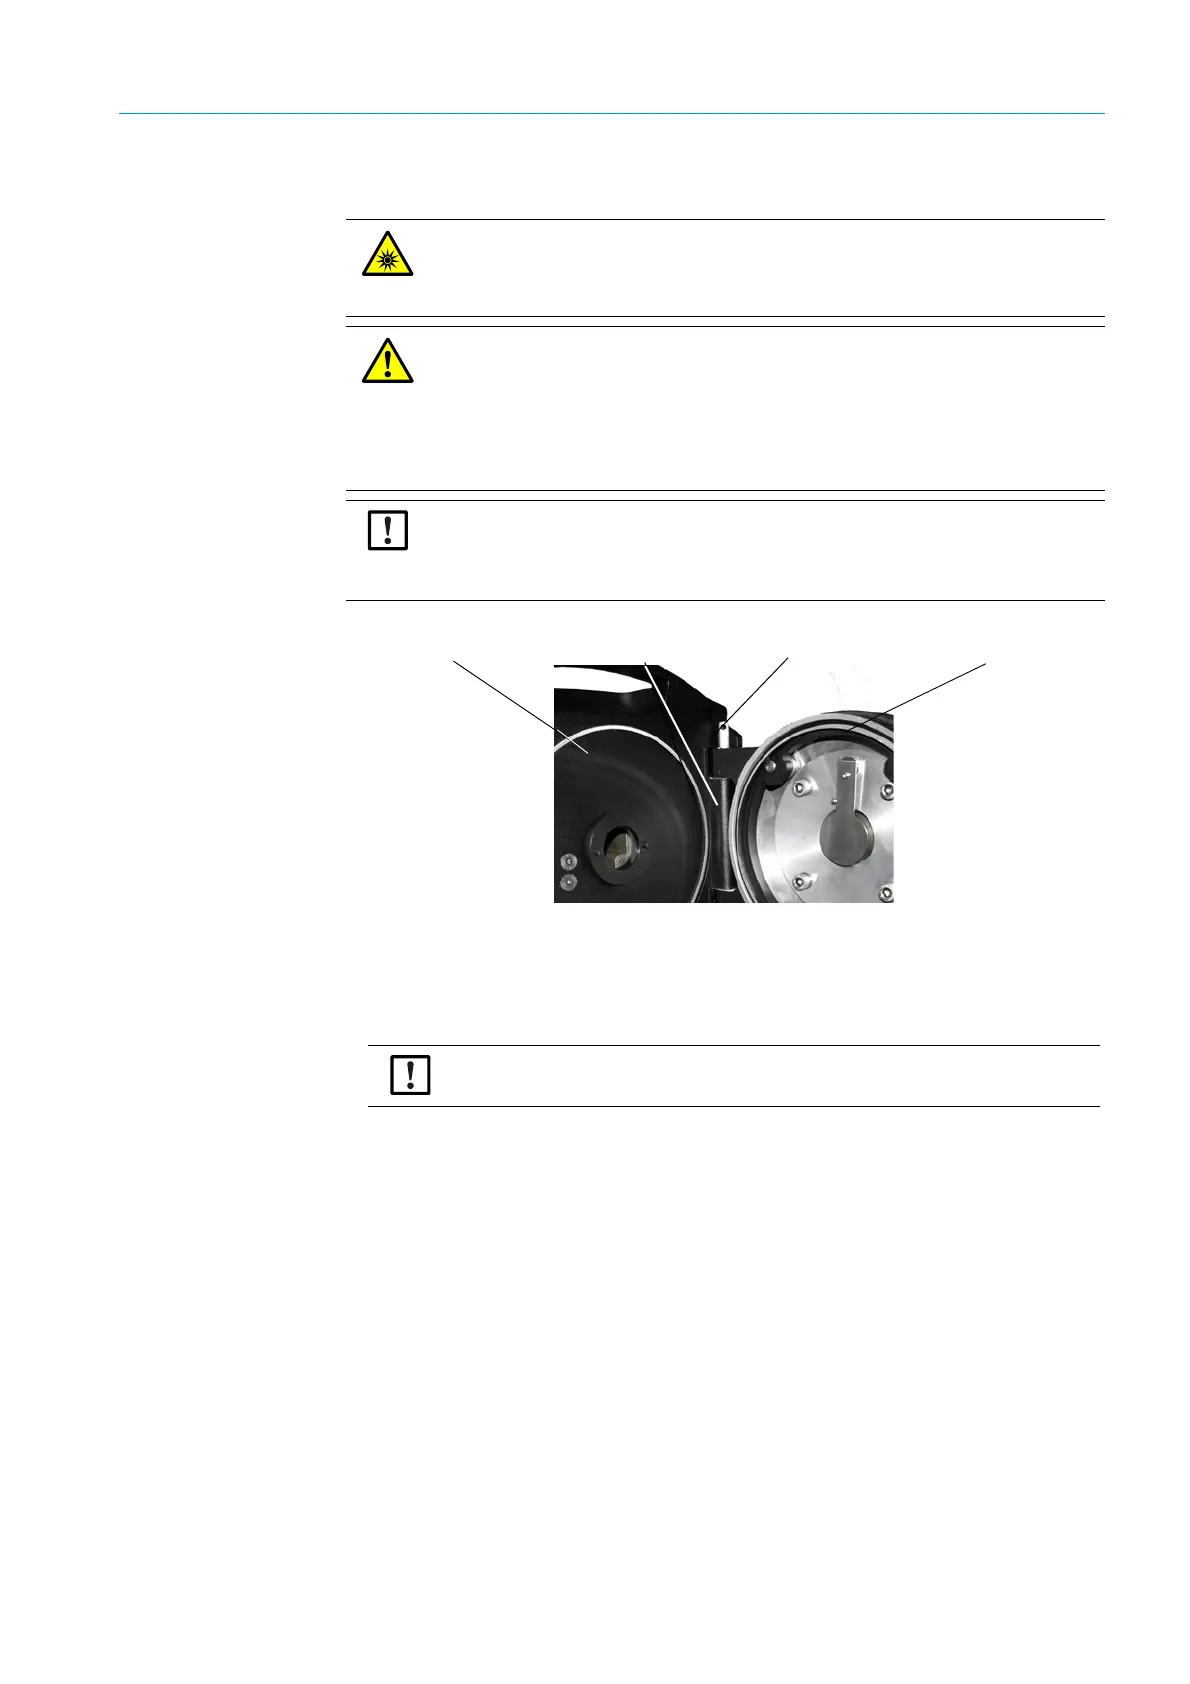
Fig. 31: Swiveling the SR-unit out
1
For GMP probe: Set the lever on the purge air fixture to the “Close” position,see “Lever of
the locking device (for GMP probe)”, page 36.
2 Open the 4 quick-release fasteners of the SR-unit and swivel the SR-unit out.
3 To remove the SR-unit:
Hold the SR-unit tight, pull out the hinge pin and take the SR-unit off
6.4 Visual inspection
▸ Check the housings of the SR-unit housing and connection unit for mechanical damage.
▸ Clean the respective housings if contaminated.
▸ Check all cables for damage.
Pay attention to chafe marks and kinks on cable ducts.
▸ Check flanges and screw fittings for firm seating.
WARNING: Damage to eyes through lamp beam
The lamp beam can cause eye damage when the SR-unit is open.
▸ Before opening the SR-unit: Switch the GM32 off at the external main power switch
or wear suitable protective goggles.
WARNING: Danger resulting from escaping gas when the SR-unit is swiveled
out
Excess pressure in the gas duct can cause hot and/or noxious gases to escape when
the SR-unit is swiveled out.
▸ Swivel the SR-unit out only when you have taken suitable safety measures.
▸ For GMP probe: Set the lever on the purge air fixture to the “Close” position (see
“Lever of the locking device (for GMP probe)”, page 36).
CAUTION: If the hinge pin has not been correctly inserted, the SR-unit can
drop when swiveled out.
▸ Check that the hinge pin is completely pressed down before swiveling the SR-unit
out, see “Install the SR-unit:”, page 36
Hinge pin
Hinge
Device flange
SR-unit
NOTE: The SR-unit is heavy
▸ Hold the SR-unit tight when pulling out the pin.

 Loading...


