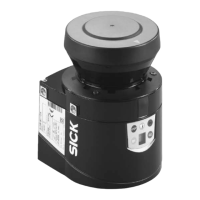
Operating instructions Chapter 5
S100
8012238/YY30/2015-02-20 © SICK AG • Subject to change without notice 25
5 Mounting
This chapter describes the preparation and completion of the mounting of the S100 laser
scanner. Mounting requires four steps:
definition of the application and the necessary mounting location for the laser scanner
definition of switching field sizes
definition of the switching point between monitoring cases (only S100 Professional)
mounting the laser scanner with or without mounting kits
Mount the S100 in a dry place and protect the device from dirt and damage.
Avoid the installation of the S100 in the vicinity of strong electric fields. These can, e.g.,
be produced by welding cables, induction cables in the immediate vicinity and also by
mobile telephones operated nearby.
Ensure that there are no obstacles in the area to be monitored in the field of view of the
S100 that could cause interference or shadowing. Such shadowed areas cannot be
monitored by the S100. If there are unavoidable shadowed areas, check whether there
is a risk. Take additional safety precautions as necessary.
Keep the area to be monitored free of smoke, fog, steam or other forms of air
impurities. There must not be any condensation on the light output window. Otherwise
the function of the S100 may be impaired and incorrect switching may occur.
Avoid placing highly reflective objects in the scan plane of the S100. Examples:
Retroreflectors can affect the measurement results of the S100. Highly reflective
objects within the switching field can blank part of the area to be monitored in certain
circumstances.
Mount the S100 such that it is not dazzled by incident sunlight. Do not position
stroboscopic and fluorescent lights or other strong light sources directly in the scan
plane as these may affect the S100 in specific circumstances.
The following steps are necessary after mounting and installation:
completing the electrical connections (chapter 6 “Electrical installation”)
configuration of the switching field (chapter 8 “Configuration”)
commissioning and checking of the installation (chapter 9 “Commissioning”)
Notes
 Loading...


