57
8 Operation
SKF products operate automatically to the greatest
possible extent.
Basically, activities during standard operation are limited
to:
• Regular function checks
• Checking the fill level on pumps without low-level
signal
• Timely refilling of lubricant
• Cleaning the exterior if dirty
8.1 Top up lubricant
See section Filling with lubricant, Page 48.
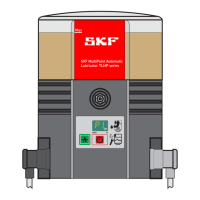
8.2 Triggering additional lubrication
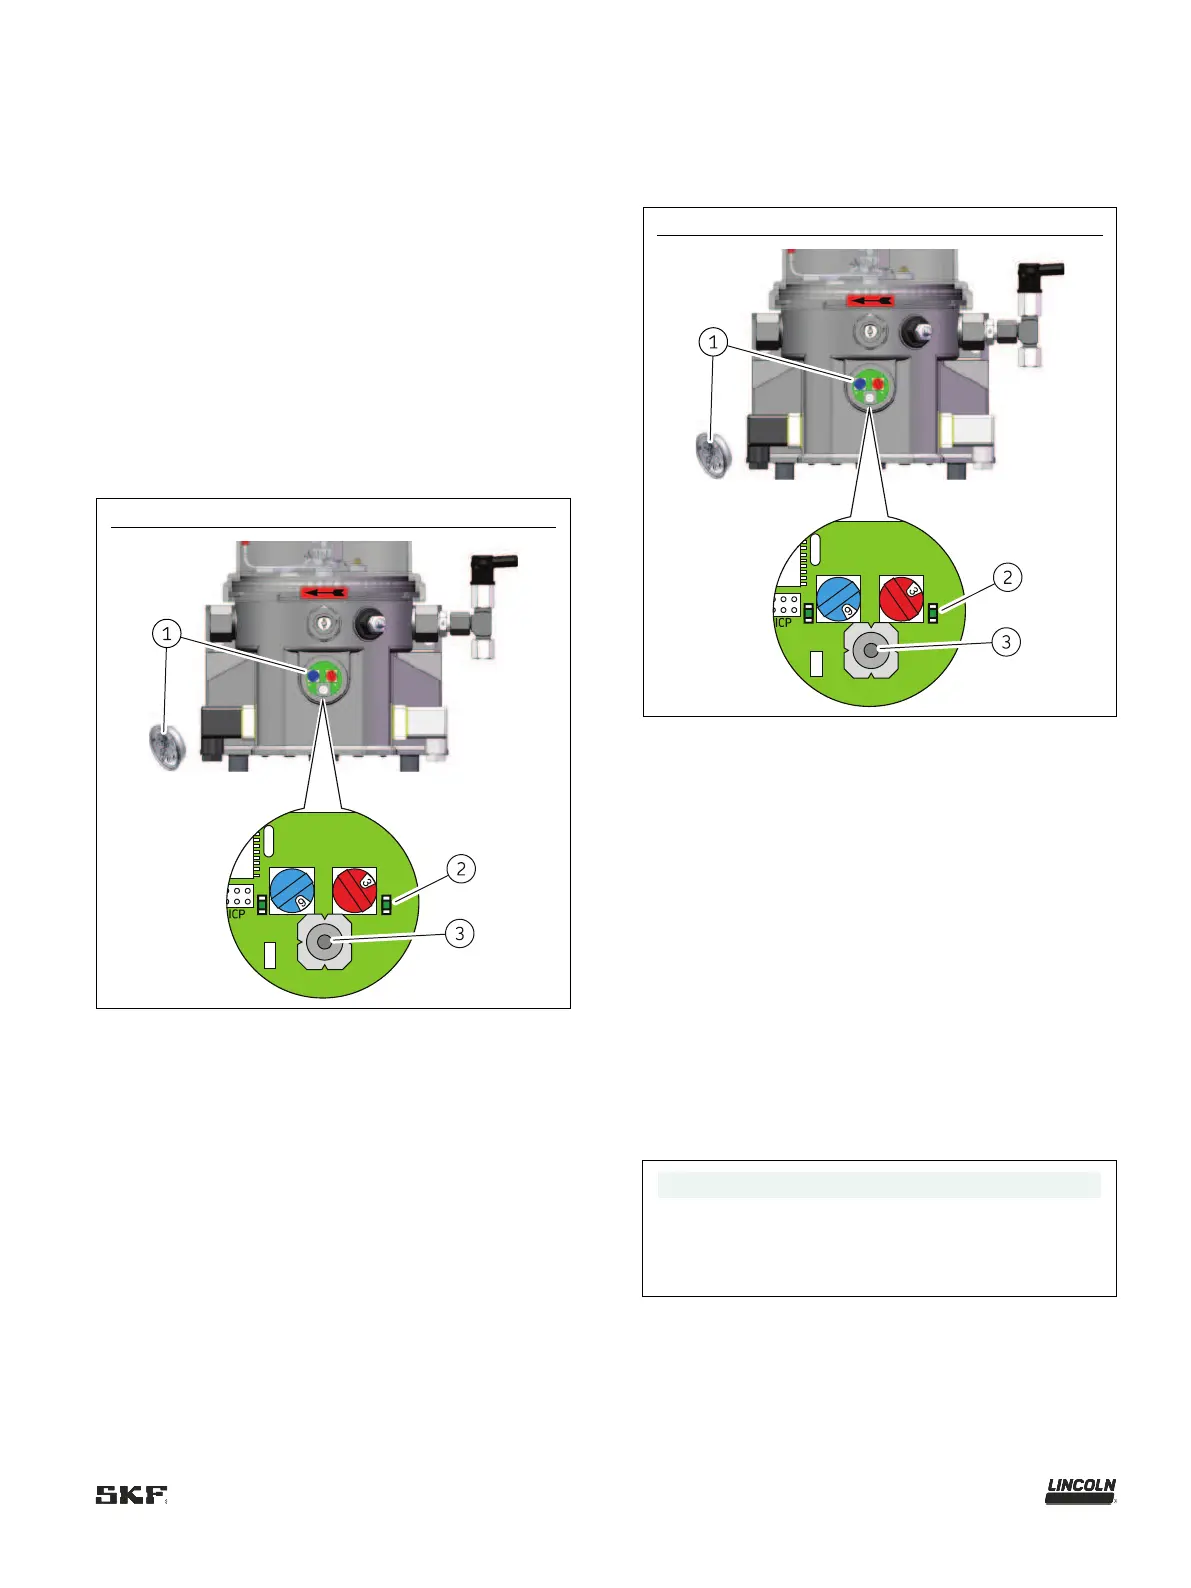
Fig.
Triggering additional lubrication
2 LED for “Operation / fault”
(steady light = pump is
To trigger additional lubrication, proceed as follows:
1. Remove the screw cap (Fig. 36/1) together with the
packing ring.
2. To trigger additional lubrication, press the
pushbutton (Fig. 36/3) on the control circuit board (for
more than 2 seconds). The right-hand LED (Fig. 36/2)
lights up for as long as the motor runs.
– The pump starts a lubrication cycle. The duration of
the lubrication cycle is determined by the value set
on the control circuit board.
3. Reinstall the screw cap and the packing ring.
– Tightening torque: 2 Nm ±0.2 Nm [1.48 ft.lb.
±0.15 ft.lb.]
8.3 Resetting an error message
Fig.
Resetting an error message
LED for “Operation / fault”
To reset an error message, proceed as follows:
1. Based on the flashing frequency of the LED (Fig. 37/2),
localize and remedy the fault: see chapter 11.1.
2. Remove the screw cap (Fig. 37/1) together with the
packing ring.
3. To reset the error message, press the
pushbutton (Fig. 37/3) on the control circuit board (for
less than 1 second). The right-hand LED goes off.
4. To switch on the pump, press the pushbutton again (for
more than 2 seconds). An additional lubrication is
carried out.
5. Reinstall the screw cap and the packing ring.
– Tightening torque: 2 Nm ±0.2 Nm [1.48 ft.lb.
±0.15 ft.lb.]
NOTE
If a fault is not reset, it remains saved even when the
machine contact/driver switch is switched off,
meaning that when the pump is switched back on, the
right
-hand LED will flash to indicate the active fault.