Engine
7-21
6036, 6042, 8042, 10042, 10054 31211015
7.8 AIR CLEANER ASSEMBLY
Note: Refer to the appropriate Operation & Safety Manual for
your machine for the correct element change procedure.
7.8.1 Air Cleaner Assembly Removal
1. Park machine on a firm, level surface, level machine, fully
retract boom, lower boom, place the transmission in (N)
NEUTRAL, engage the parking brake, and shut the
engine OFF.
2. Place a Do Not Operate Tag on both ignition key switch
and steering wheel, stating that the machine should not
be operated.
3. Open the rear and right side doors. Allow system fluids
to cool.
4. Properly disconnect the battery. Refer Section 9.8,
“Battery”, for procedure.
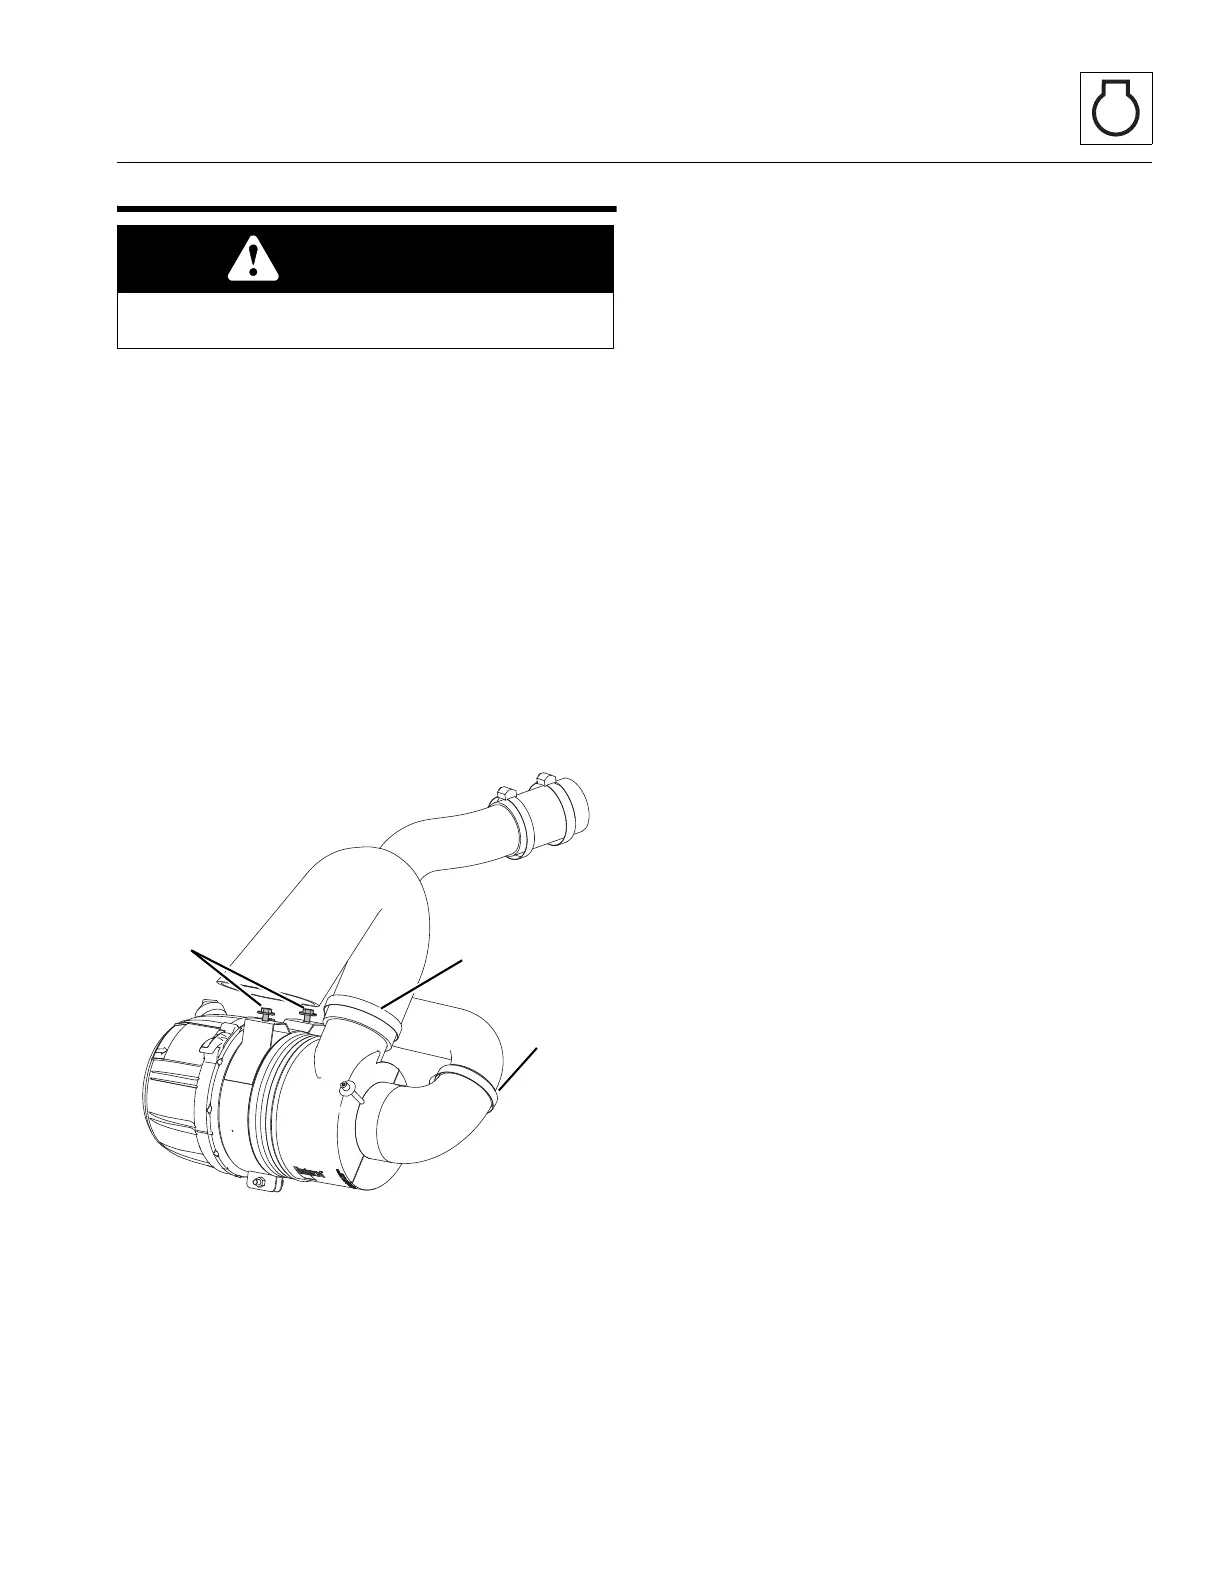
5. Loosen clamp securing air intake tube (22) and remove
tube.
6. Loosen clamps securing air cleaner hose (23) to air
cleaner assembly and remove elbow/hose from air
cleaner assembly.
7. Remove cap screws and lock washers (24) securing
mounting band to air cleaner bracket. Remove air
cleaner assembly.
7.8.2 Air Cleaner Assembly Installation
Note: Refer to Section 2.7, “Thread Locking Compound” for all
thread locking requirements.
1. Secure air cleaner assembly to air cleaner bracket with
previously used hardware (24).
2. Install the air cleaner assembly.
3. Install air cleaner hose (23) to the air cleaner assembly
and secure with clamps.
4. Install air intake tube (22) and secure with clamp.
5. Tighten all clamps.
6. Properly connect the battery. Refer Section 9.8,
“Battery”, for procedure.
7. Remove the Do Not Operate Tags from both the ignition
key switch and the steering wheel.
8. Close and secure the rear and right side doors.
CAUTION
NEVER run the engine with only the inner safety element
installed.


 To Next Page