Transmission
6-5
6036, 6042, 8042, 10042, 10054 31211015
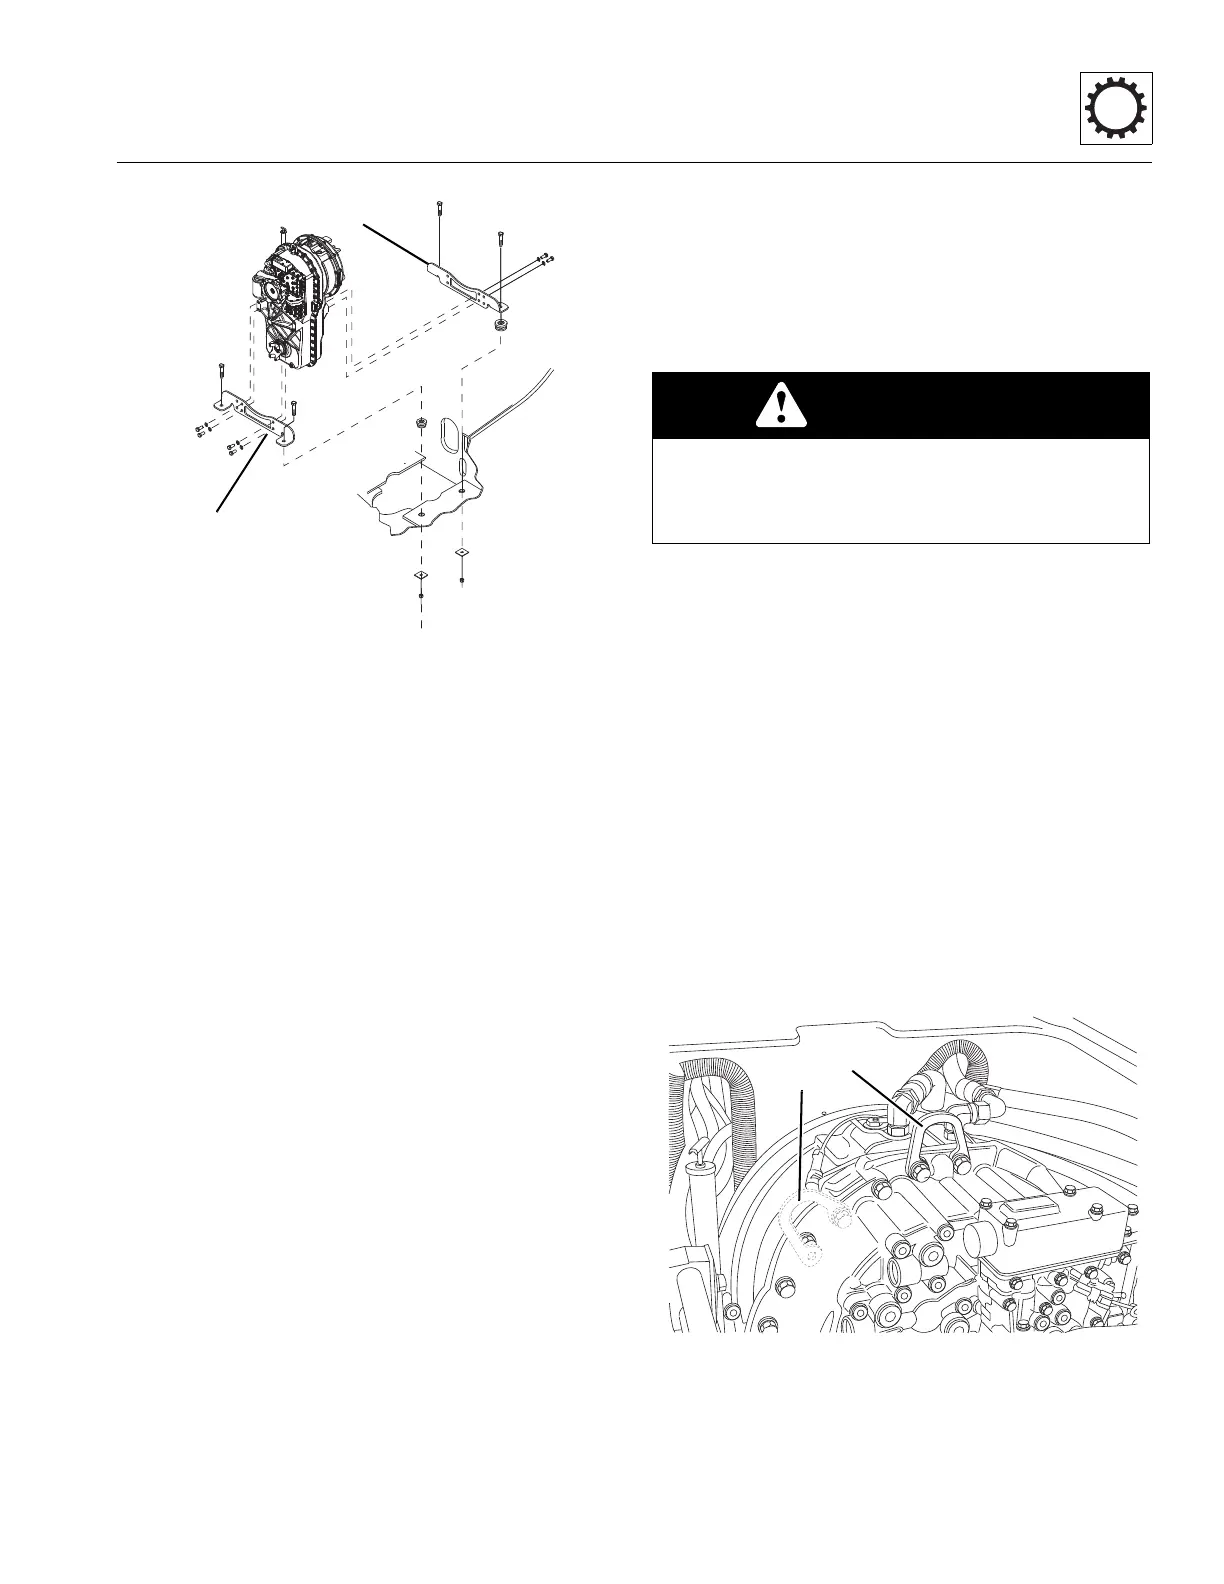
21. Remove the capscrews and lockwashers securing the
front transmission mount (9) to the transmission.
22. Remove the two capscrews, hex locknuts and rebound
washers. Remove the front transmission mount.
23. Remove the four capscrews and lockwashers securing
the rear transmission mount (1) to the transmission.
24. Remove the two capscrews, hex locknuts and rebound
washers. Remove the rear transmission mount.
25. Inspect the rubber mounts. Replace the mounts if
damaged.
26. Carefully remove the transmission from the machine.
Avoid causing damage to the transmission or
surrounding parts.
27. Lift the transmission clear of the machine and lower it
onto suitable supports or secure it to a stand built
especially for the transmission or engine service. Secure
the transmission so that it will not move or fall.
28. Remove any external transmission components as
required, including the transmission temperature
switch, and inlet and outlet cooler hose fittings. Cover
all transmission openings.
29. Remove the transmission oil filter and dispose of
properly. Clean the filter mounting surface. Cover or cap
the oil filter mount.
6.4.2 Transmission Inspection and Internal
Repair
If replacing the entire transmission, transfer the transmission
temperature switch to the replacement transmission. The
gear shift solenoids are included with a new transmission.
6.4.3 Transmission Installation
1. Install two rubber mounts and the rear transmission
mount (1) in the machine frame. Secure the mount with
the previously used hardware.
2. Use a hoist or overhead crane and sling attached to the
lifting eye at the top of the transmission. Raise and
position the transmission within the chassis.
3. Attach the transmission to the rear mounting bracket
with the previously used hardware. Torque to
148 lb-ft (200 Nm).
4. Install the two front rubber mounts and the front
transmission mounting bracket (9) on the transmission
with the previously used hardware. Torque to
148 lb-ft (200 Nm).
5. Attach the front mounting bracket to the frame with the
previously used hardware
6. Remove the hoist or overhead crane and sling.
Note: The lifting ring (3) must be repositioned to allow the
covers to be installed.
WARNING
NEVER lift a transmission alone; enlist the help of at least
one assistant or use a suitable hoist or overhead crane
and sling with the minimum lifting capacity of
1000 lb (454 kg).


 To Next Page