22
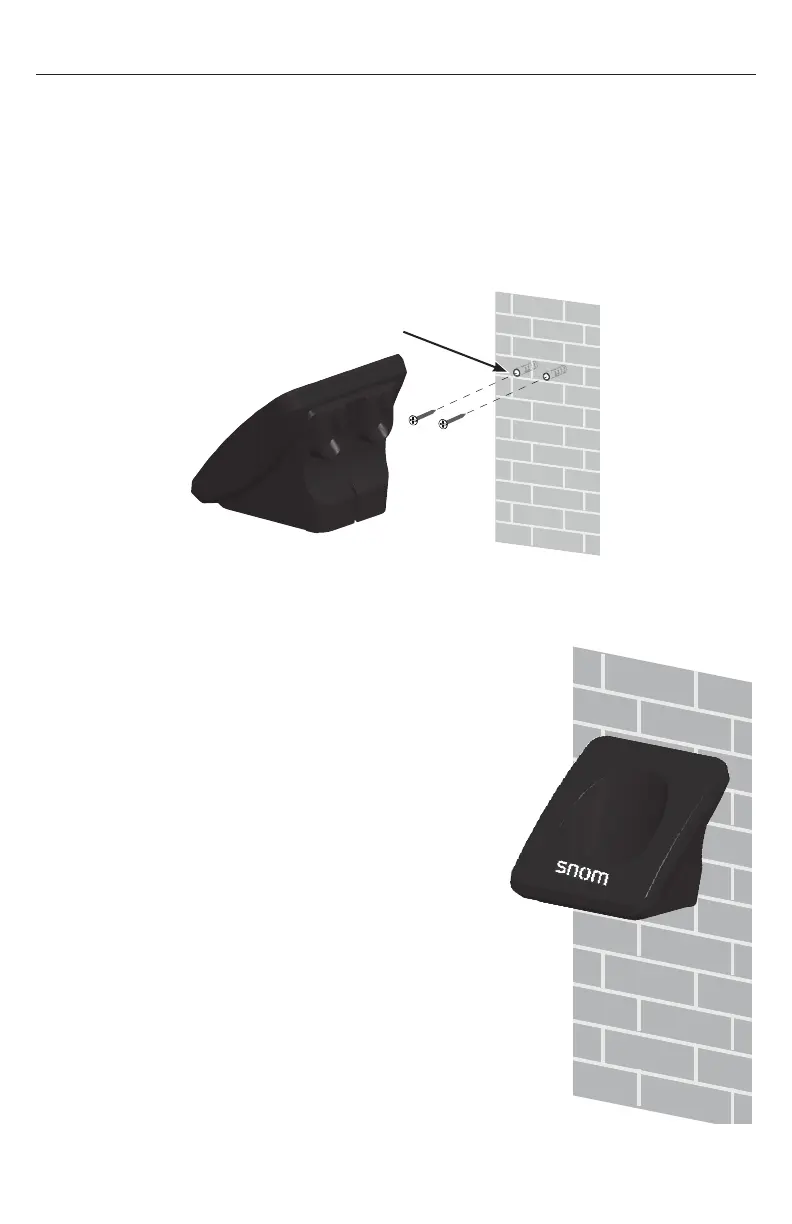
Wall mounting the charger
The charger is ready for tabletop use� If you want to mount the charger on a wall,
use two 10 mm (3/8 inch) screws and wall anchors to hold the charger in place�
Screws and wall anchors are not provided, but are available for purchase at hardware
retailers� You might need a professional to install the charger�
To mount the charger on the wall:
1� Use a pencil to mark the desired positions of the two holes on the wall� Make sure
the space between the two holes is 30 mm (1 3/16 inches)� Drill two holes in the
wall according to the marks�
2� If you drill the holes into a stud, go to step 3�
-OR-
If you drill the holes into an object other than
a stud, insert the wall anchors (not provided)
into the holes and tap gently on the ends with a
hammer until the wall anchors are flush with the
wall�
3� Insert the screws into the holes and tighten them
until only 6 mm (1/4inch) of the screws are
exposed�
4� Align the holes at the back of the charger with the
screws on the wall and slide the charger down
until it locks into place�
Screw spacing 30 mm
(1 3/16 inches)
Mount the device
only at heights
not exceeding
2 meters�