– 11 –
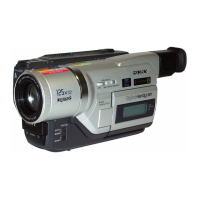
DCR-TRV320/TRV320E/TRV320P/TRV420E/TRV520/TRV520E/TRV520P/TRV525
TRV620E/TRV720/TRV720E
6. PLL f
0
& LPF f
0
Final Adjustment (VC-235 board)
(Service manual page 5-50)
Mode VTR stop
Signal Arbitrary
Measurement Point Display data of page: 3, address: 03
Measuring Instrument Adjustment remote commander
Adjustment Page C
Adjustment Address 1F, 20, 22, 29
Specified Value
Data of page: 3, address: 02 is
changed to “00” within 10 seconds,
and data of page: 3, address: 03 is
“00”
Adjusting method:
1) Select page: 0, address: 01, and set data: 01.
2) Select page: 3, address: 01, set data: 30, and press the PAUSE
button of the adjustment remote commander.
3) Select page: 3, address: 02, and check that the data changes to
“00” within 10 seconds.
Note: If it takes more than 10 seconds for changing data, there
are some errors.
4) Select page: 3, address: 03, and check that the data is “00”.
Note: If data is not “00”, there are some errors. For the error
contents, see the following table. (For the bit values,
refer to “5-4. SERVICE MODE”, “4-3. 3. Bit value
discrimination”)
Bit value of page: 3,
Error contents
address: 03
bit 6 = 1 LPF f
0
adjustment is defective
bit 2 = 1 or bit3 = 1 PLL f
0
, fine adjustment is defective
bit 4 = 1 or bit5 = 1 PLL f
0
, adjustment is defective
5) Select page: 0, address: 01, and set data: 00.
4-3. SERVICE MODE
6. Record of Use Check
(Service manual page 5-66)
Page 2 Address A2 to AA
Address
A2
A3
A4
A5
A6
A7
A8
A9
AA
Function
Drum rotation Minute
counted time Hour (L)
(BCD code) Hour (H)
User initial power Year
on date Month
(BCD code) Day
Final condensation Year
occurrence date Month
(BCD code) Day
Remarks
10th place digit and 1st place digit of counted time (decimal digit)
1000th place digit and 100th place digit of counted time (decimal digit)
After setting the clock, set the date of power on next
\
-
-