HT-ST5000
37
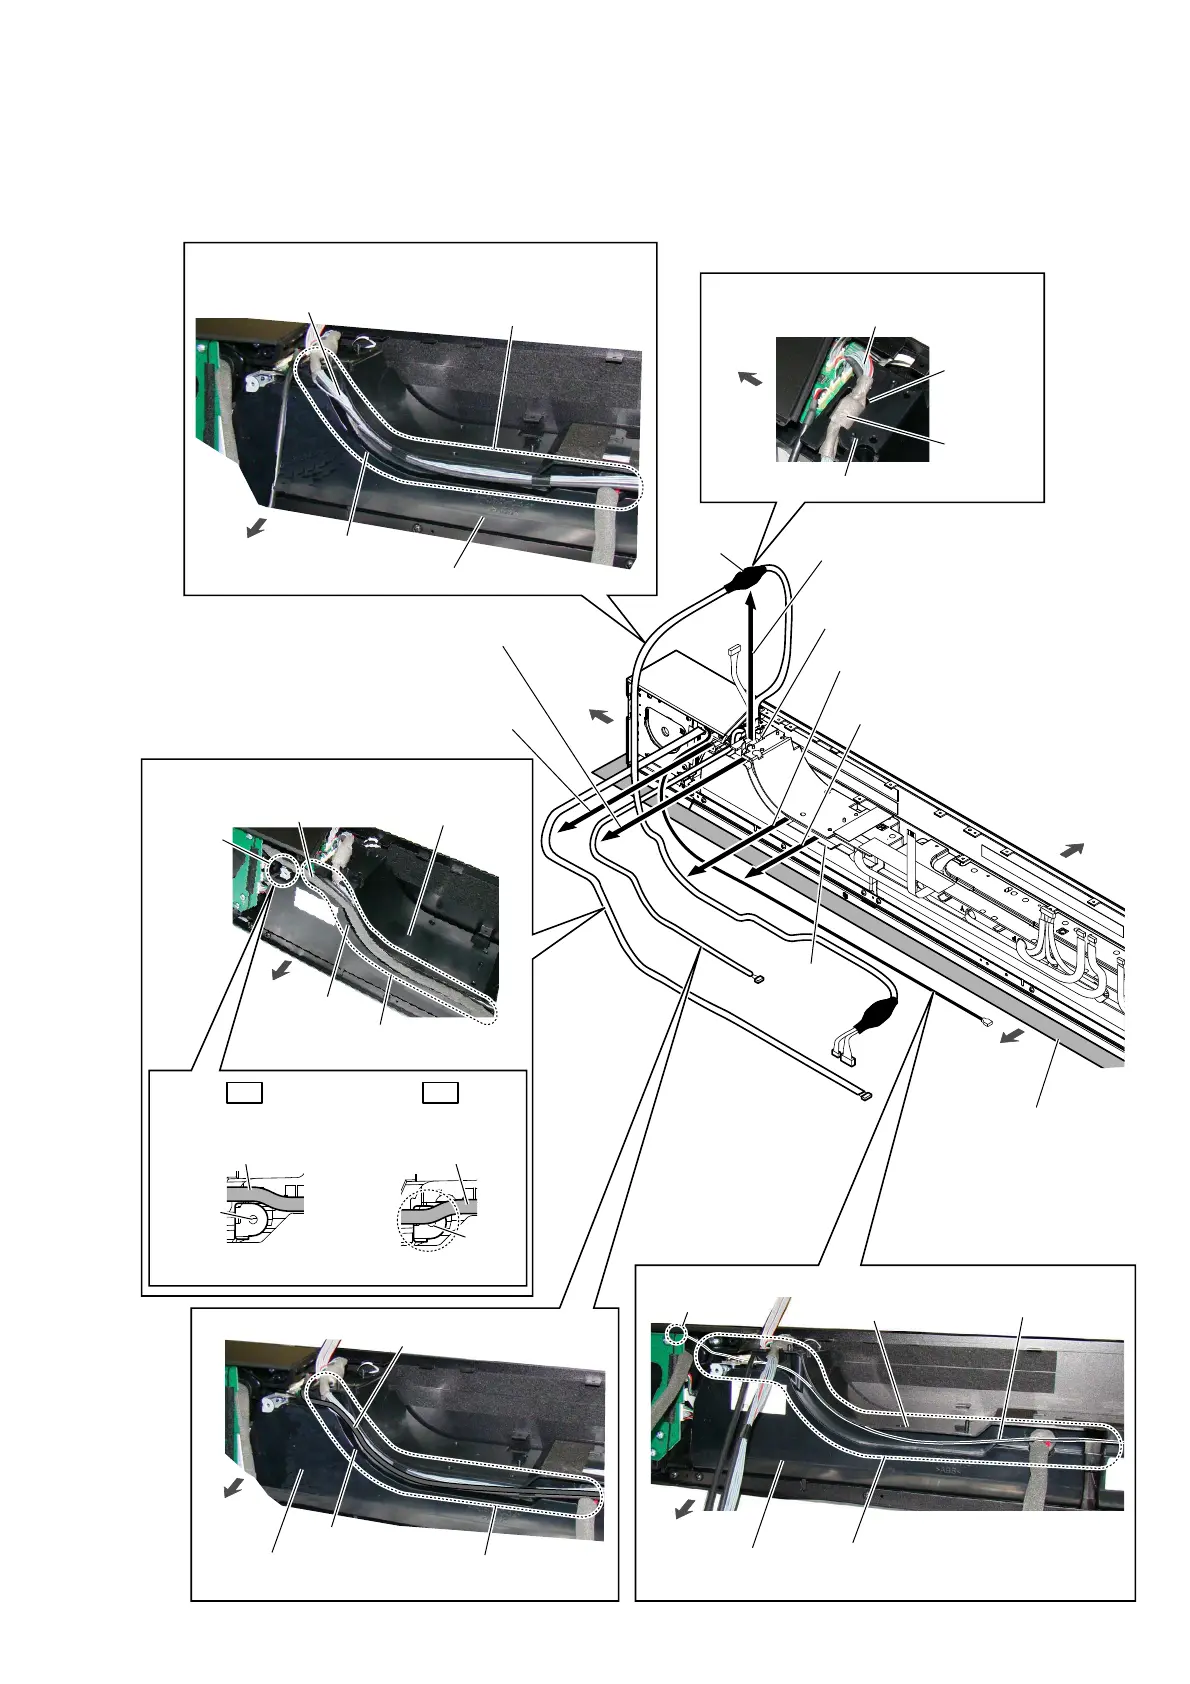
2-28. ENABLE (R-CH) BLOCK-2
• Continued on 2-29 (page 38).
bottom side
right
side
top side
Note 1:
Lay a soft piece of cloth
under the unit to avoid
damaging the grille assy.
:LUHVHWWLQJ
3 Draw the CHUKEI-WIRE board
cable out of the groove.
2 Draw the CHUKEI-WIRE board
cable out of the groove.
:LUHVHWWLQJ
CHUKEI-WIRE
board cable
5 Draw the coaxial harness
out of the groove.
1 Draw the top R-ch speaker
connection cable out of the
groove.
4 Draw the ferrite core out of the guide
hole in front (R-ch) speaker block.
guide hole
CHUKEI-WIRE board cable
:LUHVHWWLQJ
:LUHVHWWLQJ
coaxial harness
:LUHVHWWLQJ
ferrite
core
guide hole
groove
ferrite core
front (R-ch) speaker block
Note 2:
Press the cable into the groove
of front (R-ch) speaker block.
front (R-ch) speaker block
bottom side
Note 2:
Press the cable into the groove
of front (R-ch) speaker block.
top R-ch speaker
connection cable
front (R-ch)
speaker block
bottom
side
groove
CHUKEI-WIRE board cable
Note 2:
Press the cable into the groove
of front (R-ch) speaker block.
bottom
side
groove
front (R-ch)
speaker block
Note 3:
Press the coaxial harness into the groove
of front (R-ch) speaker block.
bottom side
groove
front (R-ch)
speaker block
groove
right side
groove
screw
hole
OK NG
Pass the top R-ch speaker
connection cable beside
the screw hole.
The top R-ch speaker
connection cable is
overlapping the screw
hole.
–%RWWRPYLHZ––%RWWRPYLHZ–
screw
hole
screw
hole
 Loading...