89TS 700, TS 800
Pressure is equalized via the tank
vent. A negative pressure must not
build up inside the tank. The tank
vent must be replaced if this is not
the case.
– Clean the area around the tank
vent.
– Replace the tank vent or tank if
necessary, b 12.6.2 or
b 12.7.4
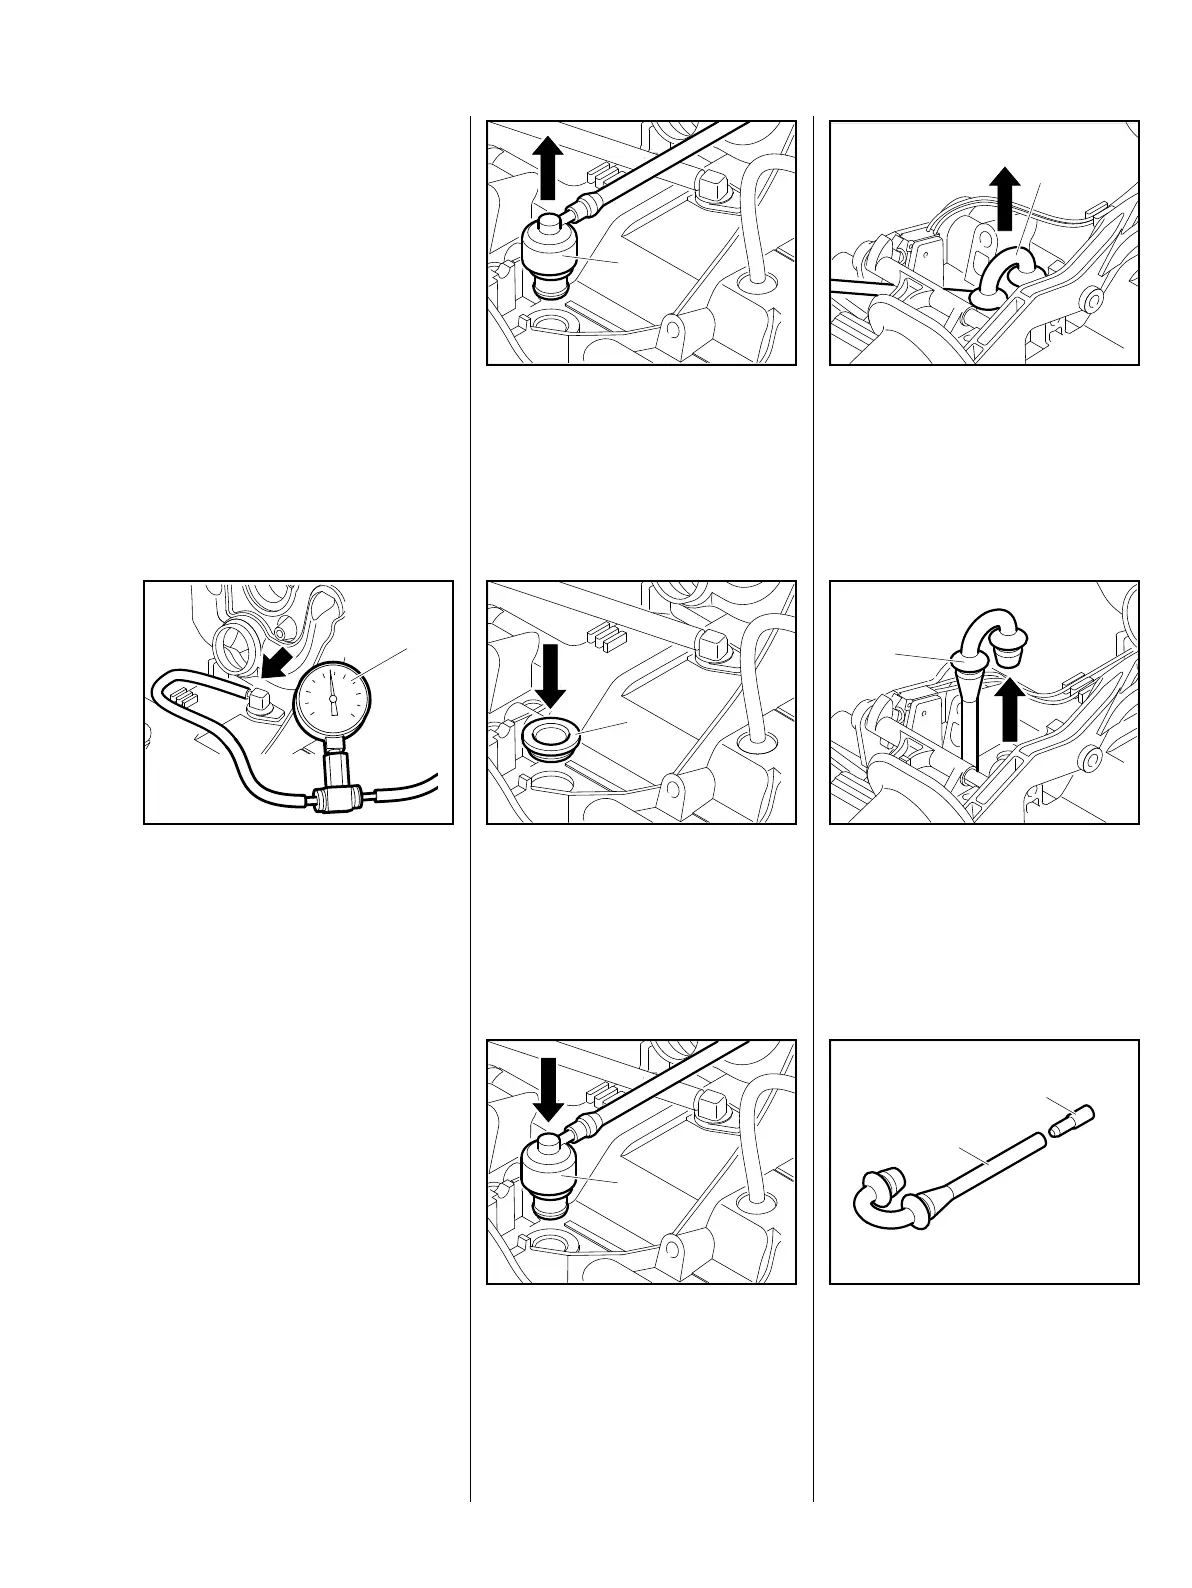
: Connect the carburetor and
crankcase tester 1106 850 2905
(1) to the elbow connector
(arrow).
– Pump the rubber bulb until the
reading on the pressure gauge
shows an excess pressure of
1
0.5 bar. If this pressure remains
constant for at least 20 seconds,
the tank and tank vent are
airtight. If the pressure drops, the
leak must be located and the
faulty part replaced.
– Reassemble parts in reverse
order.
: Prise the tank vent (1) out of the
grommet on the tank housing
with a suitable tool.
– Prise the rubber grommet off the
tank vent with a suitable tool.
1
: Press the rubber grommet (1)
into the hole in the tank housing
until the groove in the grommet is
flush with the hole and the outer
rubber flange lies flat on the tank
housing.
1
: Press the tank vent (1) into the
grommet as far as possible.
1
: Use a suitable tool to prise off
both tank vent connectors (1).
1
: Draw the tank vent (1) out of the
two holes in the tank housing.
1
: Check tank vent hose (1) and
ventilation insert (2) and replace
if necessary.
A new tank vent is supplied
complete with ventilation insert.
1
2
12.6.2 Removal / installation of
the tank vent

 Loading...