RUN XT: Service & Maintenance Manual - rev. 2.0
Page 7.29
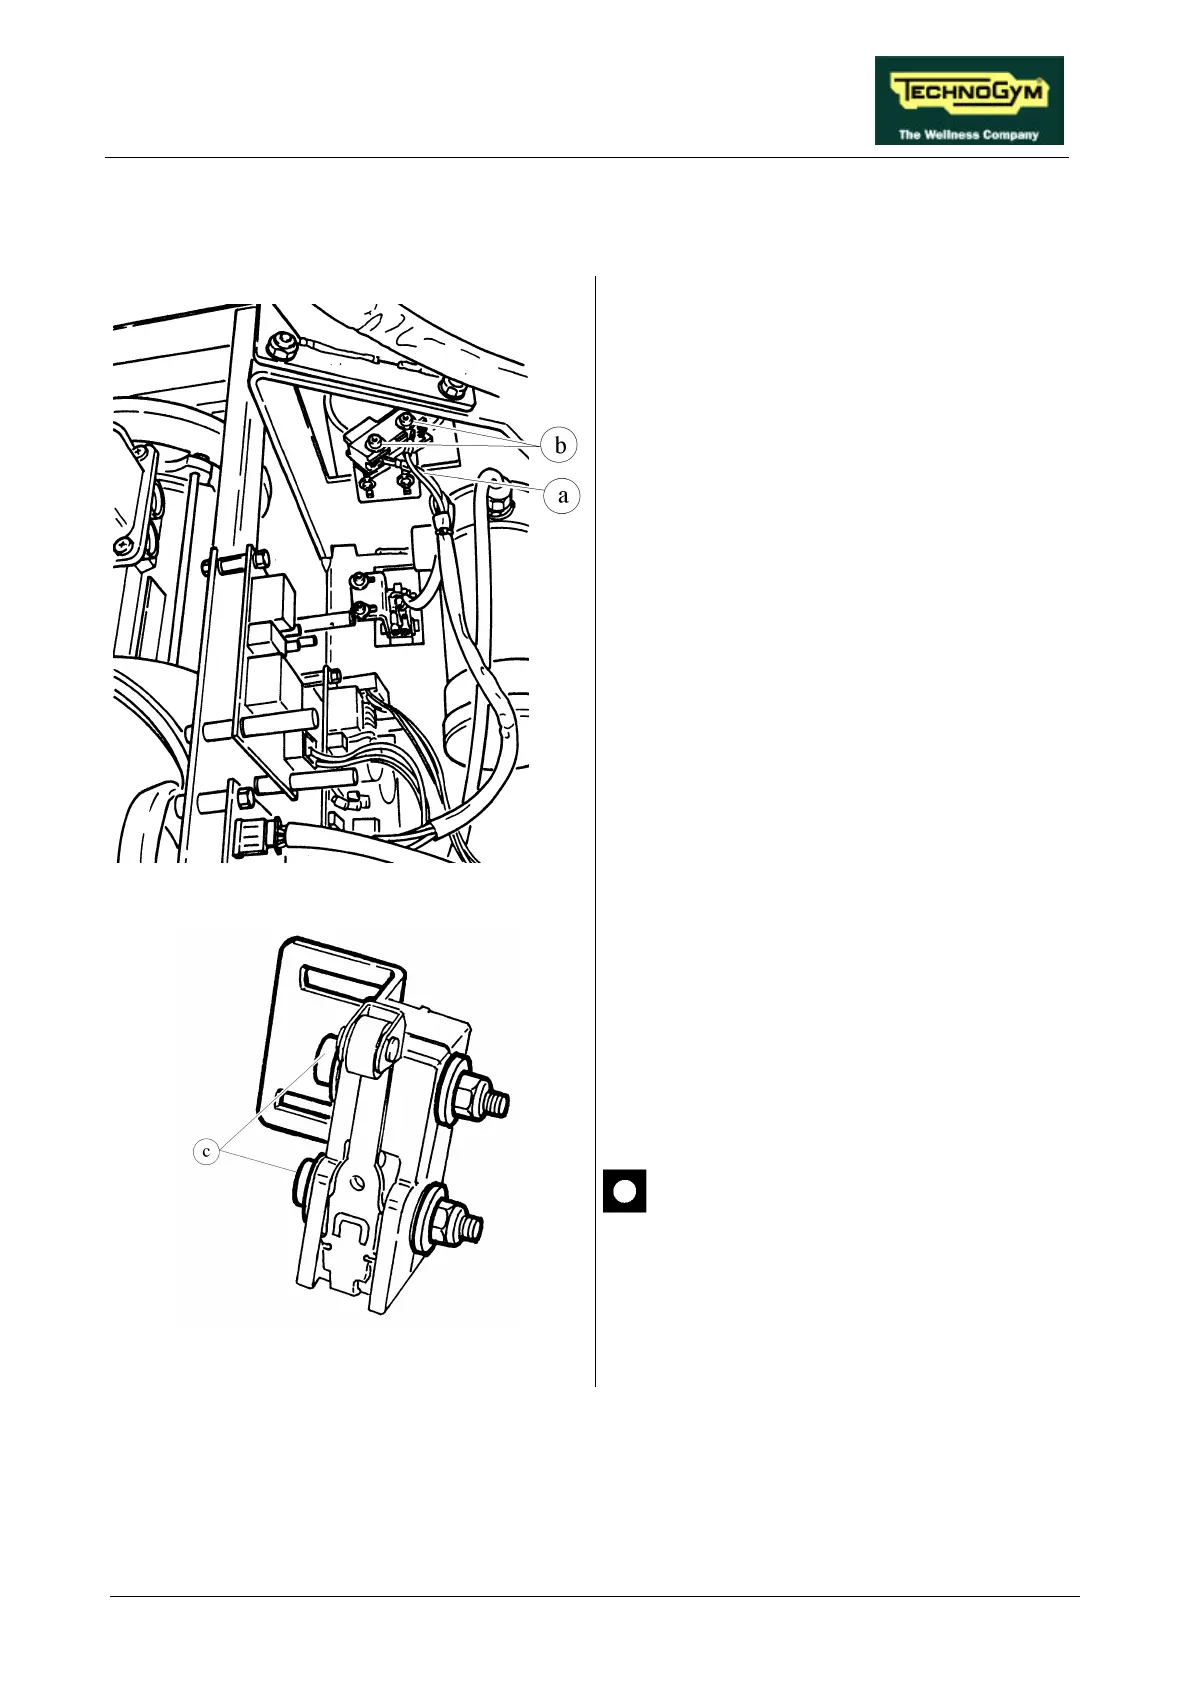
7.19. DISASSEMBLING THE LIMIT SWITCHES
Figure 7.19-1
1. Carry out the procedures described in
paragraphs 7.7. “Disassembling the motor
guard” and 7.8. “Disassembling the front
plate”.
To remove the LIMIT SWITCHES:
2. Disconnect the cables a.
3. Unscrew the 2 fixing screws b of the LIMIT
SWITCH support bracket using a 3-mm
Allen T wrench.
4. Remove the LIMIT SWITCH group and the
supporting bracket.
Figure 7.19-2
5. To remove the LIMIT SWITCHES from the
supporting bracket, unscrew the 2 screws c
using a 3-mm Allen T wrench while holding
the nut underneath in place with an 8-mm
wrench.
To reassemble the LIMIT SWITCHES, carry out
the above steps in reverse order.
When reconnecting the cables,
remember that the UPPER LIMIT
SWITCH is connected between
terminals 1 and 3, and the LOWER
LIMIT SWITCH is between terminals 1
and 2.