Getting Started
Functional Ch
eck
Perform this functional check to verify that your oscilloscope is operating
correctly.
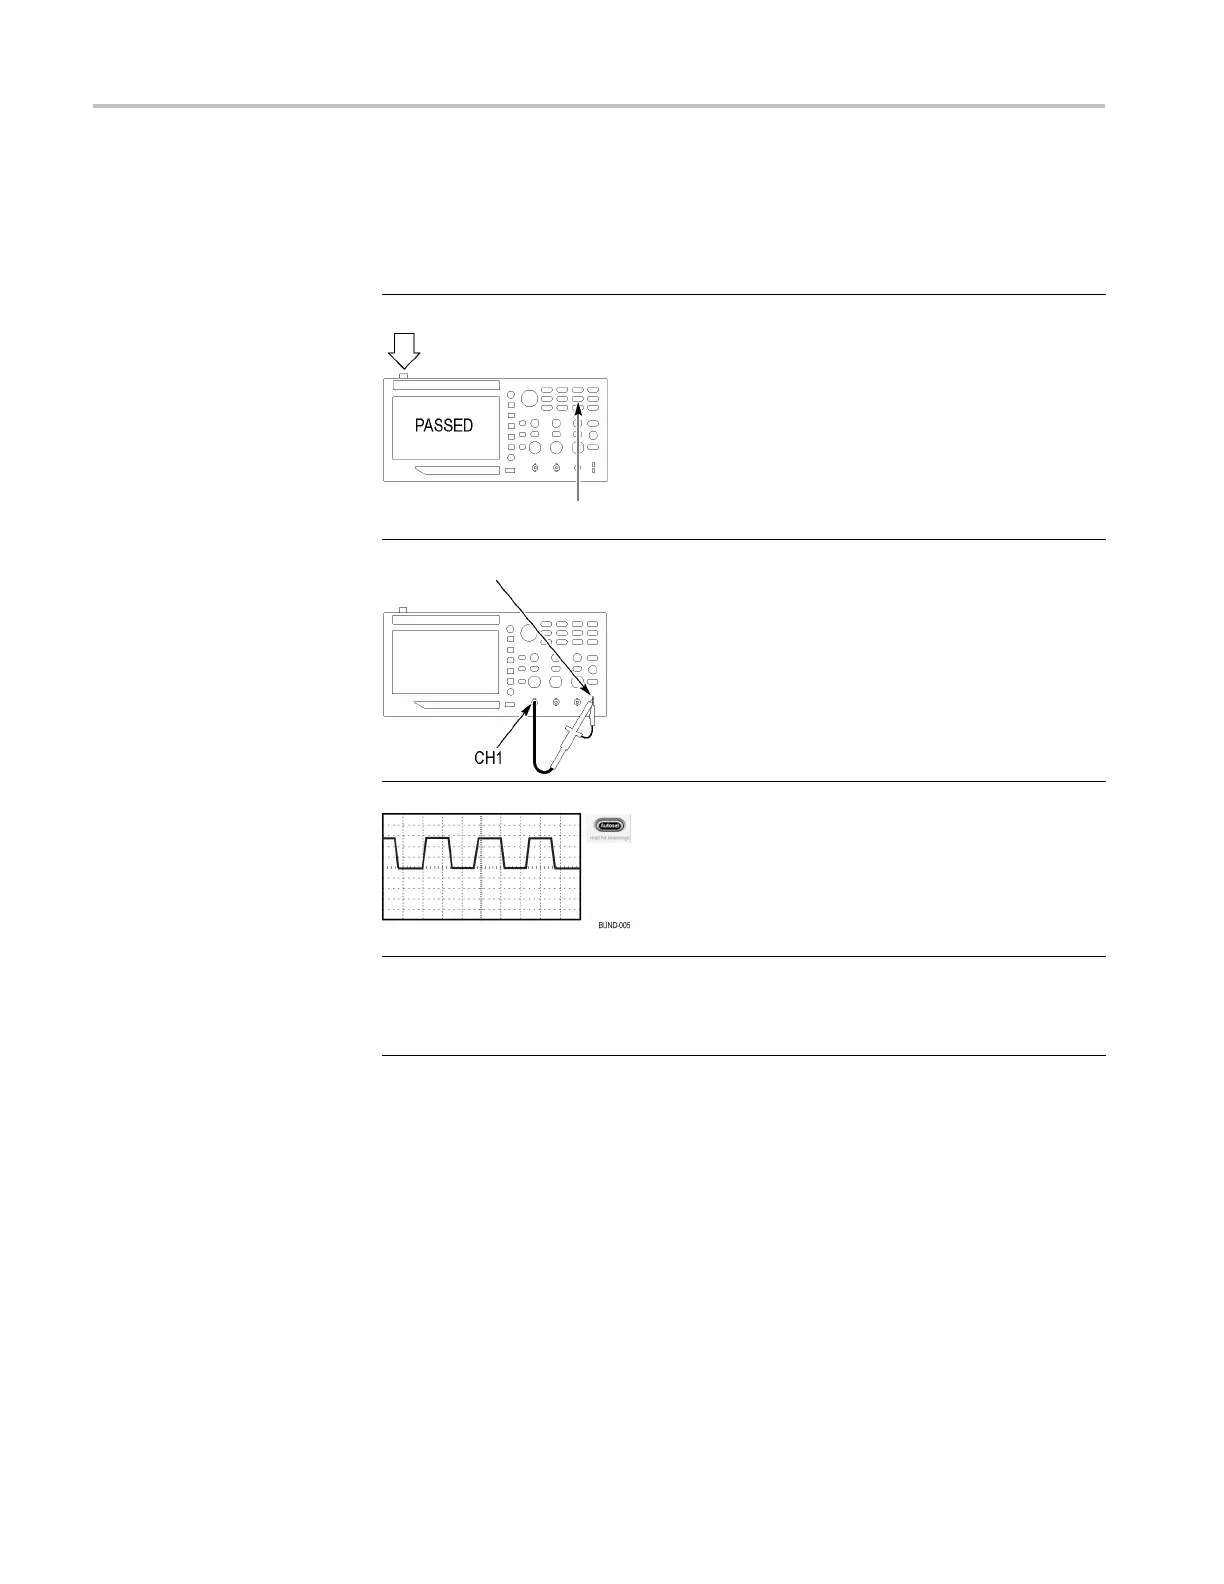
ON/OFF button
1. Power on the oscilloscope.
Push the Default Setup button.
The default
Probe option attenuation setting is
10X.
Default Setup button
PROBE COMP
2. Connect the TPP0051, TPP0101, or TP0201
probe to channel 1 on the oscilloscope. To do this,
align th
e slot in the probe connector with the key
on the channel 1 BNC, push to connect, and twist
to the right to lock the probe in place.
Connec
t the probe tip and reference lead to the
PROBE COMP terminals.
3. Push the Autoset button. Within a few seconds,
you should see a square wave in the display o f
about 5 V peak-to-peak at 1 kHz.
Push the channel 1 menu button on the front panel
twice to remove channel 1, push the channel
2 menu button to display channel 2, and repeat
steps 2 and 3.
Calibration: PASSED
4. Check that the instruction passed the calibration
tests. Push Utility ► - more - page 1 of 2 (push
more again on EDU models) ► System Status
► Misc.. Look for Calibration PASSED
4 TBS1000B and TBS1000B-EDU Series Oscilloscopes User Manual
 Loading...