4-14
Calibration and Circuit Setup
Install a CDI Shunt Sensor into the Shunt Bypass LineInstall a CDI Shunt Sensor into the Shunt Bypass Line
Warning
Do not allow the CDI Shunt Sensor to dry out. Make sure the circuit
has prime uid in it before attaching the Shunt Sensor. Exposure
to air for more than a few minutes can damage the sensor and
cause inaccurate results.
Caution
Do not remove the CDI Shunt Sensor from the BPM to make sensor
connections.
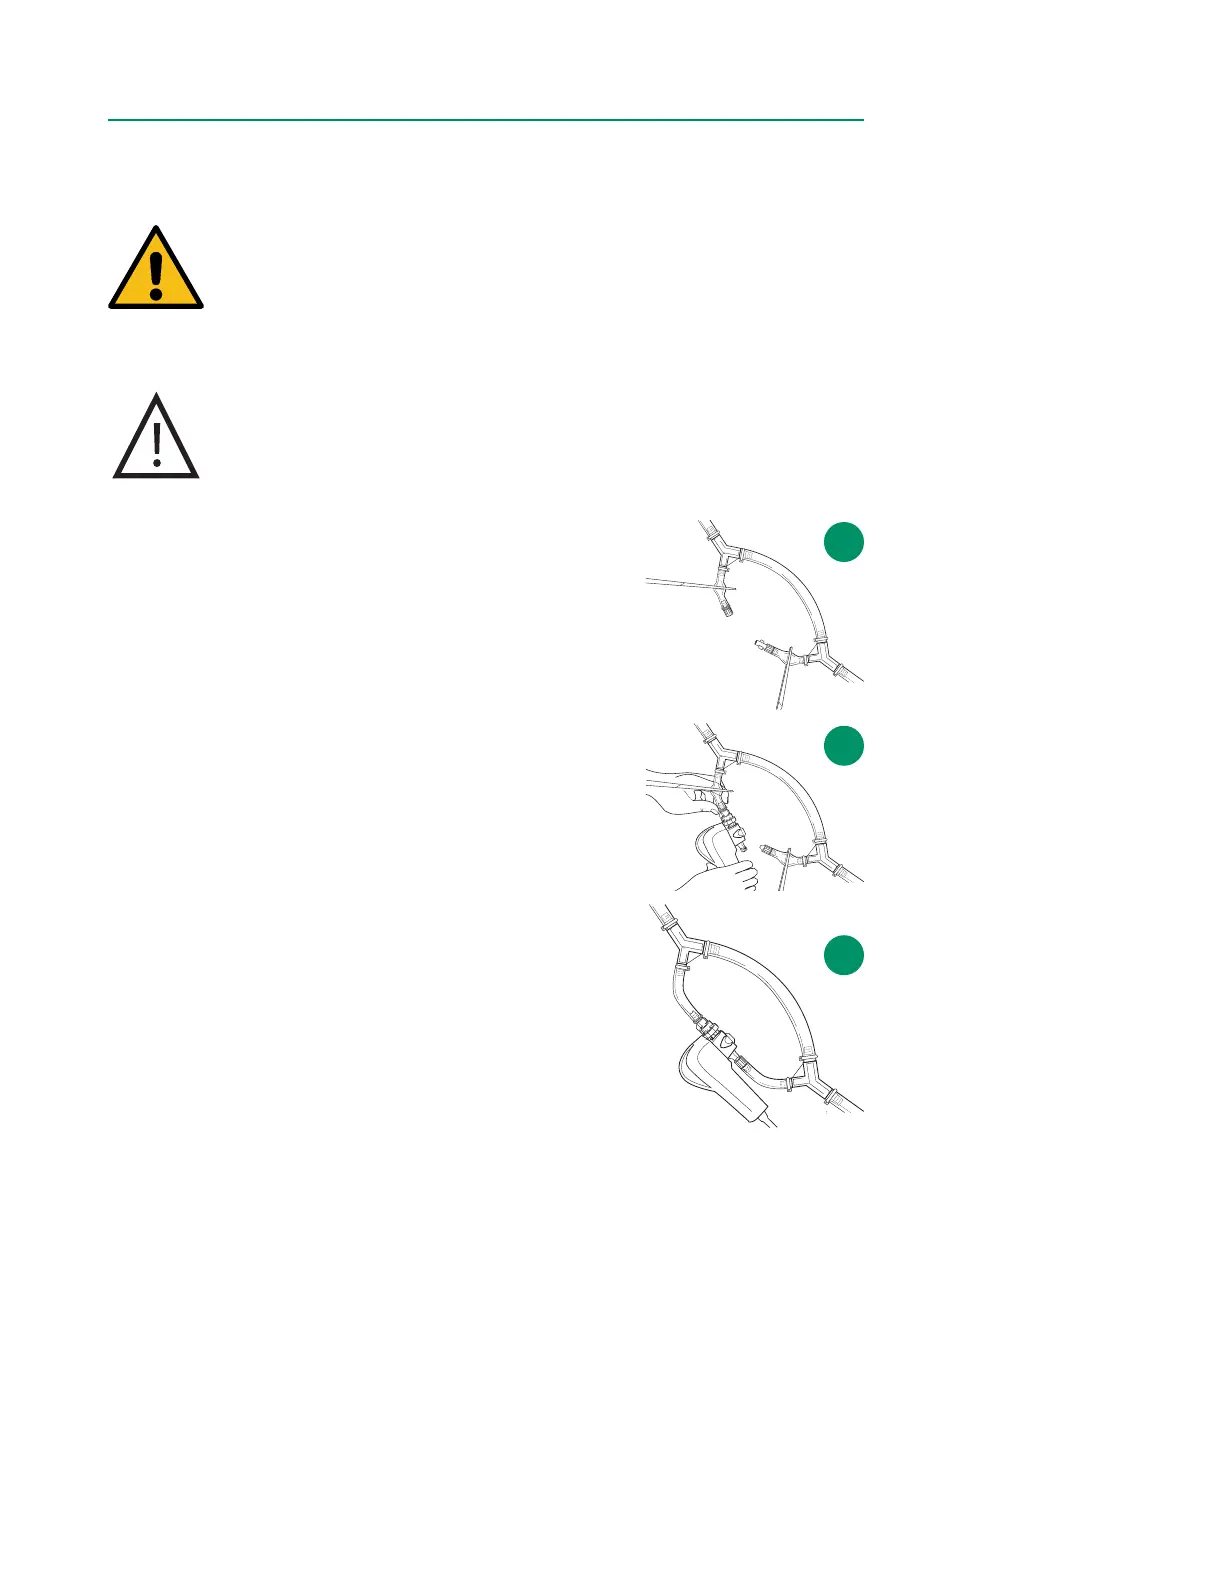
1. Stop the pump and/or clamp off the Shunt Bypass
Line.
2. Using sterile technique, remove the blue cap from
the female Luer end of the Shunt Bypass Line and
the small top Luer cap (white) from the top of the
CDI Shunt Sensor.
3. Attach the CDI Shunt Sensor to the female Luer end
of the Bypass Shunt Line.
4. Using sterile technique, remove the white cap from
the male rotating Luer connector on the Shunt
Bypass Line.
5. Remove the lter/sparger assembly (clear) from the
CDI Shunt Sensor.
6. Attach the male rotating Luer end of the Shunt
Bypass Line onto the CDI Shunt Sensor.
Note: Blood ow can go either direction through the Shunt
Sensor, but the sensor will t onto the Shunt Bypass Line
only one way.
7. Unclamp the Shunt Bypass Lines and start the pump
to circulate prime solution with a pH of 7.0-7.8
through the Shunt Sensor.
8. Prime and debubble CDI Shunt Sensor and the Shunt Bypass Line, inspecting
the line and CDI Shunt Sensor for bubbles.
9. Verify that the BPM is sufciently supported and that the tubing is not kinked.
Note: If the Shunt Bypass Line has been placed in the bypass circuit and the CDI Shunt
Sensor is not going to be used, one of the following steps should be taken:
• Remove the Shunt Bypass Line from the circuit, or
• Connect the short legs of the Shunt Bypass Line together (female Luer connector
to male rotating Luer connector)
1
6
3