4-15
Calibration and Circuit Setup
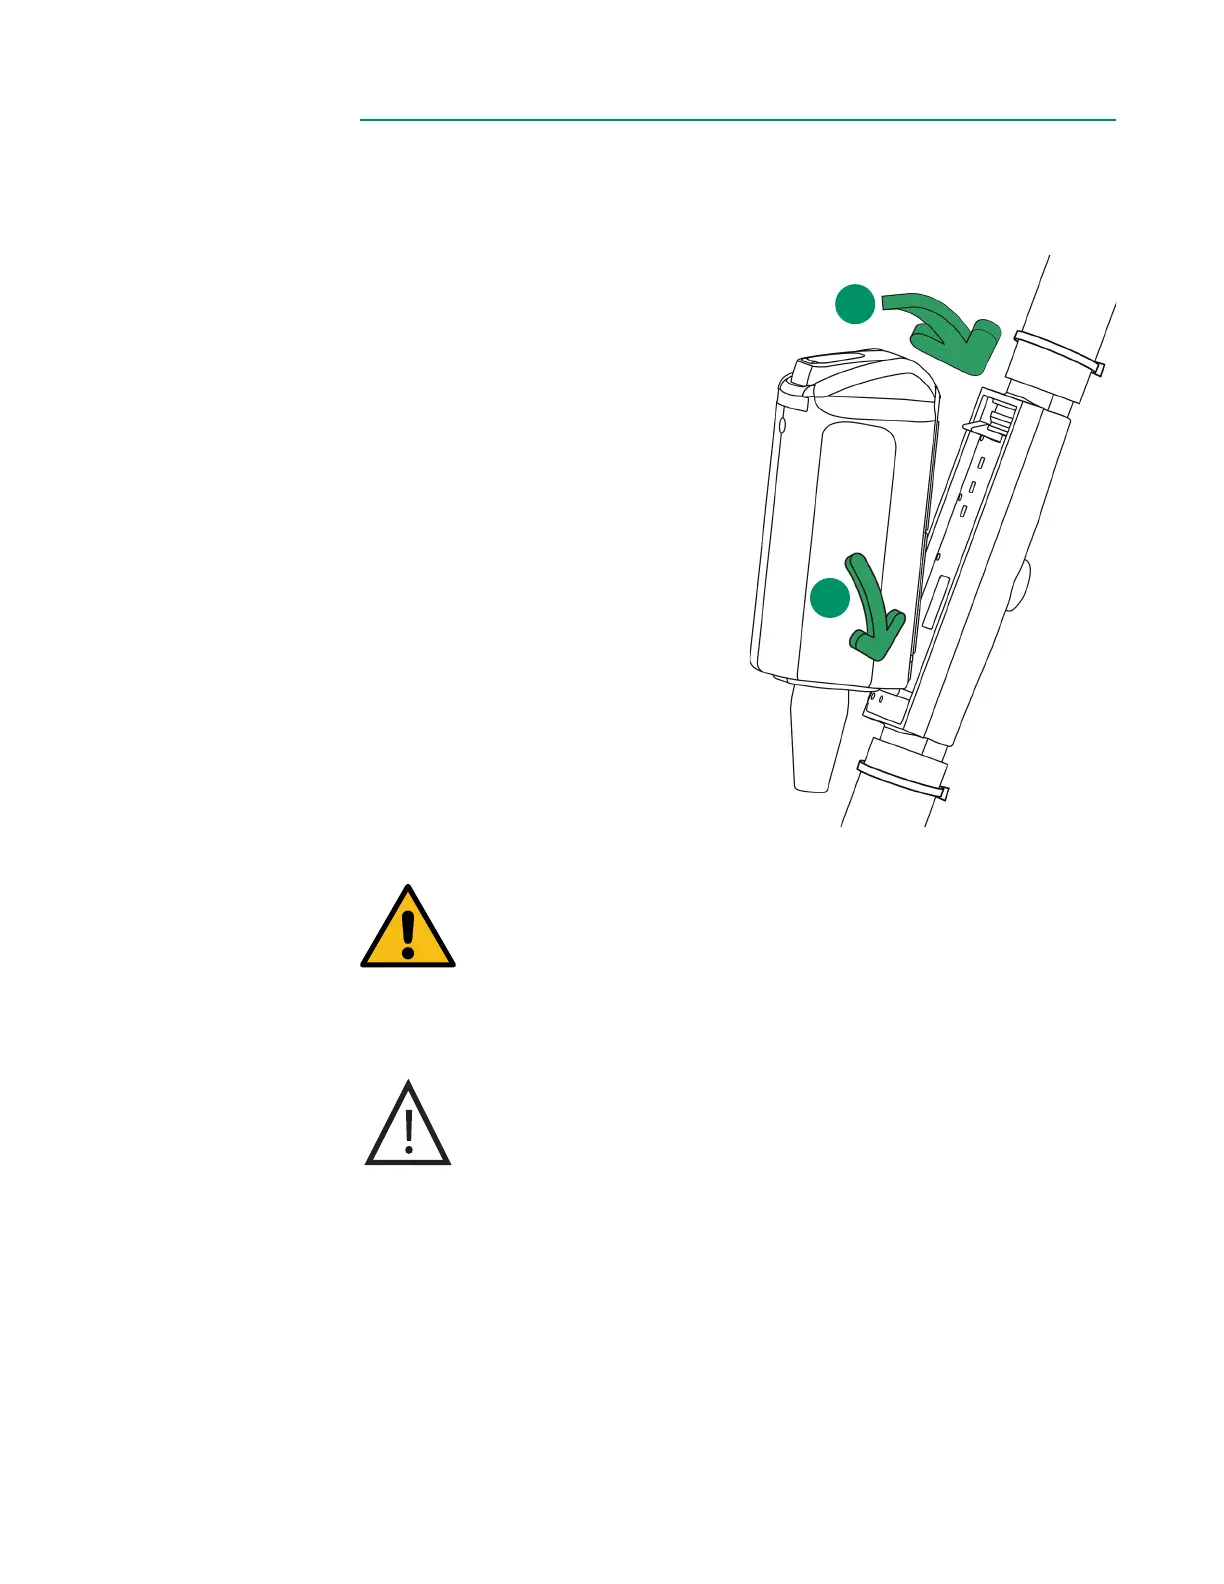
Attach the CDI H/S Probe for Hematocrit/Saturation MeasurementAttach the CDI H/S Probe for Hematocrit/Saturation Measurement
Follow the steps below to attach the CDI H/S Probe to the CDI H/S Cuvette for HCT,
Hgb and SO
2
measurement.
1. Verify expiration date of the H/S
Cuvette.
2. Remove the H/S Probe from the
probe holder by pressing down
on the release lever on top of
the probe.
3. Clip the probe to the H/S
Cuvette by inserting the tab on
the cable end of the probe into
the receptacle on the CDI H/S
Cuvette.
4. Press the H/S Probe and H/S
Cuvette together until the
release lever is latched and a
click is heard.
Warning
Avoid touching the optical surfaces of the CDI H/S Cuvette and
the CDI H/S Probe. Fingerprints on these surfaces can reduce the
accuracy of the system. If necessary, optical surfaces on the CDI
H/S Cuvette and CDI H/S Probe can be cleaned with a soft, lint
free cloth.
Caution
Although the CDI H/S Probe can be connected to the CDI H/S
Cuvette any time after passing the self-check, the numbers
reported will be invalid until blood enters the CDI H/S Cuvette.
4
3