4: INSTALLATION
Note: Wait to complete the full assembly of the
console until after you've installed all other major
accessories.
1. Find the following items, which are provided with the
PathPilot operator console:
l (Optional) Automatic Tool Changer (ATC)USBcable
Note: If you're not installing an ATC, you
don't need to use this cable.
l Ethernet cable
l Jog Pendant (PN50363)
l Machine controller
l Operator box extension cable
l WiFi dongle
2. Temporarily put the machine controller near the
machine (on a workbench, or similar).
3. Identify the machine's operator box, and remove the
Emergency Stop cable from it.
4. Connect the operator box extension cable to the
Emergency Stop cable.
5. Find the PathPilot controller's power cable and power
supply (provided in the machine owner's kit).
Note: The controller's power supply is designed
to work with either 115 Vac or 230 Vac.
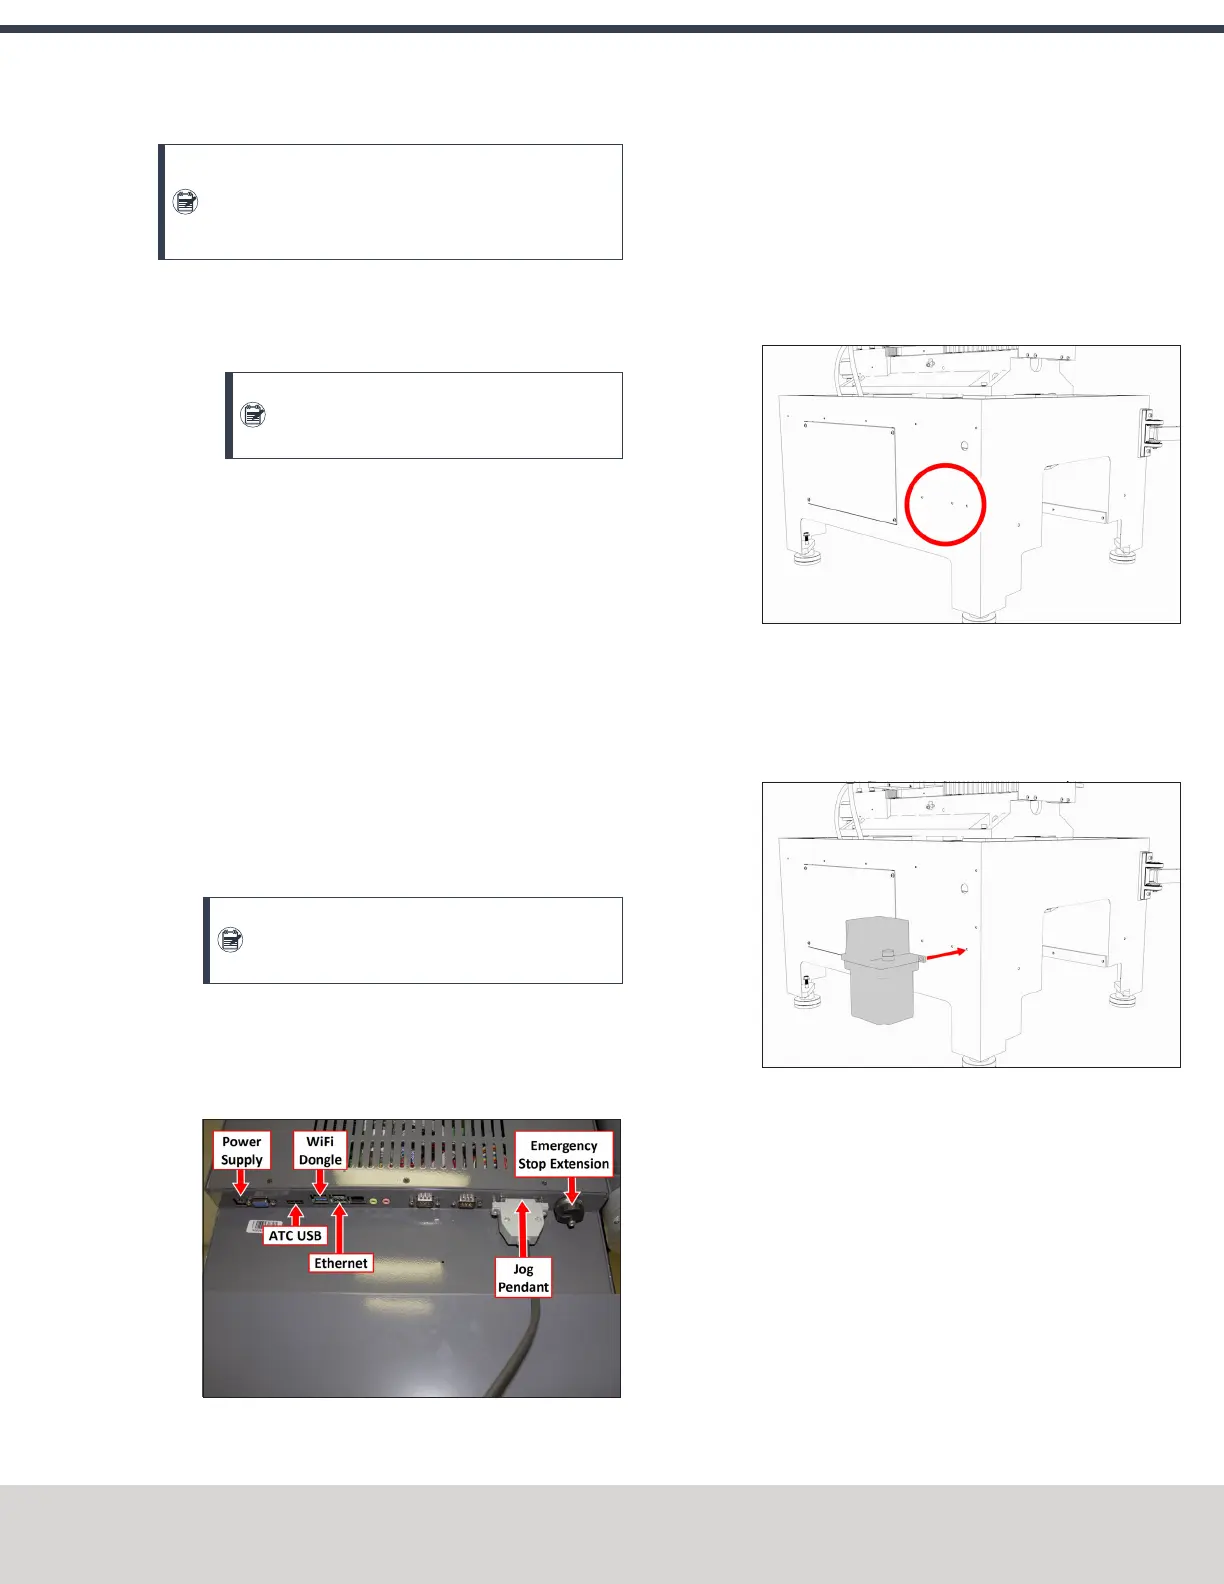
6. Connect the power, Ethernet cable, emergency stop
extension cable, ATC USB cable, WiFi dongle, and the jog
pendant cable to the controller as shown in the following
image.
Figure 4-28: Controller connections.
7. Connect the Ethernet cable to the Controller
Communications port on the side of the electrical
cabinet.
4.7.6 Install the Oiler
1. Find the two pilot holes on the left side of the machine
stand, as shown in the following image.
Figure 4-29: Pilot holes for an oiler on the machine
stand.
2. Attach the oiler to the machine stand with a Phillips
screwdriver, two M6 × 16 mm screws, two M6 lock
washers, and two M6 nuts.
Figure 4-30: Automatic oiler aligned with the pilot
holes on the machine stand.
3. Depending on your oiler type, do one of the following:
l If you have a (strongly recommended) automatic
oiler, go to "Make Automatic Oiler Connections" (on
the next page).
l If you have a manual oiler, go to "Make Manual Oiler
Connections" (on the next page).
©Tormach® 2020
Specifications subject to change without notice.
Page 49 Tormach 1100MX Operator's Manual (Version 0720A)
For the most recent version, see tormach.com/support
 Loading...


