8. Open and close the enclosure doors to align the door
switch and the lock key. Make sure that the lock key
freely engages and disengages the door switch.
9. Tighten all four M5 × 0.8-10 flanged button head screws
on the lock key assembly.
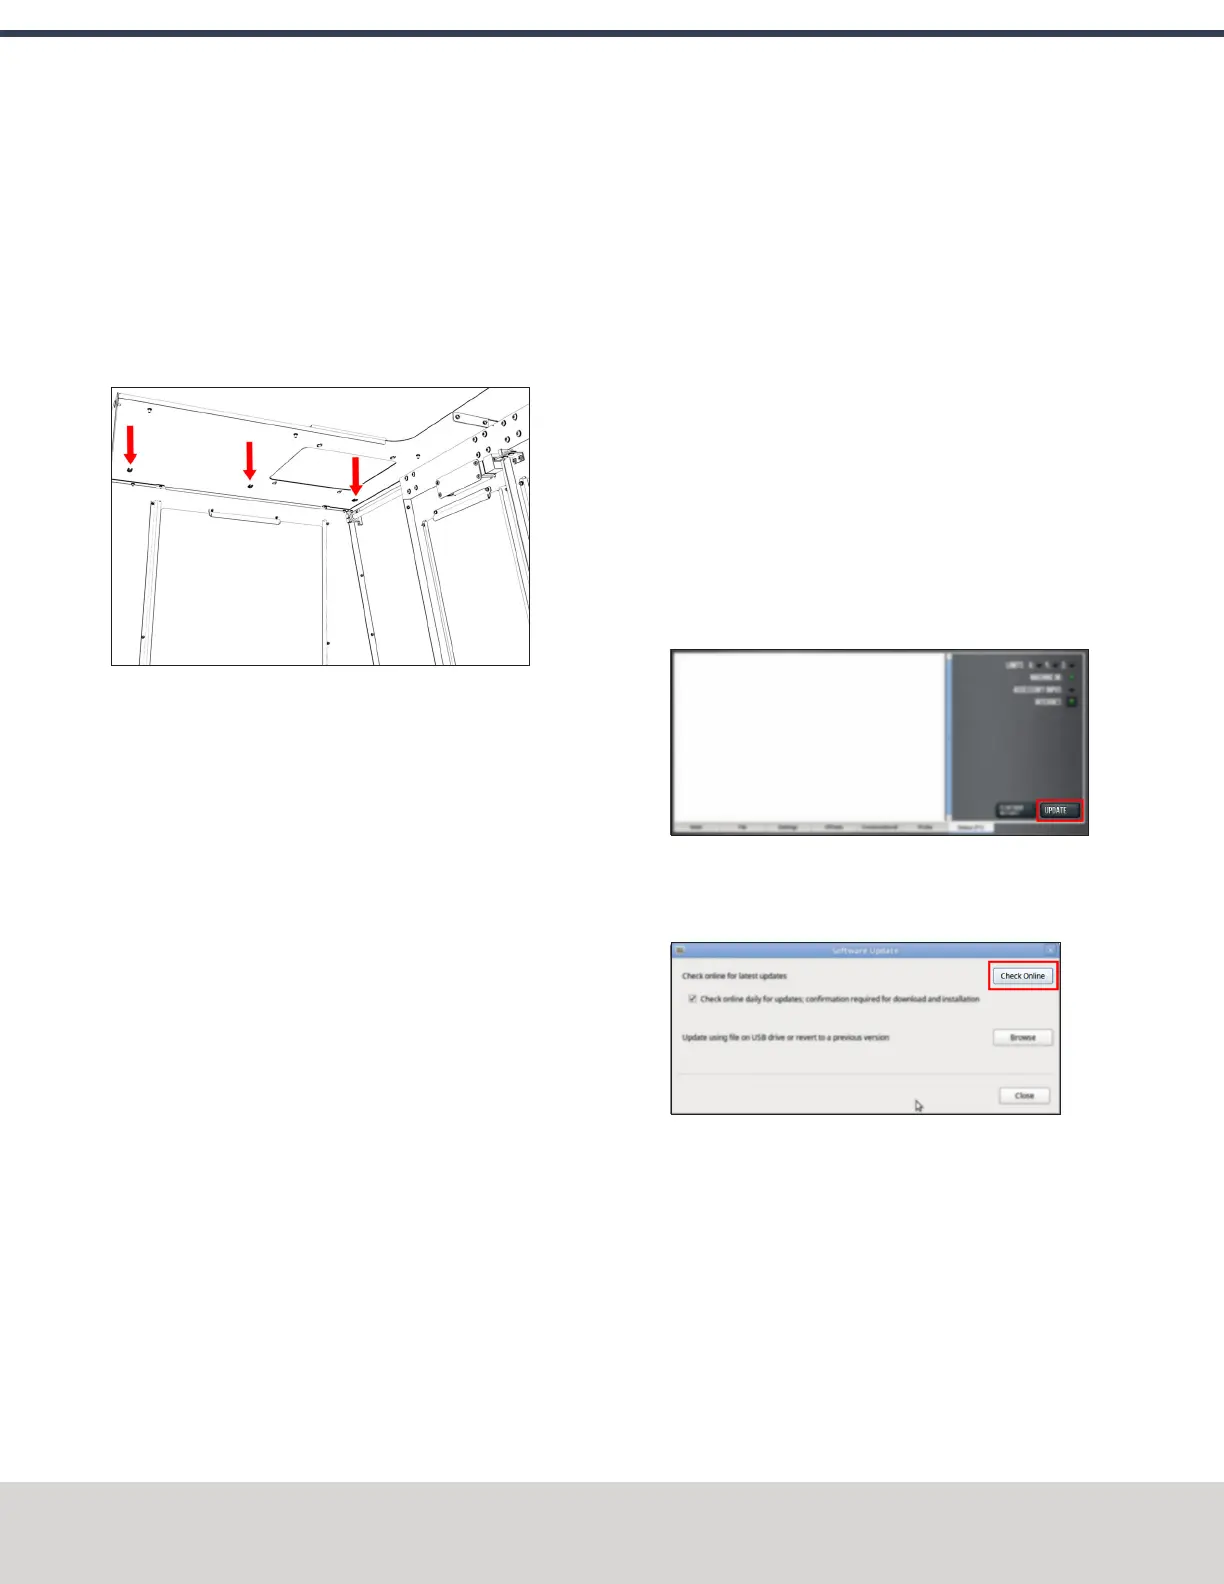
10. Attach three cable tie anchors to the right top panel on
the enclosure with a 3 mm hex wrench and three M5 ×
0.8-10 flanged button head screws.
Figure 4-130: Three cable tie anchors installed inside
the right side of the enclosure.
11. Route the loose end of the door switch cable to the
electrical cabinet, and connect it to the Enclosure Door
Switch outlet.
12. Secure the door switch cable to the cable tie anchors
that you installed in Step 10 with three cable ties. Make
sure that the cable doesn't restrict the motion of the
enclosure door.
13. Turn the door lock override switch to the locked position
with a flat-blade screwdriver.
14. Find the screw for the door lock override switch that you
set aside in Step 6. Then, put it back to secure the door
lock override switch in the locked position.
15. Power on the machine and the PathPilot controller.
a. Turn the Main Disconnect switch to ONon the side of
the electrical cabinet.
b. Twist out the Emergency Stop button on the operator
box, which enables movement to the machine axes
and the spindle.
c. Press the Reset button on the operator box.
d. Bring the machine out of reset and reference it.
Update PathPilot
Before using the Door Lock Switch Kit, you must make sure
that the PathPilot controller is updated to PathPilot v2.1.6 (or
newer). This version of PathPilot has settings required to use
the Door Lock Switch Kit.
To update PathPilot, do either of the following:
l "Download and Install an Update File from the
Controller" (below)
l "Install an Update File from a USB Drive" (on the next
page)
Download and Install an Update File from the Controller
1. Confirm that the PathPilot controller is powered on and
out of Reset mode.
2. Downloading and installing an update file requires an
Internet connection. From the Status tab, confirm that
the Internet button LEDlight is on. Then, select Update.
Figure 4-131: Update button on the Status tab.
3. From the Software Update dialog box, select Check
Online.
Figure 4-132: Software Update dialog box.
©Tormach® 2020
Specifications subject to change without notice.
Page 82 Tormach 1100MX Operator's Manual (Version 0720A)
For the most recent version, see tormach.com/support
4: INSTALLATION