14. Once the mount arm is secured to the enclosure, open
the enclosure door and verify that the mount arm's
screws don't interfere with the enclosure door jamb. If
they do, loosen the screws on the door jamb, and slide it
toward the back of the machine.
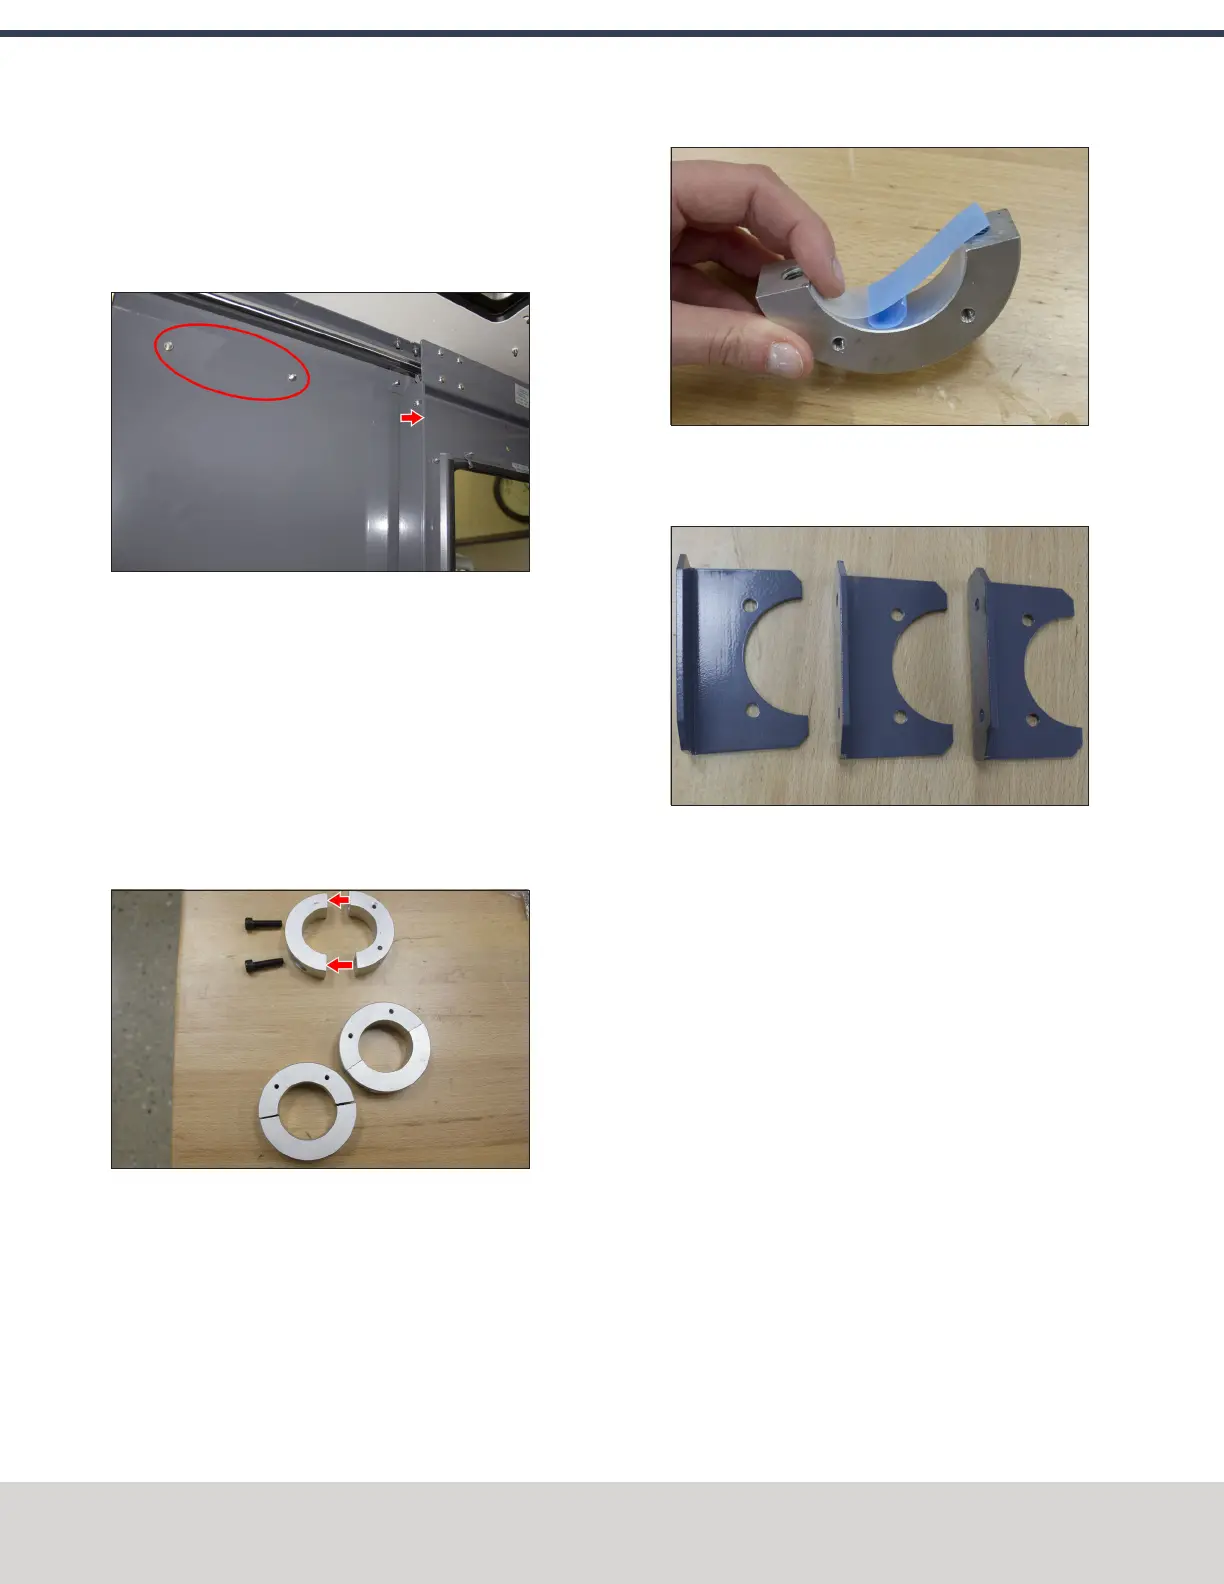
Figure 4-145: Door jamb moved to provide clearance
for the mount arm's screws.
Mount the Console
Complete the following steps in the order listed:
Assemble the Controller and Keyboard Tray
1. Find the three provided split collars. If they're connected,
remove their bolts using a 6 mm hex wrench, and
separate them. The split collars are matched pairs, so
you must keep them together.
Figure 4-146: One split collar disassembled.
2. Find the four provided pieces of plastic with adhesive
backing. Cut each piece of plastic so that it's the length
of the inside of the split collar.
3. Adhere one piece of plastic to the inside of each split
collar.
Figure 4-147: Adhering tape on the inside of a split
collar.
4. Find the three provided mount arm brackets.
Figure 4-148: Mount arm brackets.
©Tormach® 2020
Specifications subject to change without notice.
Page 86 Tormach 1100MX Operator's Manual (Version 0720A)
For the most recent version, see tormach.com/support
4: INSTALLATION

 Loading...


