4: INSTALLATION
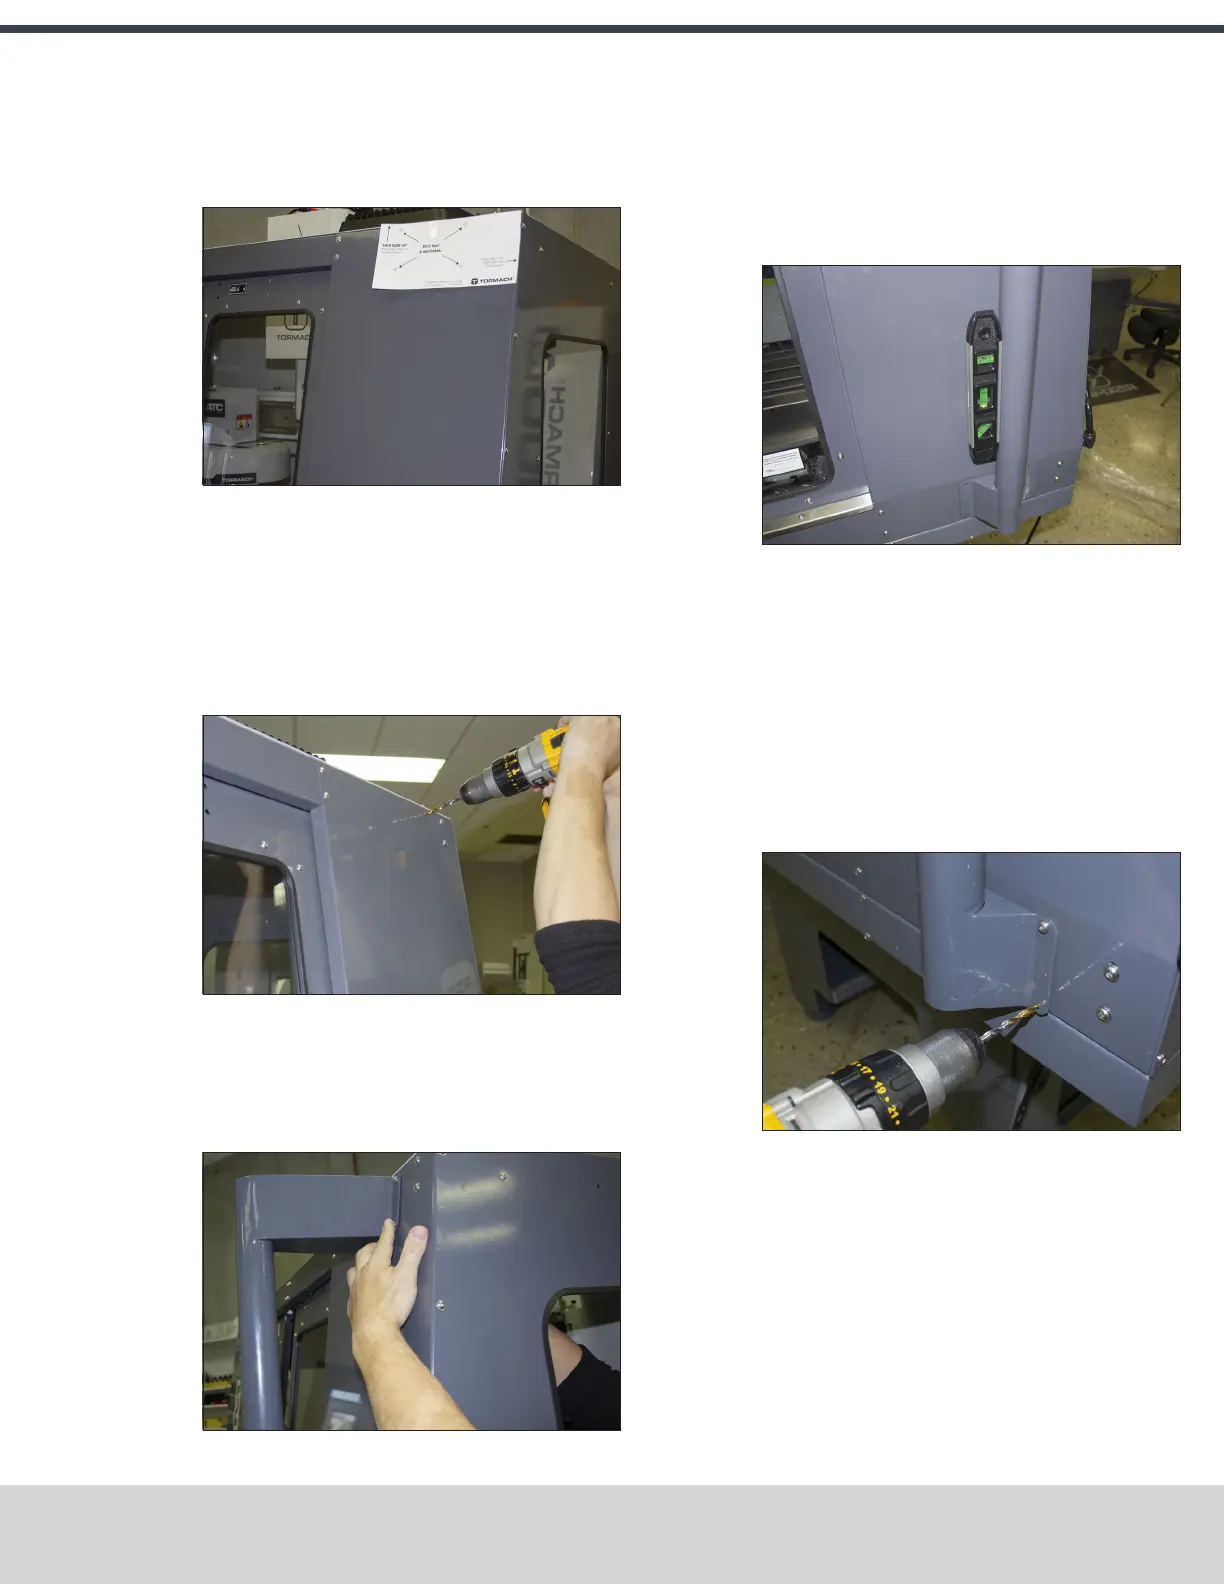
4. Align the drill template to the top of the enclosure and
tape it in place, as shown in the following image.
Figure 4-140: Drill template taped to the enclosure.
5. Put a mark in each hole on the drill template using a
hole punch.
6. Remove the drill template from the enclosure and
discard it.
7. Drill into the marks on the enclosure that you made in
Step 5 using an electric drill and a 15/64 in. drill bit.
Figure 4-141: Drilling holes into the top of the
enclosure.
8. Secure the top of the mount arm to the enclosure with
four M6 screws, four washers, and four nuts using an M3
hex wrench.
Figure 4-142: Securing the top of the mount arm to
the enclosure.
9. Using a level, align the bottom of the mount arm with
the bottom of the enclosure.
Figure 4-143: Bottom of the mount arm level on the
enclosure.
10. Using the bottom of the mount arm as a template, drill
one hole using an electric drill and a 15/64 in. drill bit.
11. Put one M6 screw, one washer, and one nut into the hole
that you drilled in Step 10 using an M3 hex wrench.
The mount arm is now secure enough to reliably drill the
remaining three holes.
12. Drill the remaining three holes for the mount arm's
bottom bracket.
Figure 4-144: Drilling the remaining three holes into
the enclosure.
13. Put three M6 screws, three washers, and three nuts into
the remaining three holes using an M3 hex wrench.
©Tormach® 2020
Specifications subject to change without notice.
Page 85 Tormach 1100MX Operator's Manual (Version 0720A)
For the most recent version, see tormach.com/support
 Loading...


