4: INSTALLATION
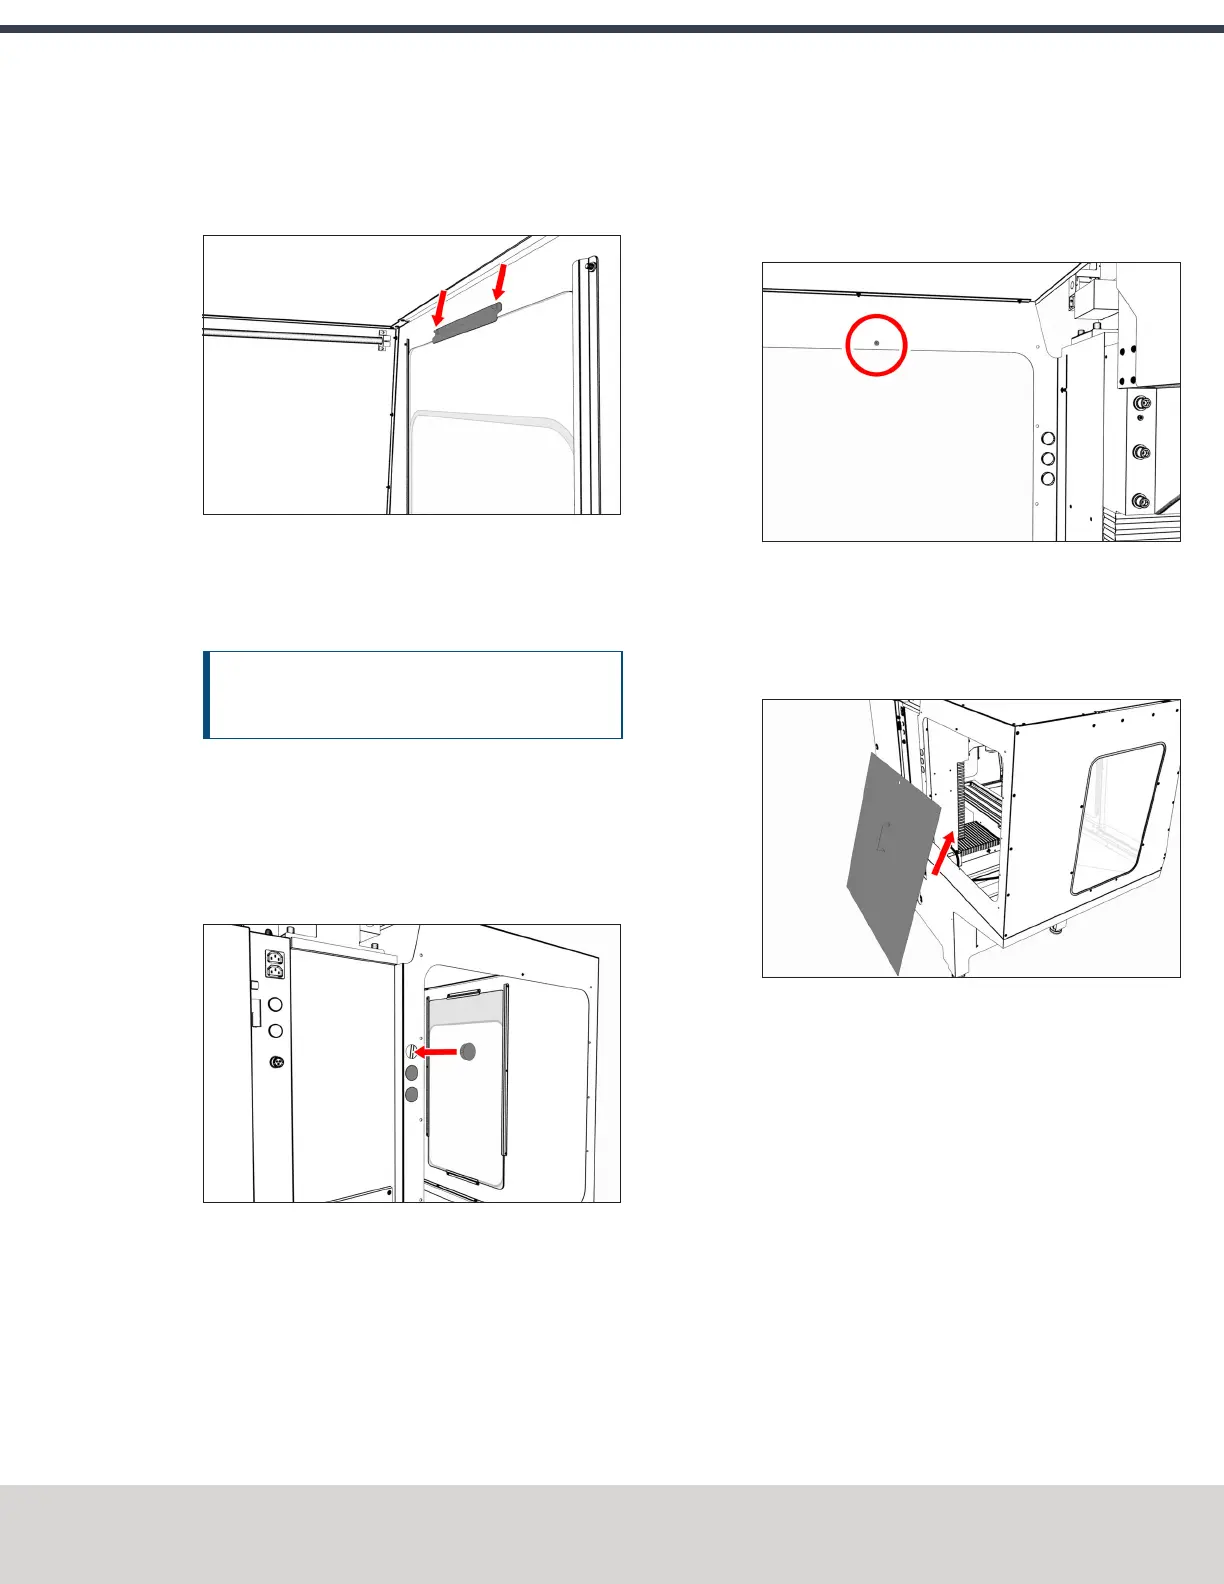
5. Attach one horizontal window retainer above the
window on the left side panel with two M5 × 0.8 - 10
screws.
Figure 4-117: Horizontal window retainer attached
above the window.
6. Tighten all screws on the window retainers to secure the
window.
NOTICE! To prevent window damage from over-
tightening, use your fingers to tighten the screws.
7. Repeat Steps 1 through 6 for the window on the right
side panel.
Install the Access Panel
1. Push three round hole plugs into the three holes on the
left rear panel.
Figure 4-118: Round hole plugs pushed into the left
rear panel.
2. Push a strip of rubber trim to the edge of the access
panel opening on the left rear panel. Verify that the trim
covers the entire perimeter of the opening. When
finished, use shears or a knife to cut the excess trim.
3. Find the threaded hole toward the top center of the left
rear panel. Then, loosely install one M5 × 0.8 - 10 screw
from the inside of the enclosure.
This screw supports the access panel while you install
the remaining fasteners.
Figure 4-119: Supporting screw inside the left rear
panel.
4. Tilt the access panel and put it through the opening on
the left rear panel. Then, hang it inside the enclosure on
the installed M5 × 0.8 - 10 screw.
Figure 4-120: Access panel moving inside the
enclosure.
©Tormach® 2020
Specifications subject to change without notice.
Page 79 Tormach 1100MX Operator's Manual (Version 0720A)
For the most recent version, see tormach.com/support
 Loading...


